

Website redesigns can be both exciting and challenging for businesses. There is no small amount of high hope for the redesign, yet this is a monumental undertaking. A redesign can solve your existing problems by giving you a chance to strip a site down and build it back up again.
Take it from someone who’s done plenty of WordPress rebuilds—it’s worth it but definitely requires some work.
Why Redesign Your Website?
A redesign is needed when your site feels stuck. This comes in many different forms, but here are a few that warrant a big change:
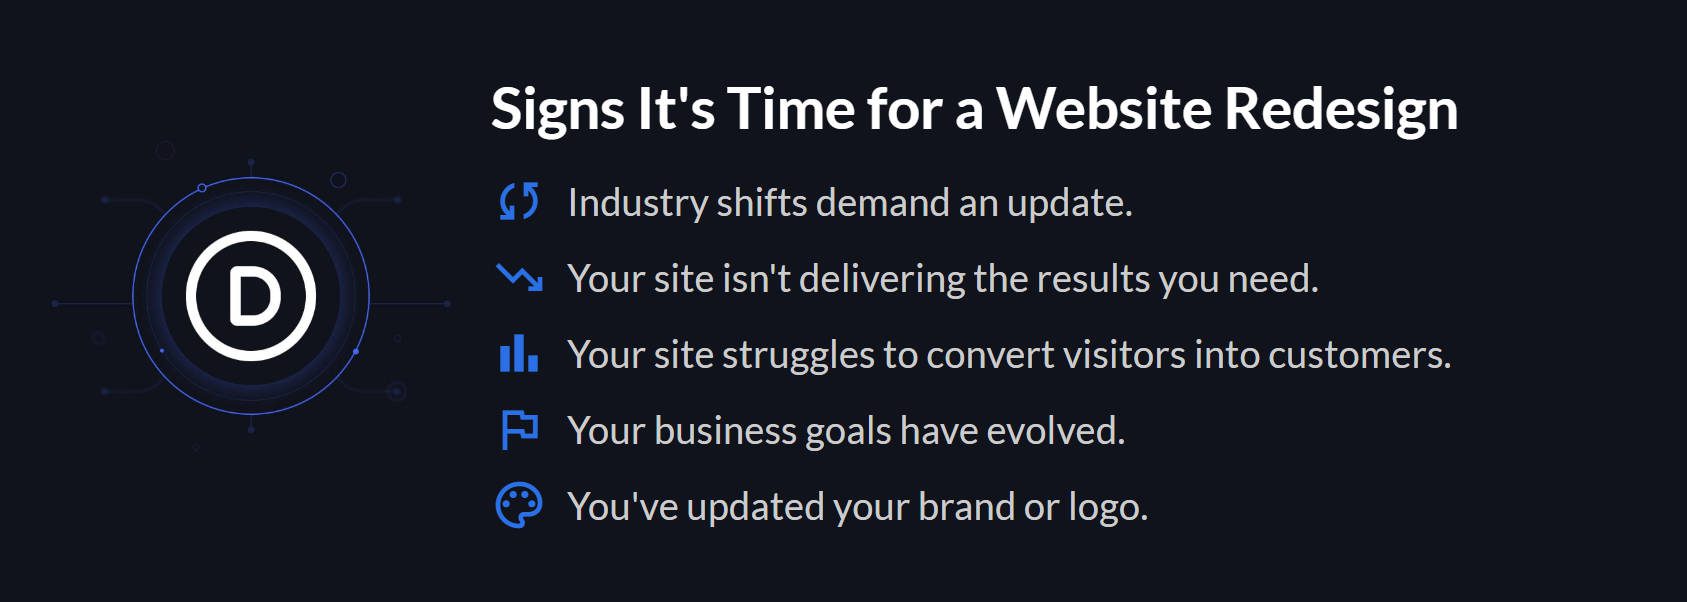
If you were nodding your head yes to any of these, a redesign might be in your best interest.
Steps for Redesigning a WordPress Site
There’s a foolproof process for any website redesign. But, unsurprisingly, we recommend starting with a plan.
1. Plan Your Redesign Needs
Goal setting is an important part of a website redesign. It’s just too big of a project to float through aimlessly. Think about what you realistically want to achieve.
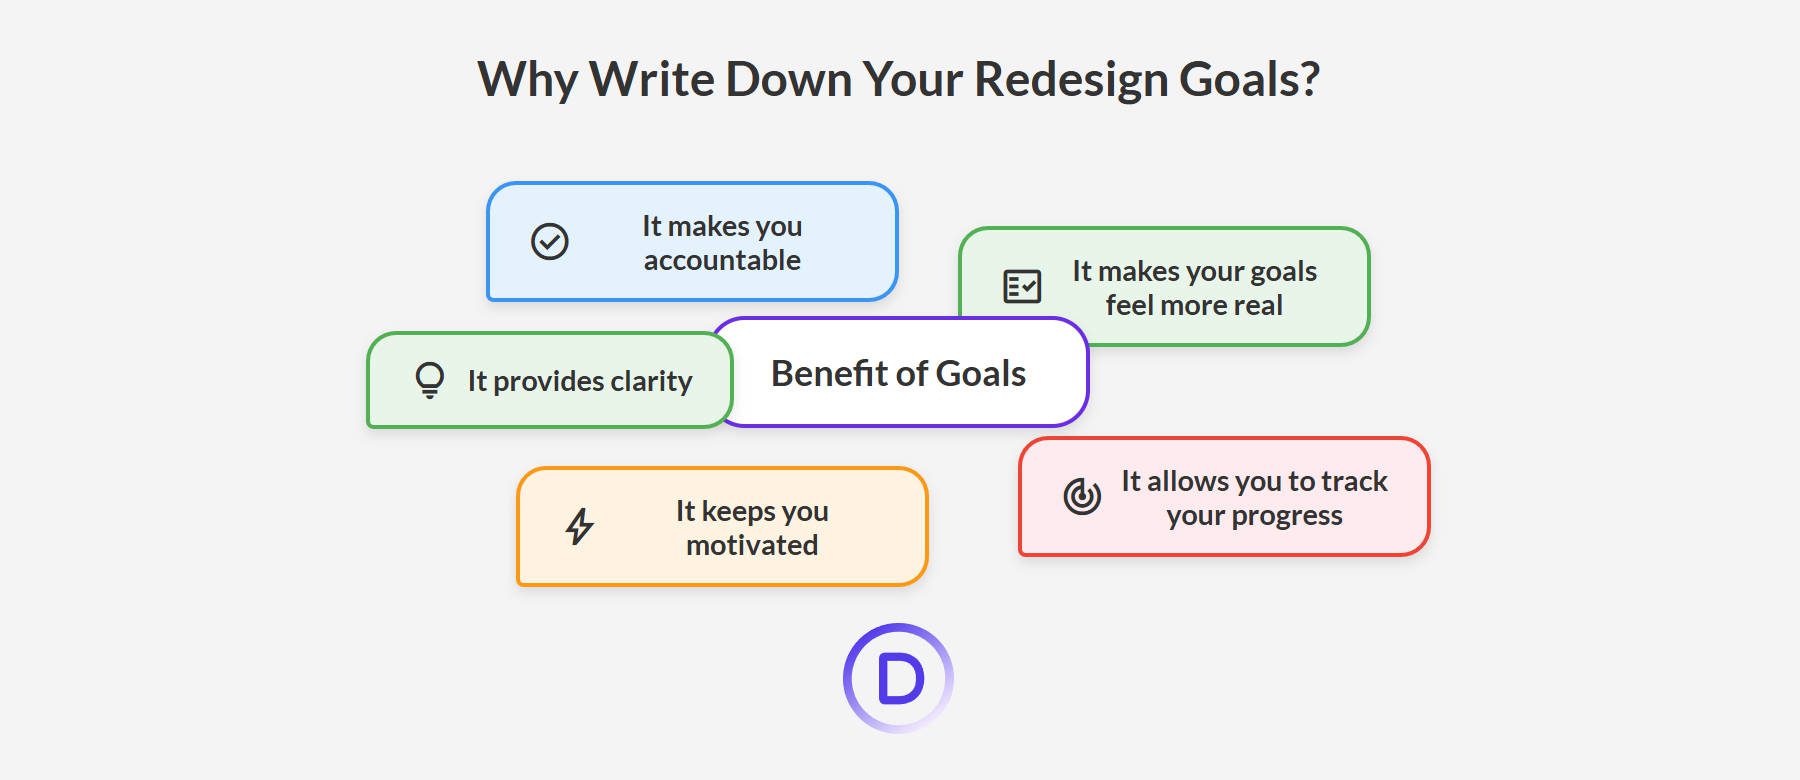
Common goals for a website redesign often include things like:
- Achieving better Core Web Vitals scores (since faster sites benefit everyone)
- Increasing conversion rates (whether that means more form submissions, product purchases, or any other key action on your site)
- Boosting user engagement, measured by factors like dwell time and bounce rates
- Changing to a platform that’s easier to use. Using a site-builder like Divi for WordPress provides a scalable design system that makes creating new content easier.
- Adding new functionality to enhance the user experience (for example, customer reviews, faster checkout, improved video display, or simpler navigation)
Some of these goals, like your Core Web Vitals scores or conversion rates, are easily measurable by tracking metrics. Others, like creating a better design system, might be more about achieving a certain feeling or level of efficiency. The important thing is to make sure your goals are well-defined and written down before you start.
Just because you are redesigning your site doesn’t mean everything must go. Your core content—like blog posts, service descriptions, image library, and product information—is generally still valuable. Determine what you can keep to have a slightly shorter to-do list.
2. Create a Staging Site
Never work on a live site. Set up a staging site instead. Use your hosting tools to clone your WordPress site. If you don’t do this, you risk breaking your website while visitors still try to access it. Plus, a staging site takes the pressure off by keeping your current website up. I also do not recommend using an Under Construction page on a live site unless the original site is a net-negative. Just wait until the redesigned site is ready.
Siteground offers one of the easiest ways of creating a staging site from your existing website.
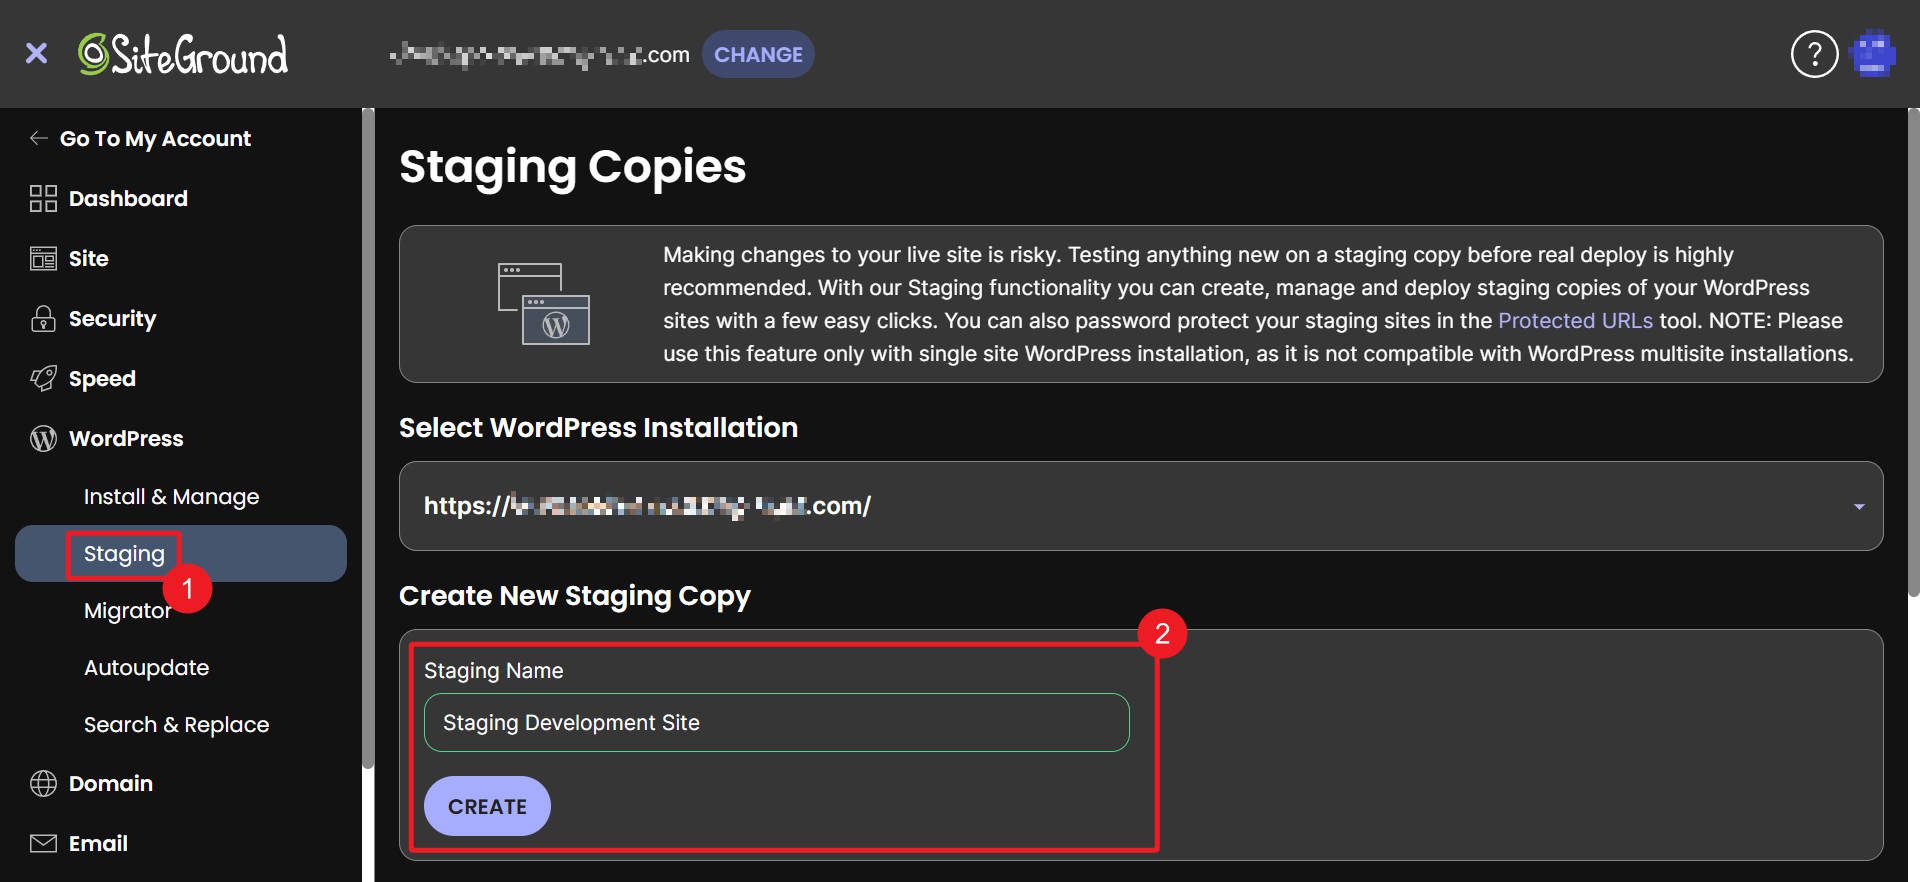
A staging site is a clone of your website that “lives” on a temporary URL. It is completely separate from your live site, so there is no interference between the two.
On your staging site, you’ll want to temporarily de-index it so that Google doesn’t notice it until you push it as your live site. To do that, go to “Settings > Reading,” then check the box that says, “Discourage search engines from indexing this site.” You’ll confuse Google if you let it index your staging site in addition to your live site.
3. Preserve SEO and Technical Details
A redesign can affect your SEO. Search engines create their indexes based on your existing site structure. Changing too much will cause Google to drop pages from its index and start the process all over again. That’s why I recommend conducting a full audit of your existing site. Use Google Search Console to identify high-performing pages, crawl errors, and keyword rankings. Exporting this data will help you establish benchmarks to compare your redesigned site and keep you from changing the fundamentals of your website too much.
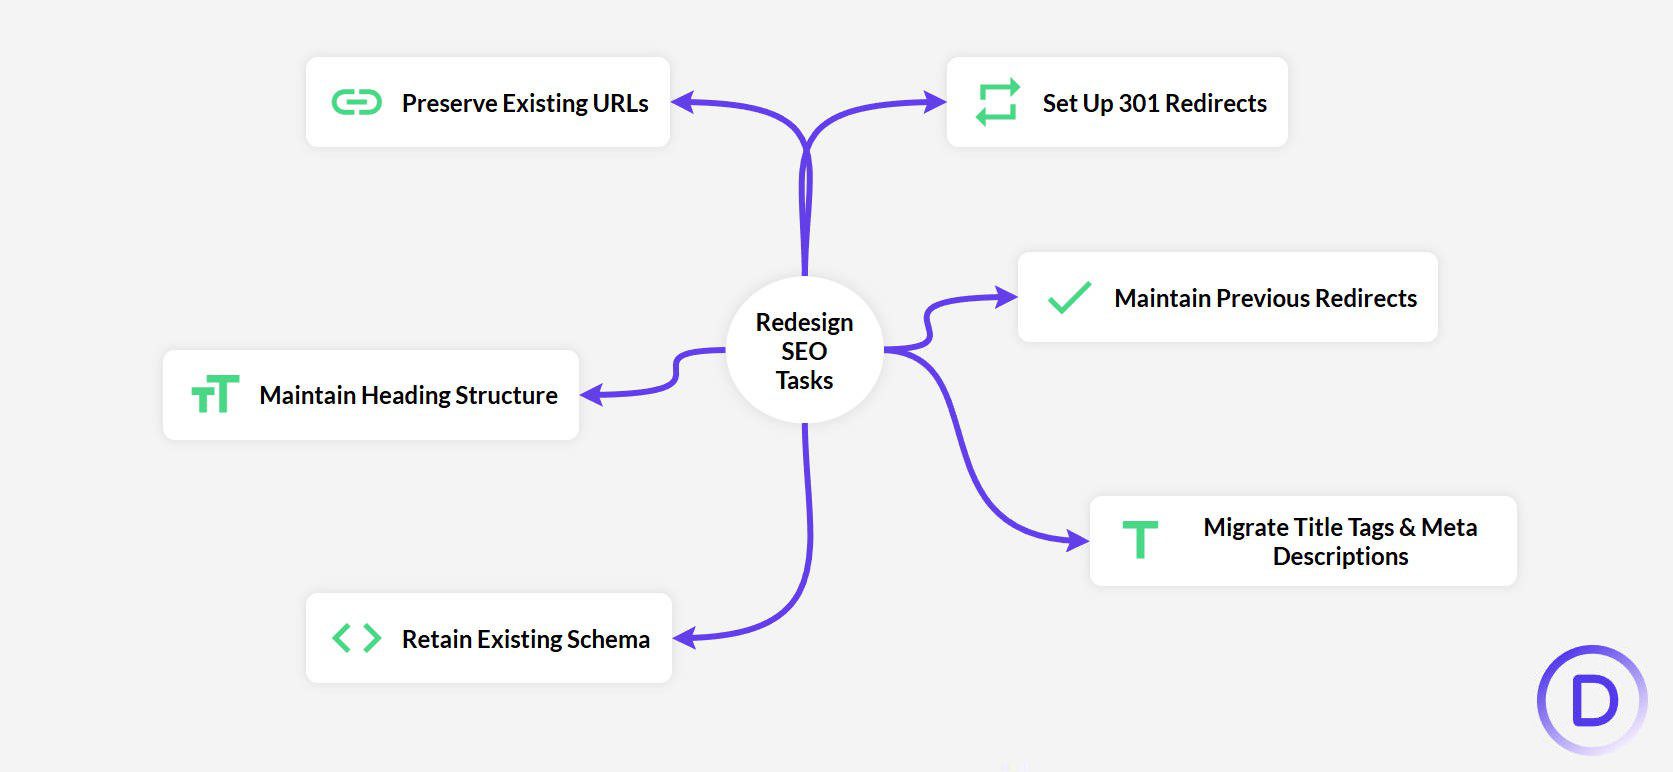
Make sure to do each of these for every redesign:
- Preserve existing URLs. Keep track of every page and post on your website, including CMS-built pages (think for taxonomies and store pages). I like to have a spreadsheet of all of these. You can look at your sitemaps for 95% of your site’s pages.
- Set up 301 redirects for any pages with a URL change (very important—some plugins will do this automatically).
- Regarding 301s, keep your previous redirects intact. You might also want to clean up any necessary 301s (404s aren’t bad, but use a 301 if a page moves).
- Migrate your title tags and meta descriptions. You may change them, but you certainly don’t want to lose them if you don’t.
- Keep any additional schema used on your pages (more than what’s created by default from your SEO plugin). It’s a pain to recreate schema when you simply forgot to save it (use the spreadsheet for this, too).
- Keep your heading structure intact because search engines use it for context. You’re allowed to make content changes, but just know that they could affect your previous SEO.
SEO is often an afterthought with redesigns. While SEO can be one of the last things you optimize a new website for (within reason), it should be one of the first things you think about on a redesign. If your existing website gets current traffic, you don’t want to go back a step (or several).
I’d also recommend that you don’t change SEO plugins unless you have a clear reason to do so. If you do, many plugins have migration tools to transition most of the SEO settings from your old plugin to the new one.
4. Use Divi for Your WordPress Redesign
While changing a theme can drastically change a website, the good news is that all your media and CPTs stay intact. Your uploaded images and videos will have the same URL path as with any custom post types you’ve built (though query loops and on-page elements will need to be rebuilt, and your pagination might change). This should give you more confidence with a redesign because you aren’t starting from zero.
Now, you have hundreds of options when choosing a theme for a WordPress redesign. However, there is none better for actually designing a website than Divi. I have not seen a page builder for WordPress give users as many design options (whether or not they are a beginner or someone very proficient in CSS).
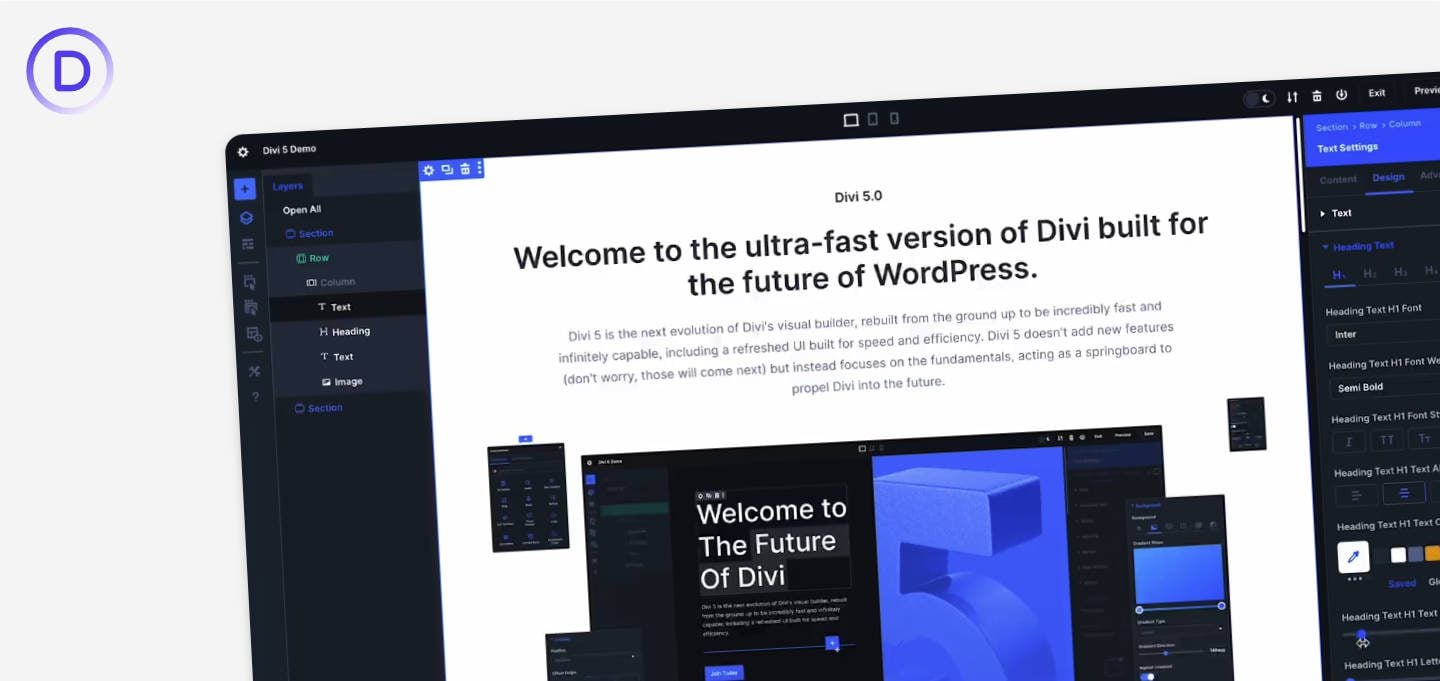
Divi is a design machine, and if you are really committing to a redesign, I suggest that you don’t choose a tool that will push you into yet another design bottleneck. First and foremost, Divi is a design tool. That means it has every feature and function you need to rebuild your new website.
If you need a little more help, Divi has Starter Sites that are designed by our team of professional web designers. You could also use our tried-and-true AI website builder for something more custom. The best part about both options is that every design is Divi-compliant, meaning that everything is editable within Divi’s editor.
On a tight budget? Divi is actually among the most affordable web design tools on the market. You get a full-fledged design tool, Cloud storage, AI assistant, VIP support (and more than I’m willing to stuff into this sentence) for $7.42 a month.
To get the most from Divi, learn about using Module Presets and the new Option Group Presets (in Divi 5). These are Divi’s ways of applying a class-based design system that makes designing faster and more consistent. If you are using a designer, make sure they are aware of these features within Divi.
5. Design Your Pages and Templates
Start by setting up your global colors and fonts. You can establish your primary color palette and font pairings right within the Divi Theme Options or the WordPress Theme Customizer.
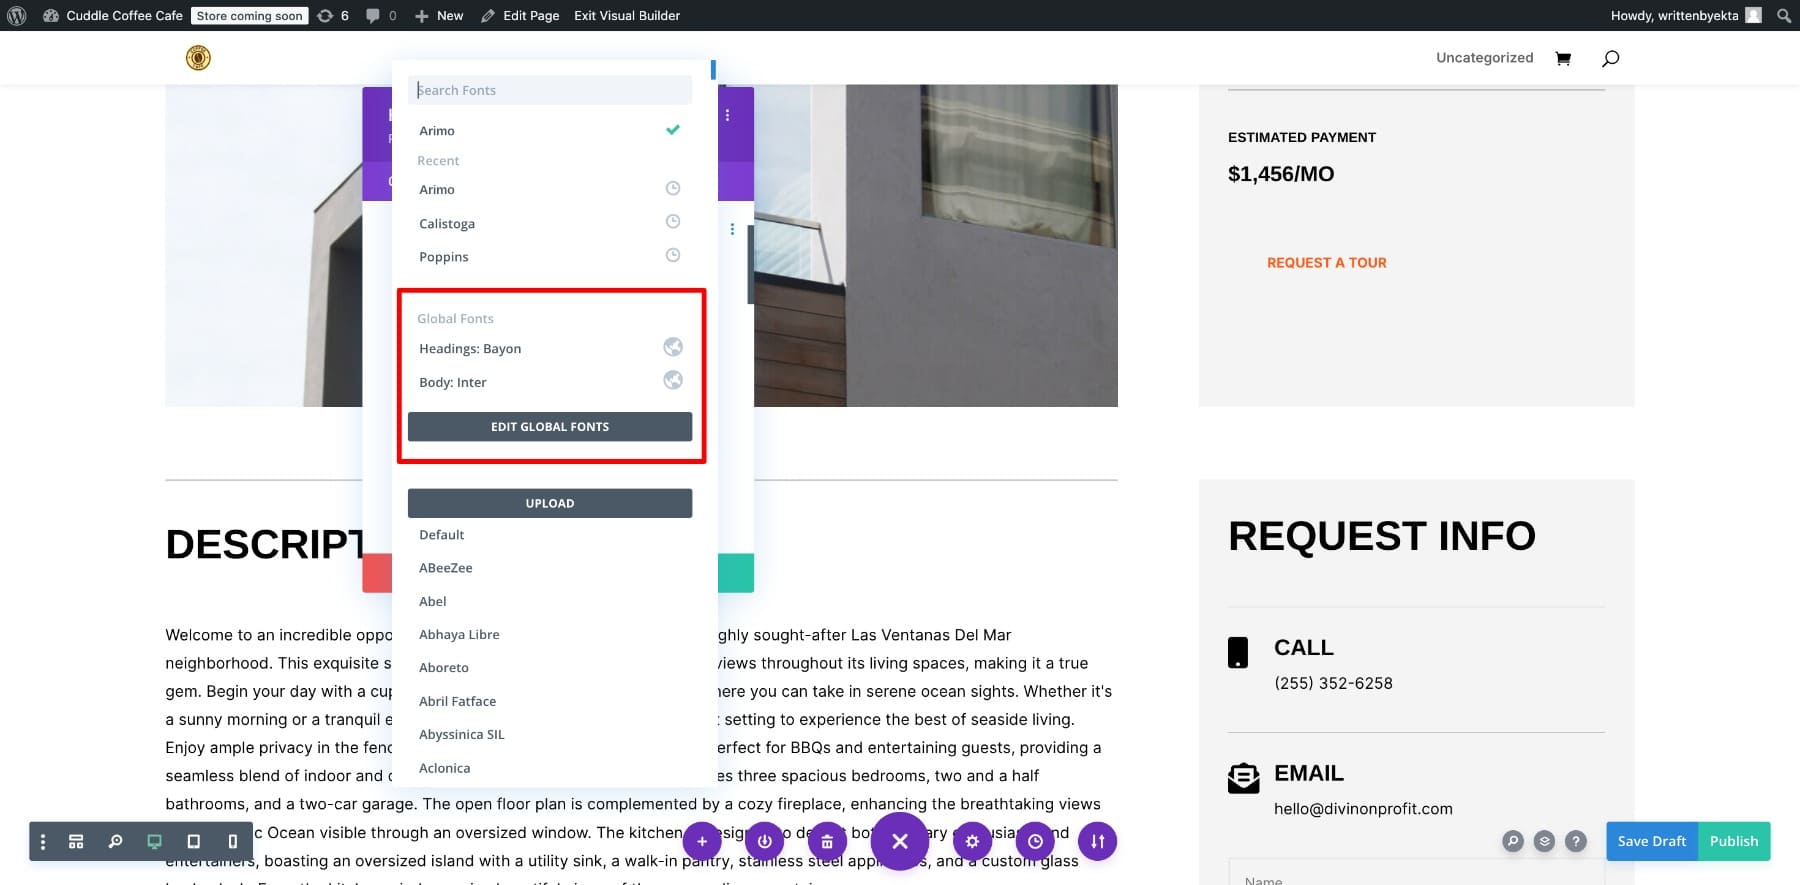
Next, start working with Divi’s Preset system. Presets create reusable design styles for all of your common website elements. Think about things like buttons, headings, different text styles, form fields, and so on. Presets are crucial for ensuring design consistency throughout your site. I start with a page with elements that I know I’ll use throughout the site—others like starting with their homepage for this.
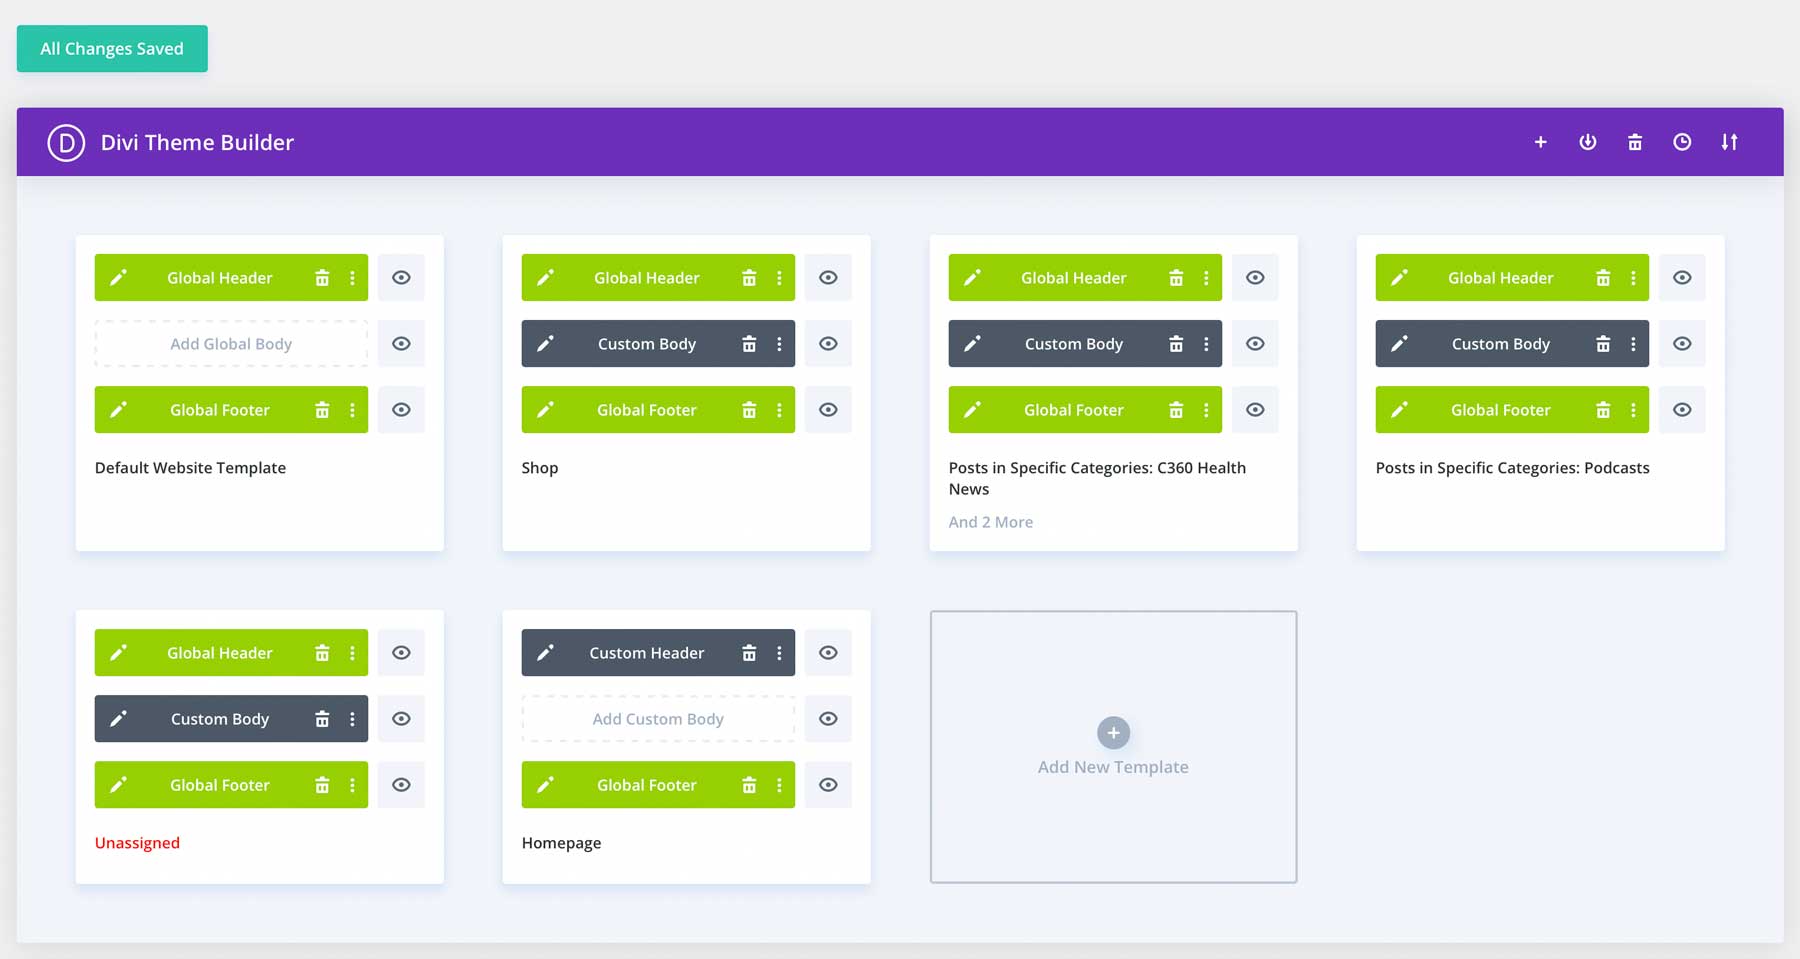
Then, work on your header and footer templates using Divi’s Theme Builder. Create global header and footer templates that will be applied across your entire website (or to specific sections, if needed). Also, create any necessary dynamic page templates. Dynamic page templates are used for content that is applied to a template automatically (like your blog posts, category archive pages, and product pages).
After this, I find it best to finish by designing core static pages. Begin with your most critical static pages, like your homepage, about page, contact page, services page, etc. As you design these pages, apply your global styles and presets to maintain visual consistency. Focus on creating clear layouts with effective call-to-actions on each page.
6. Optimize Your Site for Performance
I won’t belabor this point since you can read in-depth about improving your Google Page Speed score and which plugins you should use for speed optimization. But here are things I’d have on any of my own completed redesigns:
Divi
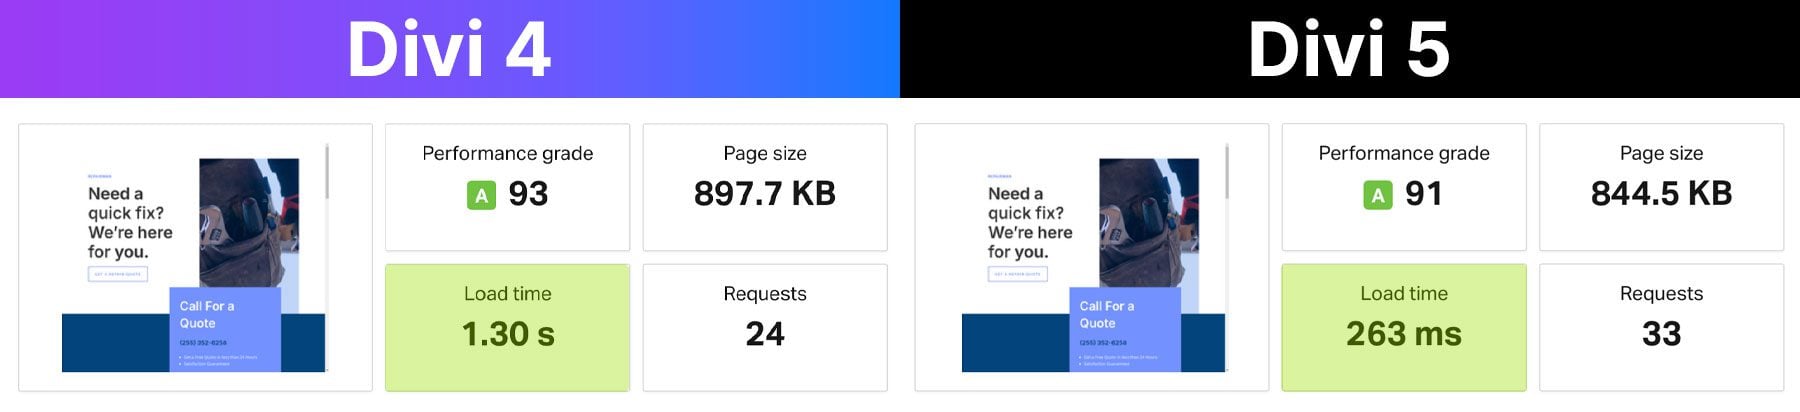
An earlier version of Divi 5 Alpha that reduced page load time by a factor of four
We’ve already covered how Divi is a fantastic theme that places no limits on design freedom and control. But it’s also among the fastest and most performant WordPress themes on the market. If you are installing Divi for the first time during this redesign, I highly recommend that you look into Divi 5—a completely rebuilt version of our website builder that is much, much faster and that already has more new features than the older version of Divi. If you are redesigning a WooCommerce store, then the old version is your best bet right now, but in most other cases, Divi 5 will be what you want to use.
Cloudflare CDN

Cloudflare is a Content Delivery Network (CDN) that stores and serves your website’s static assets on servers worldwide, reducing the distance data travels to your users (making it faster). I’ve often used the free version for smaller websites. However, the next tool is what I’d use for a website that I depended on for my business’ income.
NitroPack
NitroPack is an all-in-one platform for making websites very, very fast. It offers WordPress websites smart caching, optimized resource delivery via its own CDN, and impressive image optimization. It also handles lazy loading and converting images to WebP. With WordPress, you’re often patching together a string of plugins and third-party tools, but Nitropack is truly a one-stop shop. Treat yourself to this amazing suite of integrated tools—you’ll thank me later.
7. Follow a Pre-Launch Checklist
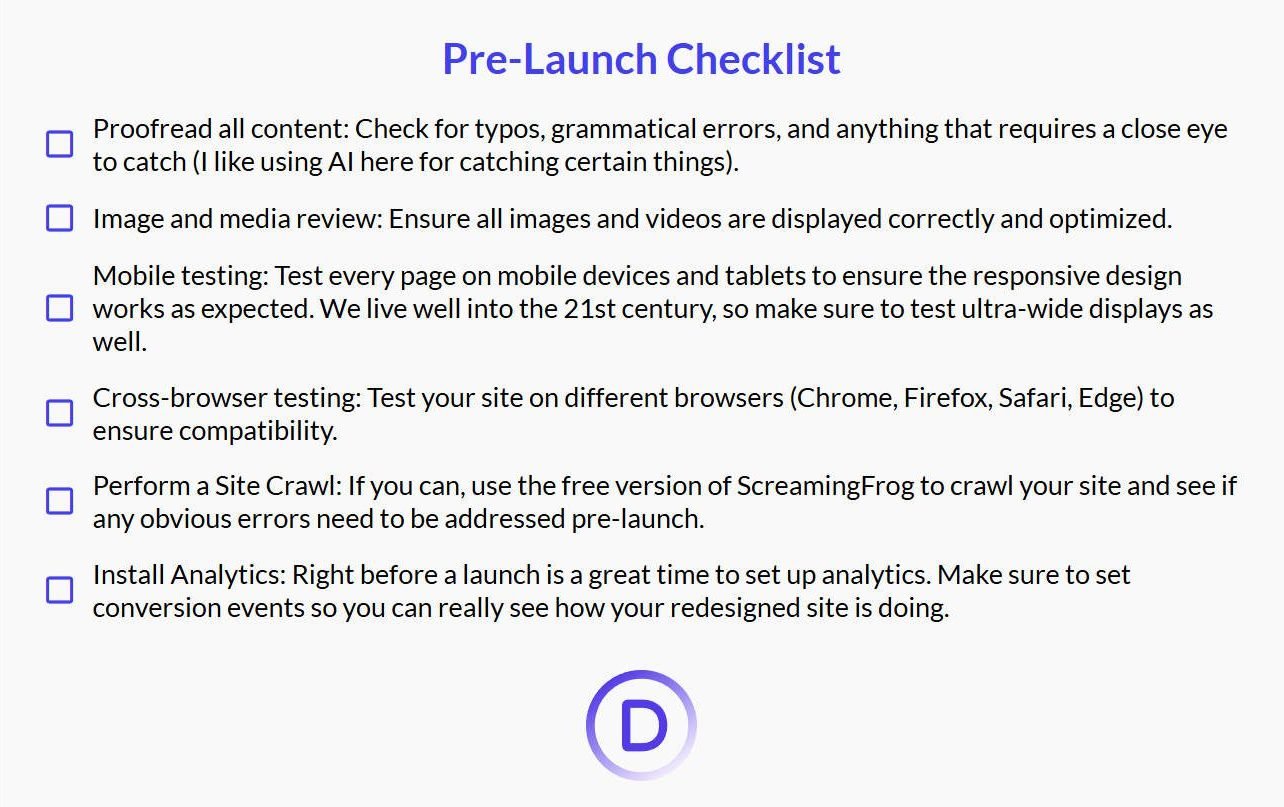
A pre-launch checklist is there so that you don’t accidentally miss something. There are literally hundreds of things that you can check, but here are six major categories of things to check:
- Proofread all content: Check for typos, grammatical errors, and anything that requires a close eye to catch (I like using AI here for catching certain things).
- Image and media review: Ensure all images and videos are displayed correctly and optimized.
- Mobile testing: Test every page on mobile devices and tablets to ensure the responsive design works as expected. We live well into the 21st century, so make sure to test ultra-wide displays as well.
- Cross-browser testing: Test your site on different browsers (Chrome, Firefox, Safari, Edge) to ensure compatibility.
- Perform a Site Crawl: If you can, use the free version of ScreamingFrog to crawl your site and see if any obvious errors need to be addressed pre-launch.
- Install Analytics: Right before a launch is a great time to set up analytics. Make sure to set conversion events so you can really see how your redesigned site is doing.
8. Go Live
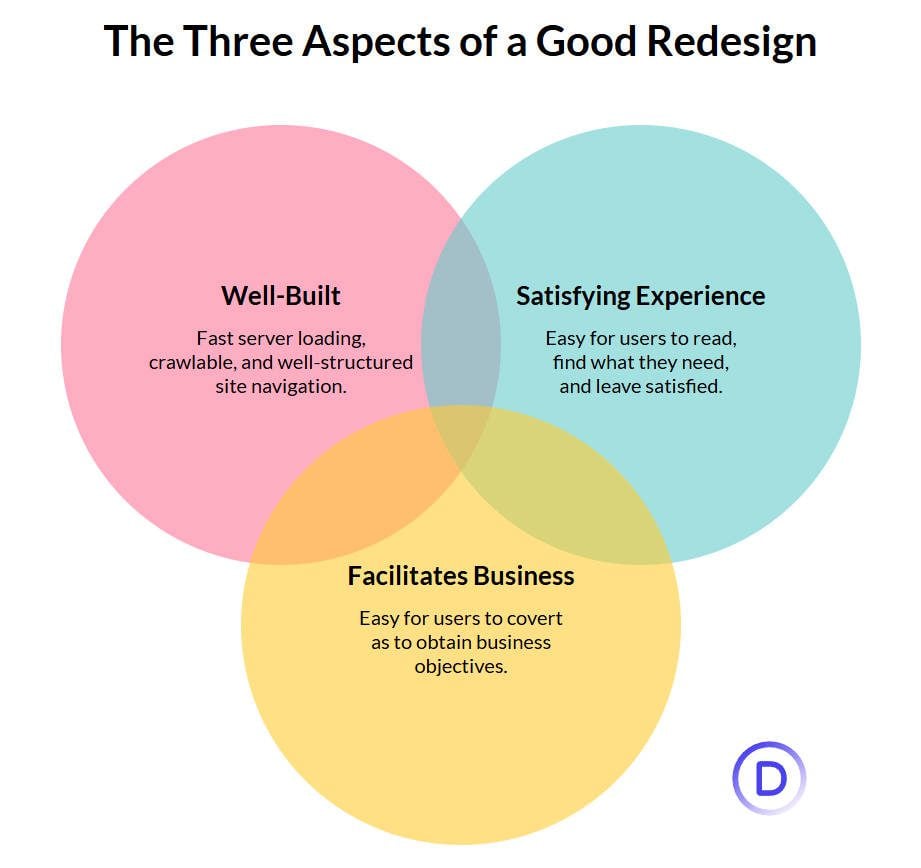
The moment of truth has arrived! Once you’ve rigorously tested your redesigned website on your staging environment and are confident in its stability and performance, it’s time to go live. At this point, you’ve built something that functions well, satisfies your end users, and will meet your business goals.
If you’re using SiteGround, you can make your staging site live using their Site Tools. Just like Siteground created your staging environment with one click, it’ll swap the staging site to the live environment.
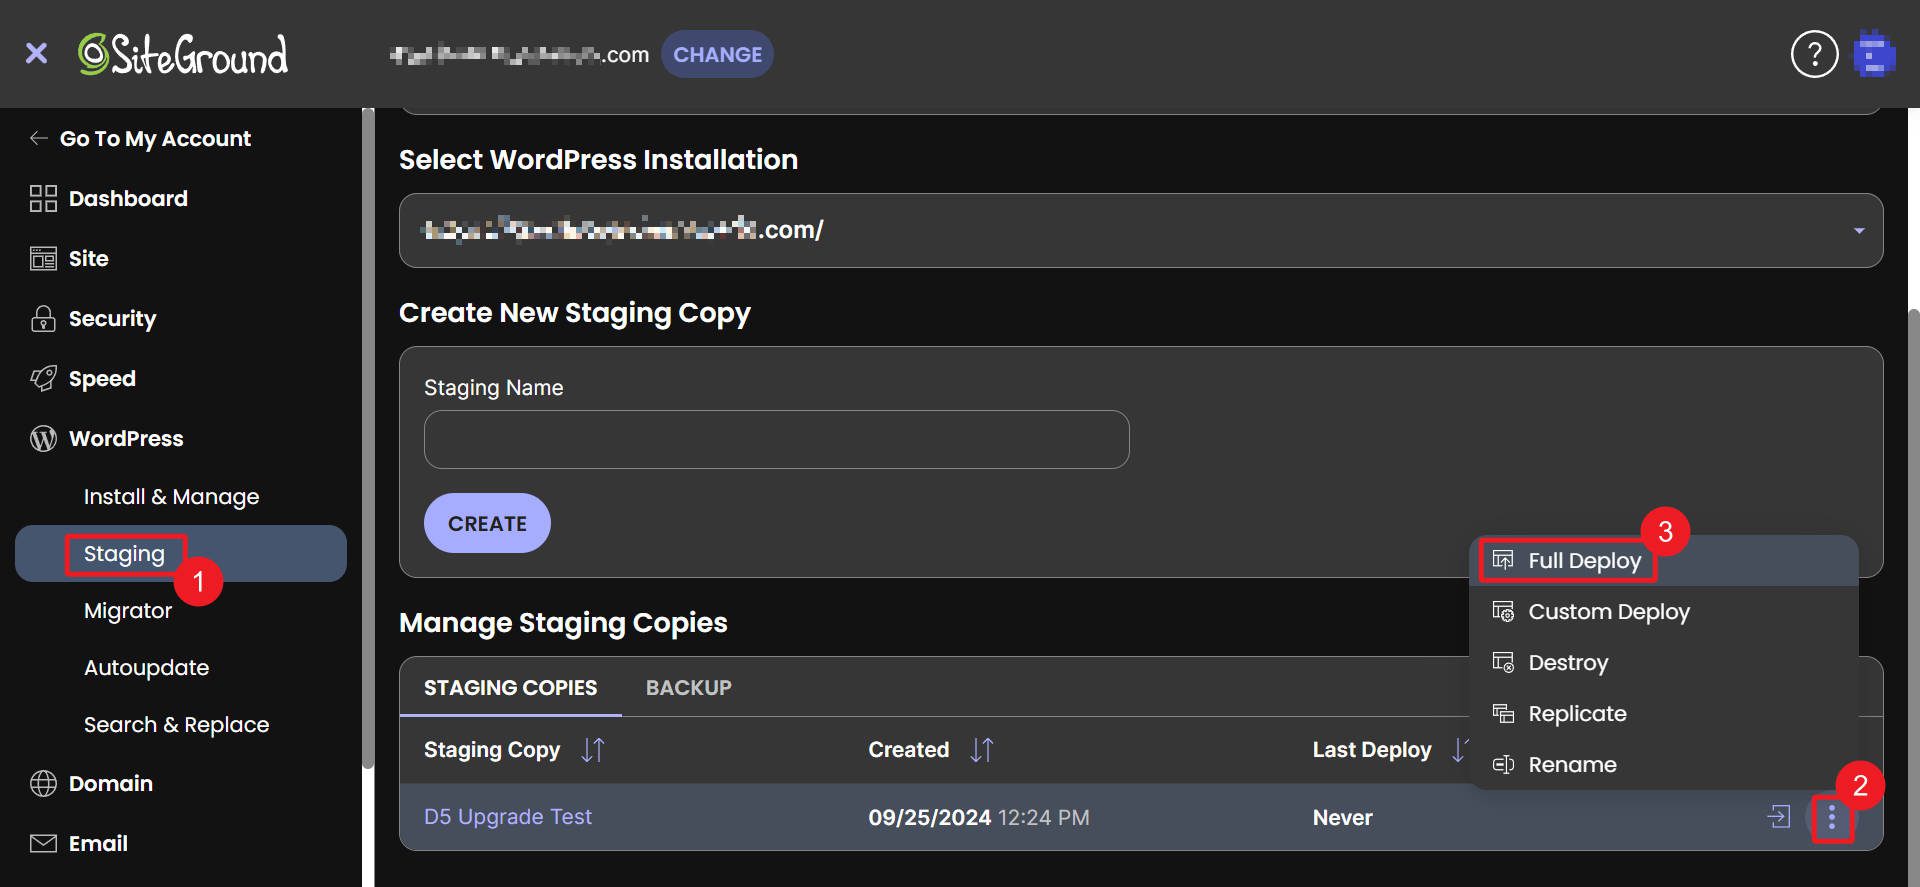
It just takes a few moments for it to happen. I love how it handles changing the staging URL across the entire site to your custom domain. This used to be such a pain, but now it is truly effortless.
WordPress Redesign Done Right
We often hear users say they wished they had switched to Divi years in advance, especially those who want greater design control than what a typical WordPress theme offers. Divi makes a WordPress redesign a pleasure. Its drag-and-drop builder, global design settings, and advanced styling options let you redesign your website to reflect your brand and goals. Don’t cut any corners and get a WordPress theme you’ll end up replacing in a couple of years.
Once you have the right theme, focus on adding new features to your website, maintaining (and improving) its SEO, and building with speed and responsiveness from the start.
Get it To Go
Redesigns are a lot of work, but the way we do it using these tools makes them much easier. We recommend any of these tools below for hosting, design, and optimization of your site.
| Recommendations | Useful for | |
|---|---|---|
| Siteground | Web hosting provider with one-click staging | Get Now |
| Divi Theme | The best WordPress theme for designers | Get Now |
| Quick Sites | Pre-built starter sites and AI-generated websites | Get Now |
| Divi AI | AI-powered web design assistant | Get Now |
| NitroPack | Total website performance optimization plugin and service | Get Now |
| Cloudflare | Security, CDN, and performance optimization | Get Now |
| Rank Math | Leading WordPress SEO plugin | Get Now |
| Divi Dash | Free dashboard to monitor all your websites from one place | Get Now |
The post How to Redesign Your WordPress Site (& Keep Your SEO) appeared first on Elegant Themes Blog.
# A Comprehensive Guide to Redesigning Your WordPress Site While Preserving SEO Integrity
Redesigning your WordPress site can be an exciting yet daunting task. A fresh design can enhance user experience, improve functionality, and align your website with current branding. However, one of the most critical aspects to consider during this process is preserving your SEO integrity. A poorly executed redesign can lead to a drop in search engine rankings, loss of traffic, and ultimately, a decrease in conversions. This guide will walk you through the essential steps to redesign your WordPress site while safeguarding your SEO efforts.
## 1. Conduct a Comprehensive SEO Audit
Before you begin the redesign process, it’s crucial to understand your current SEO standing. Conduct a thorough SEO audit to identify:
– **Current Traffic Sources**: Use tools like Google Analytics to see where your traffic is coming from.
– **Keyword Rankings**: Identify which keywords are driving traffic to your site and their current rankings.
– **Backlink Profile**: Analyze your backlinks to understand which sites are linking to you and the quality of those links.
– **Technical SEO Issues**: Check for issues such as broken links, slow loading times, and mobile responsiveness.
This audit will serve as a baseline for your redesign and help you identify areas that need improvement.
## 2. Plan Your Redesign Strategically
A successful redesign requires careful planning. Here are some key considerations:
– **Define Your Goals**: What do you want to achieve with the redesign? Improved aesthetics, better user experience, or enhanced functionality?
– **User Experience (UX)**: Focus on creating a user-friendly interface. Consider the navigation structure, layout, and overall design. A well-structured site can improve dwell time and reduce bounce rates, both of which positively impact SEO.
– **Mobile Responsiveness**: Ensure that your new design is mobile-friendly. Google prioritizes mobile-first indexing, so a responsive design is crucial for maintaining your rankings.
## 3. Choose the Right Theme and Plugins
Selecting the right WordPress theme and plugins is vital for both aesthetics and SEO. Here are some tips:
– **SEO-Friendly Themes**: Choose a theme that is optimized for SEO. Look for themes that are lightweight, fast-loading, and compatible with popular SEO plugins.
– **Limit Plugins**: While plugins can enhance functionality, too many can slow down your site. Only use essential plugins and ensure they are regularly updated.
## 4. Preserve URL Structure
One of the most significant risks during a redesign is changing your URL structure. If your URLs change, you risk losing your existing rankings. To preserve your SEO integrity:
– **Keep URLs Consistent**: If possible, maintain the same URL structure. If changes are necessary, ensure that they are logical and user-friendly.
– **Implement 301 Redirects**: For any URLs that must change, set up 301 redirects to point users and search engines to the new URLs. This helps preserve link equity and ensures a seamless user experience.
## 5. Optimize On-Page SEO Elements
As you redesign your site, take the opportunity to optimize on-page SEO elements:
– **Title Tags and Meta Descriptions**: Ensure that each page has unique and descriptive title tags and meta descriptions that include relevant keywords.
– **Header Tags**: Use header tags (H1, H2, H3) appropriately to structure your content. This not only helps with SEO but also improves readability.
– **Image Optimization**: Optimize images by using descriptive file names and alt tags. This can improve load times and accessibility.
## 6. Test Before Launching
Before going live with your redesigned site, conduct thorough testing:
– **Check for Broken Links**: Use tools like Screaming Frog or Ahrefs to identify any broken links.
– **Test Redirects**: Ensure that all 301 redirects are functioning correctly.
– **Mobile and Browser Compatibility**: Test your site on various devices and browsers to ensure a consistent experience.
## 7. Monitor Performance Post-Launch
After launching your redesigned site, it’s essential to monitor its performance closely:
– **Use Analytics Tools**: Keep an eye on Google Analytics and Google Search Console to track traffic, rankings, and any potential issues.
– **Watch for Changes in Rankings**: Be prepared for fluctuations in rankings after a redesign. It’s normal for rankings to dip temporarily, but they should stabilize over time.
– **Gather User Feedback**: Encourage users to provide feedback on the new design. This can help you identify any usability issues that may affect SEO.
## Conclusion
Redesigning your WordPress site can breathe new life into your online presence, but it’s essential to approach the process with a focus on preserving your SEO integrity. By conducting a thorough audit, planning strategically, maintaining URL structures, optimizing on-page elements, and monitoring performance post-launch, you can ensure that your redesign enhances both user experience and search engine visibility. With

Recent Comments