

One of the biggest headaches of running a freelance business or web agency is staying on top of website maintenance. It’s very time-consuming, especially when you are responsible for multiple websites. Manually updating plugins, themes, and WordPress core files is a necessity, but it is a tedious process that can easily lead to oversight, leading to potential security concerns. This is where a site management tool comes in handy.
In this post, we’ll introduce you to Divi Dash, Elegant Themes’ newest product in the Divi ecosystem, and show you how to use it to update all your WordPress websites at once.
Let’s dive in.
What is a Site Management Tool?
A site management tool is a freelancer’s dream come true. It allows you to manage and maintain multiple websites from one centralized dashboard. These tools typically offer an intuitive interface, automated WordPress, plugins, and theme updates, performance monitoring, and more. In some cases, as with Divi Dash, they provide other tools such as client management and team collaboration.
What is Divi Dash?
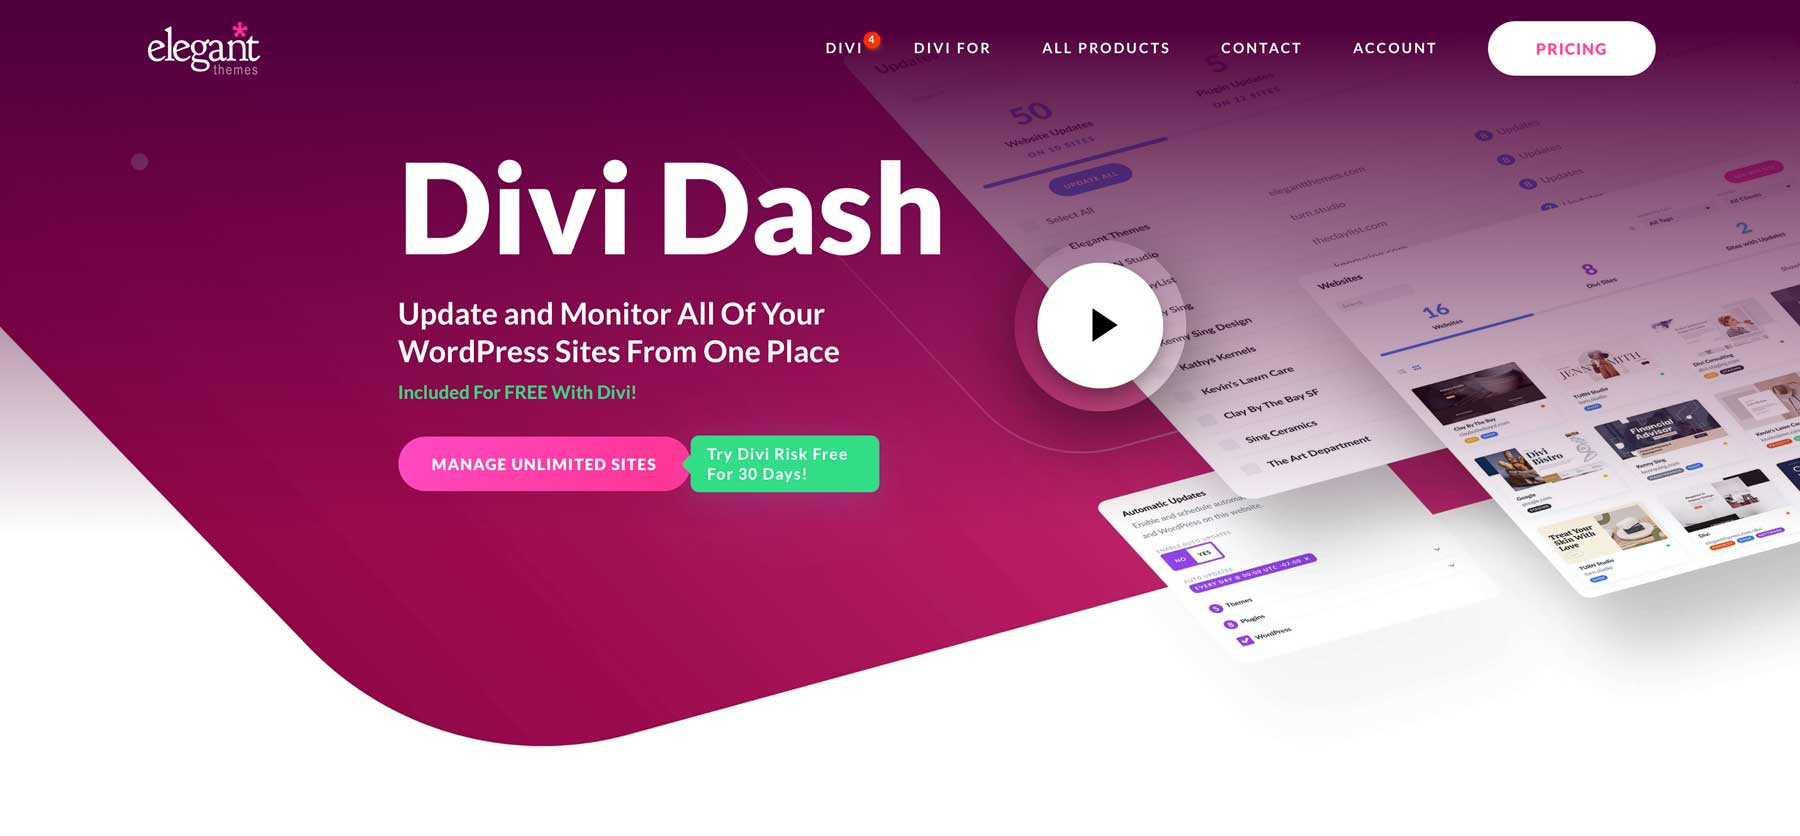
Divi Dash is Elegant Themes’ new site management tool for Divi users. It’s available for free with a yearly or lifetime Divi license. It allows you to manage your websites in a simple, user-friendly dashboard. It’s specifically designed for WordPress users who manage multiple websites. With Divi Dash, you can ditch the tedious logins and individual updates. Instead, it offers a centralized dashboard where you can oversee everything from a single location. Divi Dash allows you to automatically update themes, plugins, and core WordPress files with a single click, ensuring your sites are always secure and running smoothly.
Divi Dash also boasts features to streamline client management, perform bulk updates, and monitor site performance, making managing multiple websites easier and more efficient.
How To Update All Your WordPress Websites At Once
Divi Dash is a game-changer for managing multiple WordPress websites. Its ability to update all your sites simultaneously is a major time-saver. But first, let’s guide you through adding your websites to Divi Dash. Keep in mind that Divi Dash is free with any Divi License. However, a Divi Lifetime License is the best way to manage unlimited WordPress websites, regardless of whether they use the Divi theme.
Log in to The Members Area
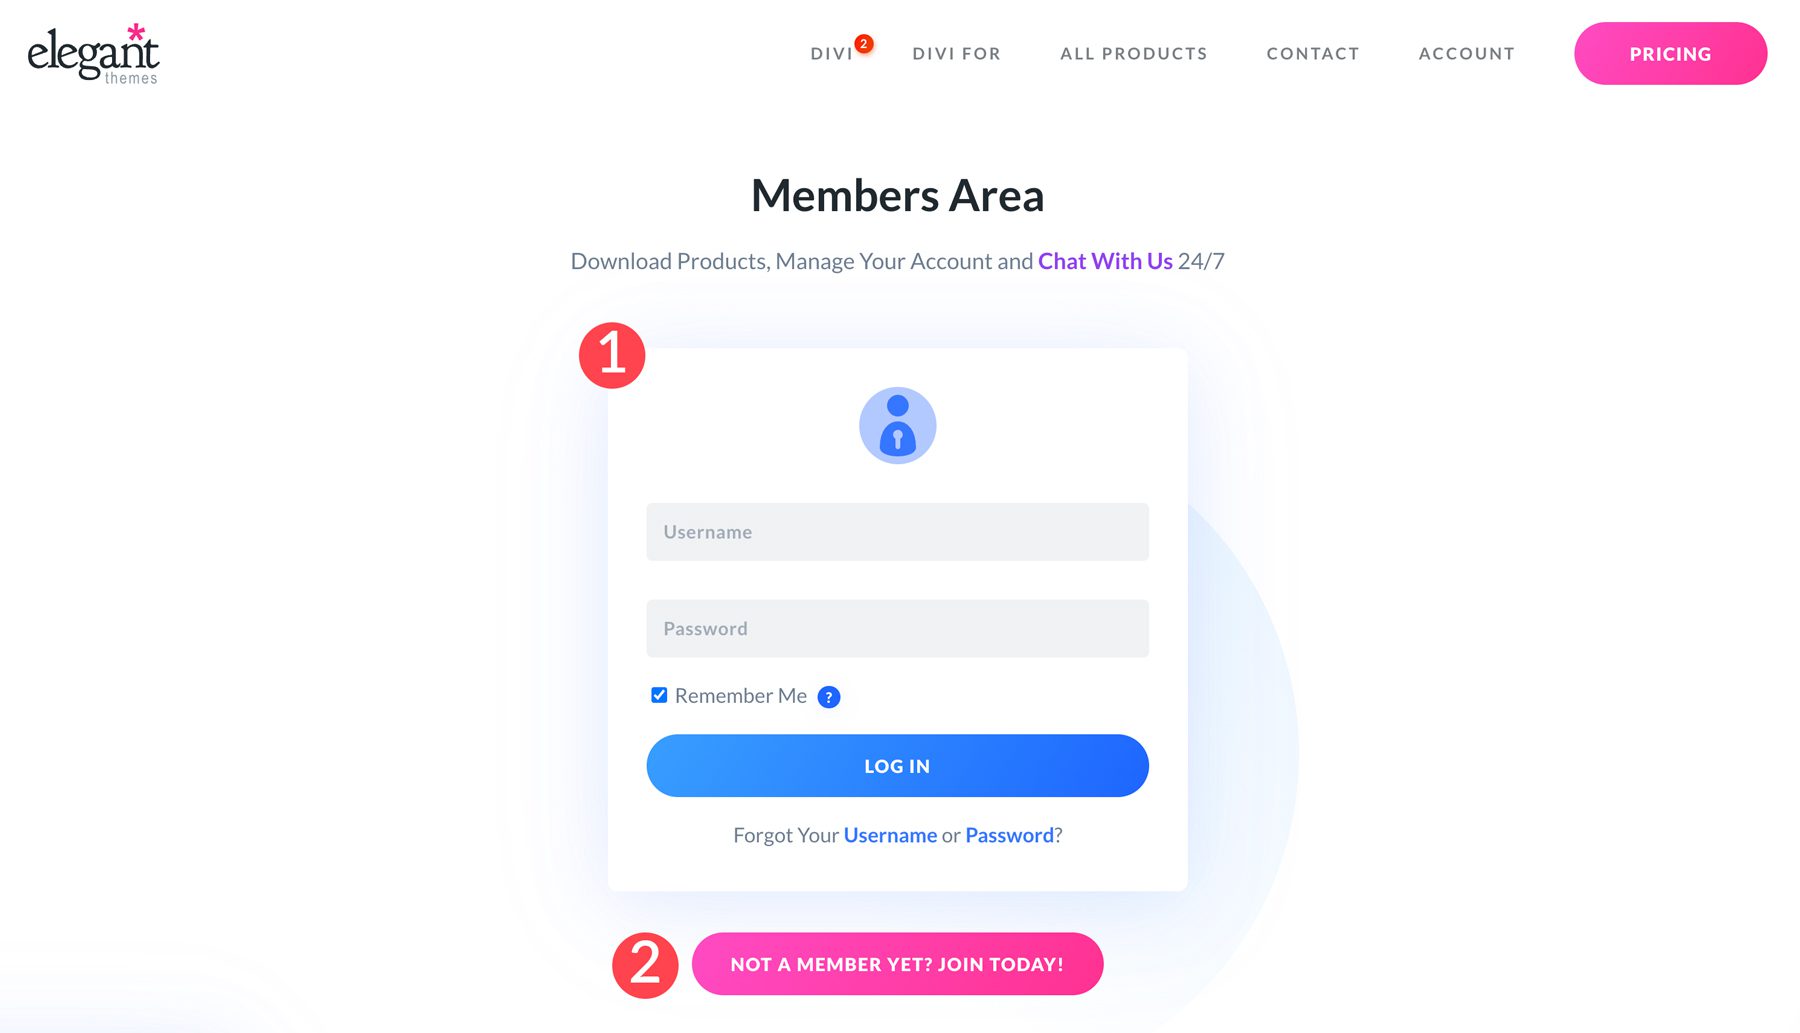
Before you can add and update websites, you need to know how to access Divi Dash. First, log in to the Members Area on the main Elegant Themes website using your ET username and password. If you still need to become a member, no worries! You can sign up on the member login page.
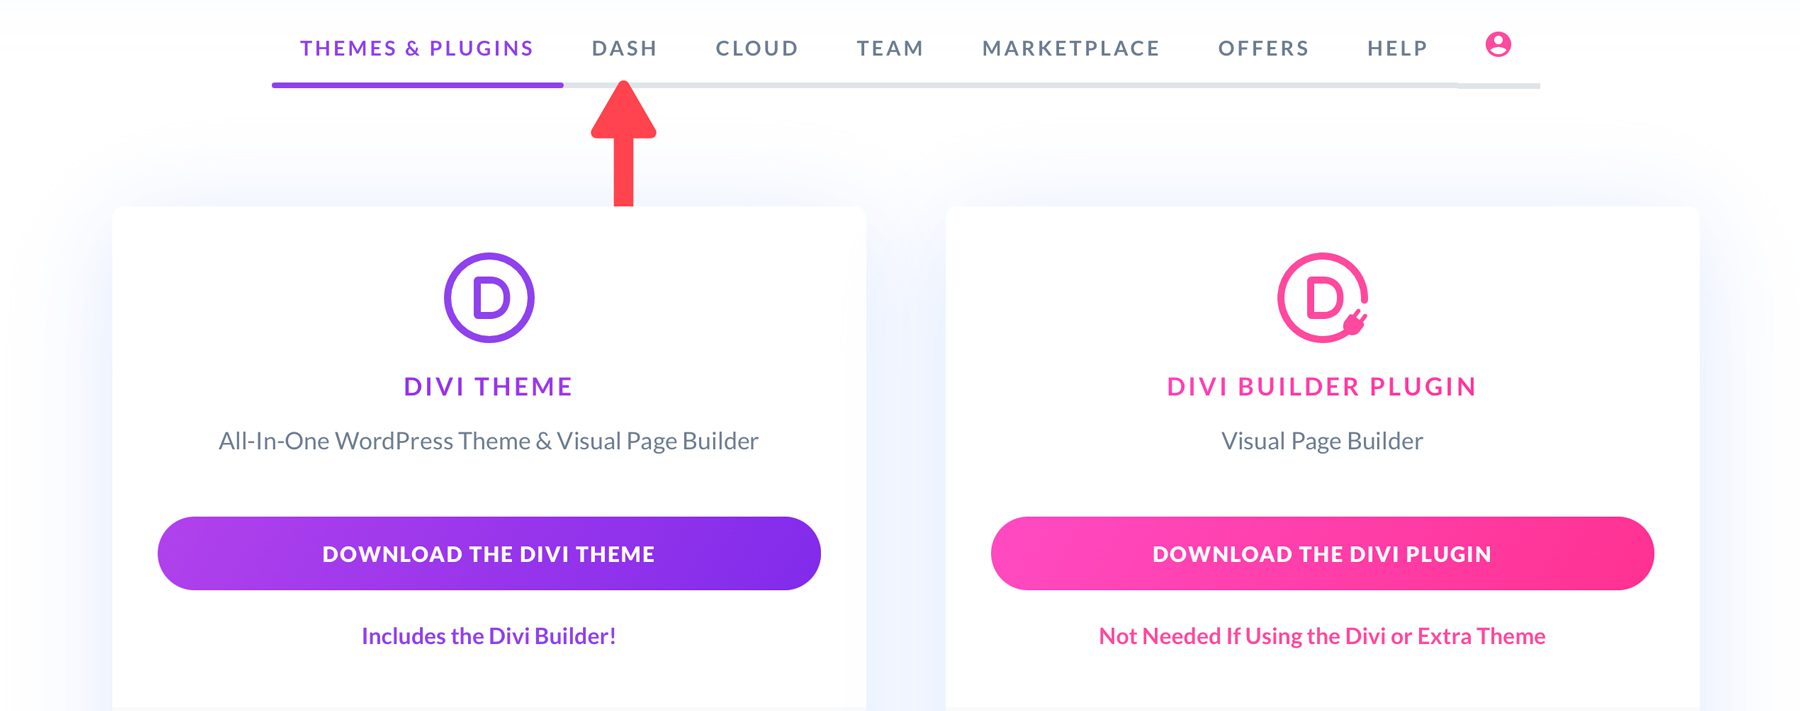
Once the screen refreshes, locate the Dash tab in the menu.
Add Websites to Divi Dash
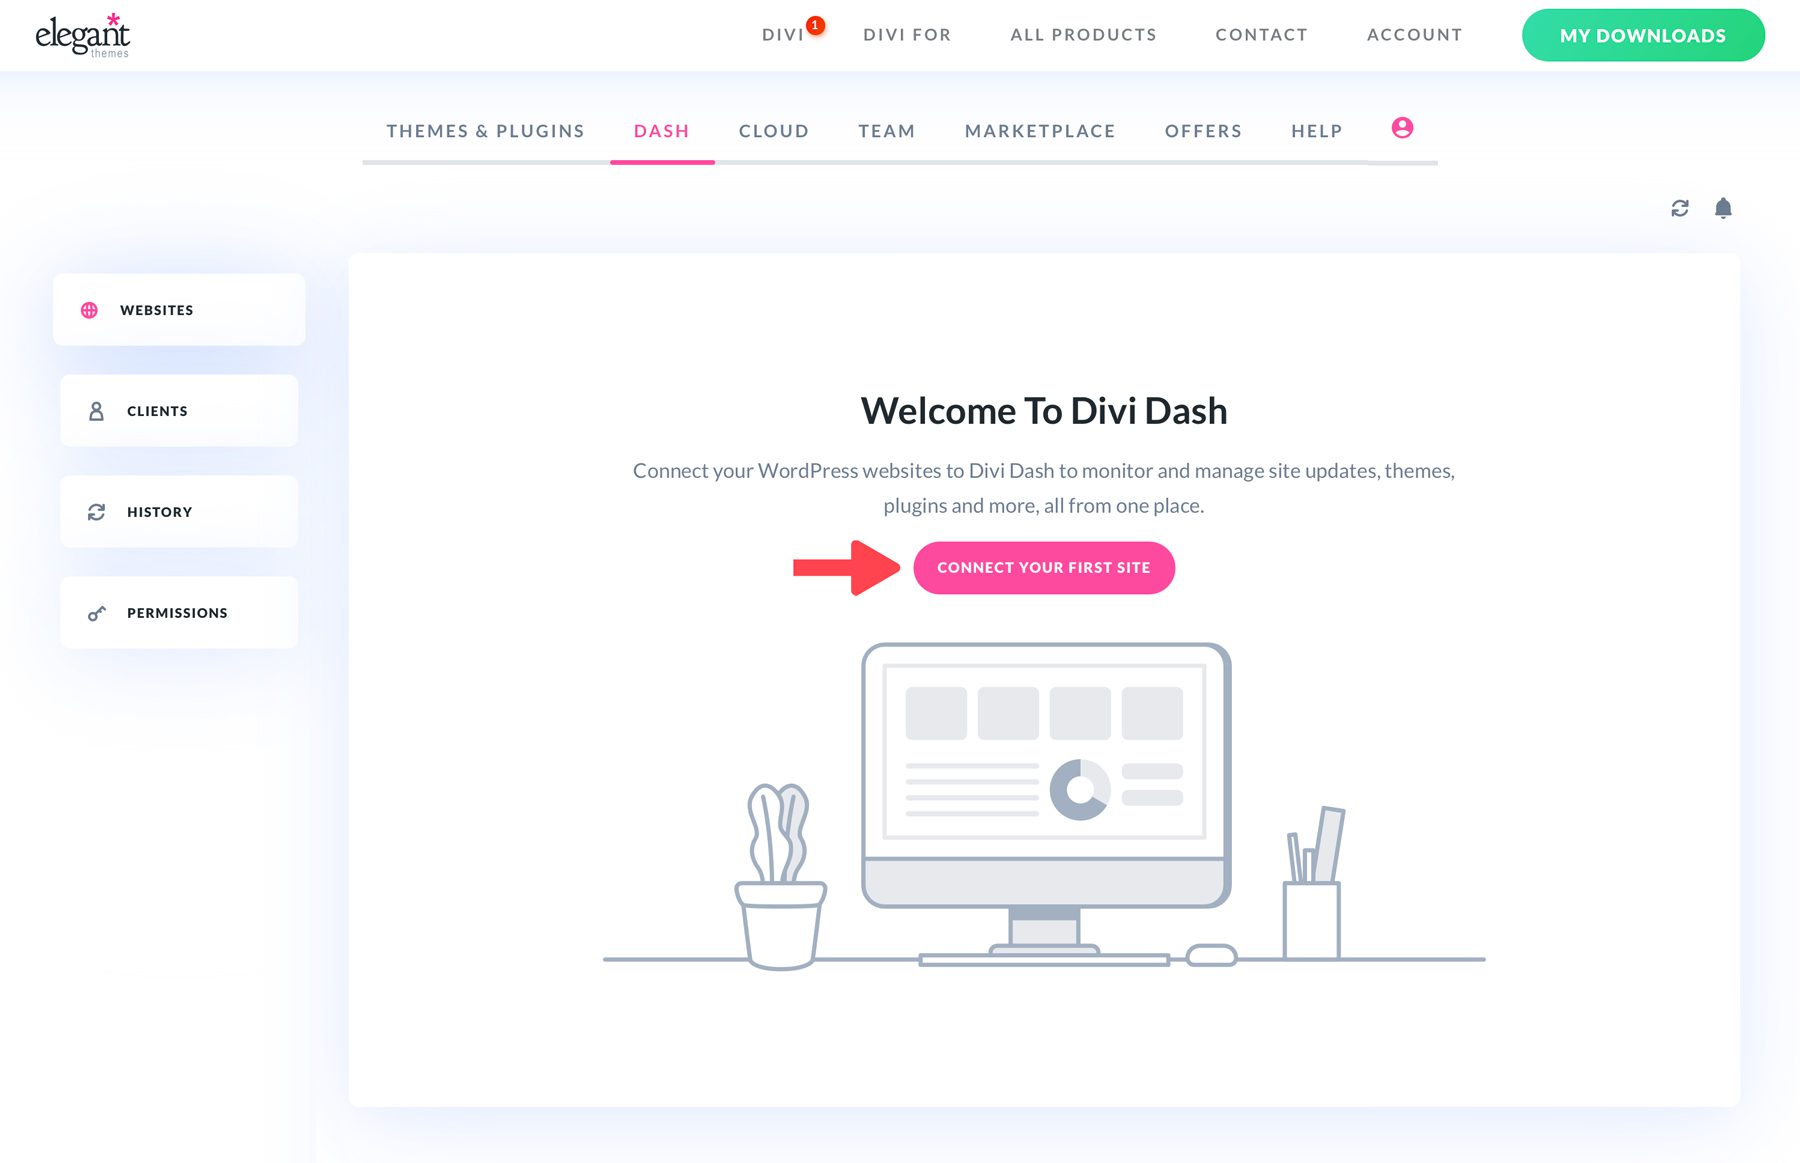
When the screen refreshes, you’ll see the Divi Dash interface. To add a website, click the Connect Your First Site button.
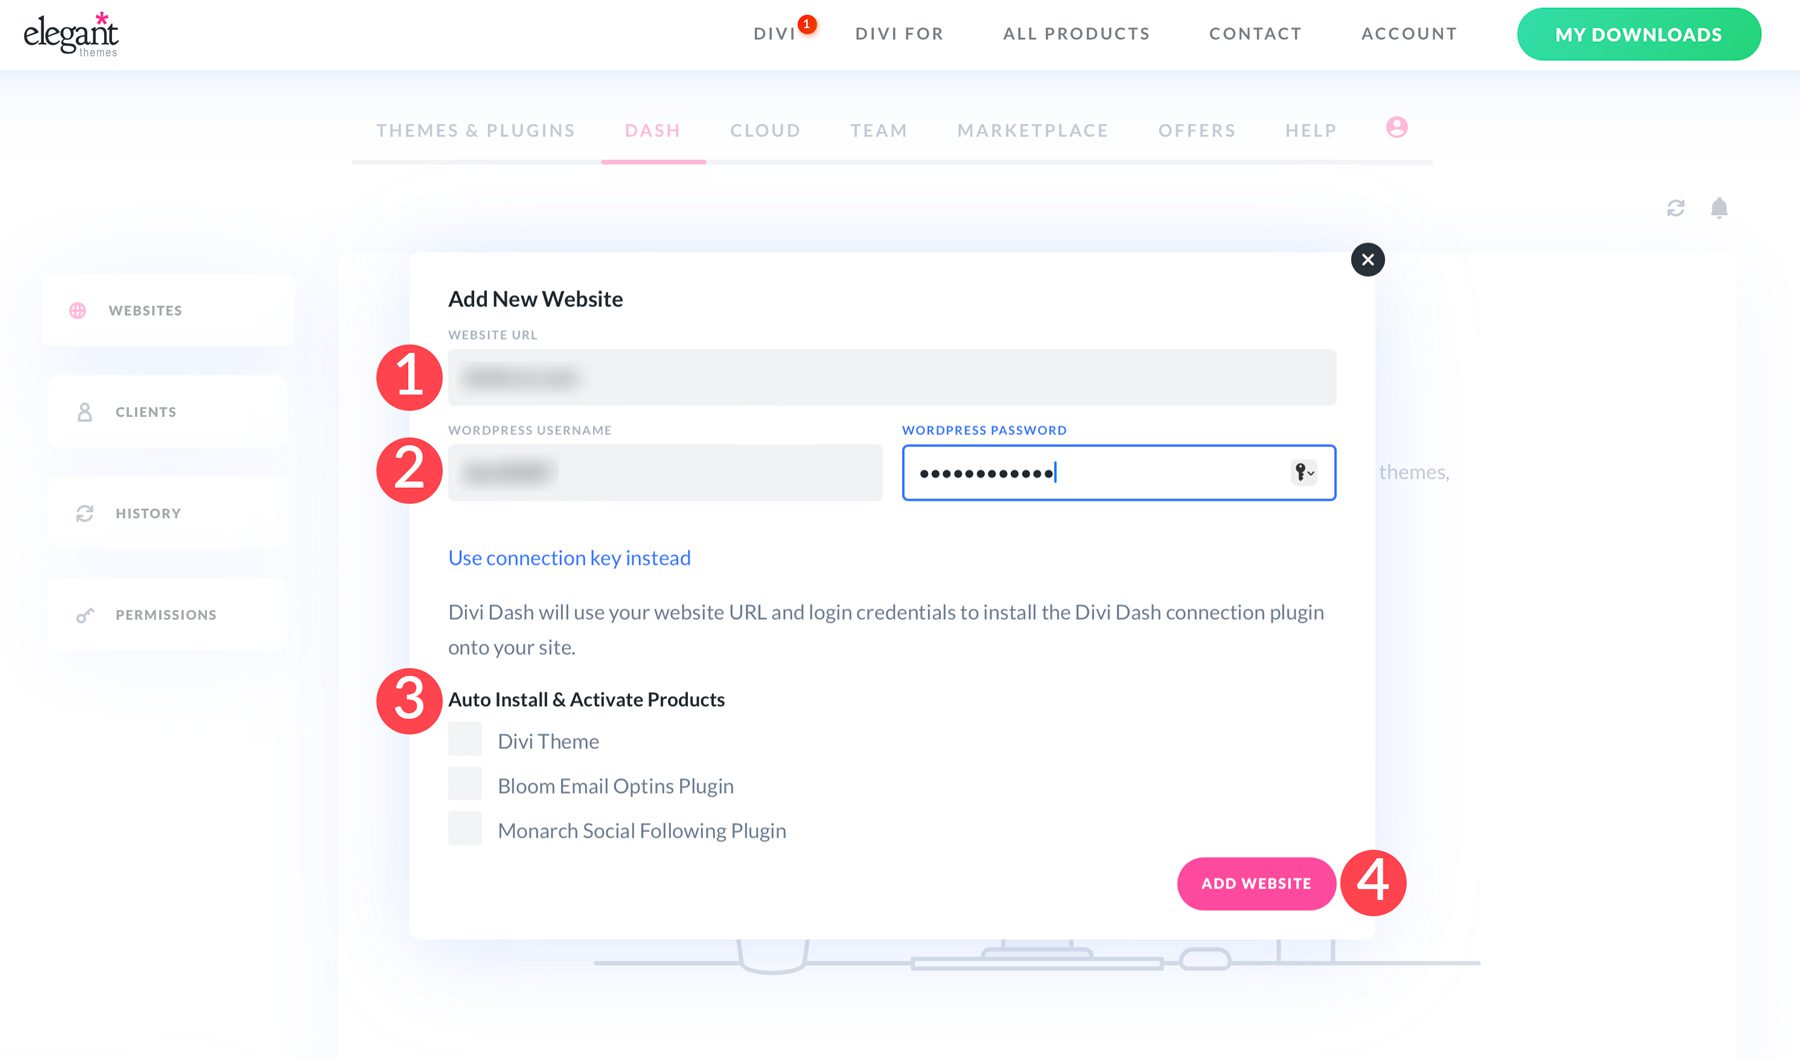
When the dialog box appears, enter the URL and your WordPress login credentials, and select the products you’d like to auto-install. Finally, click the Add Website button.
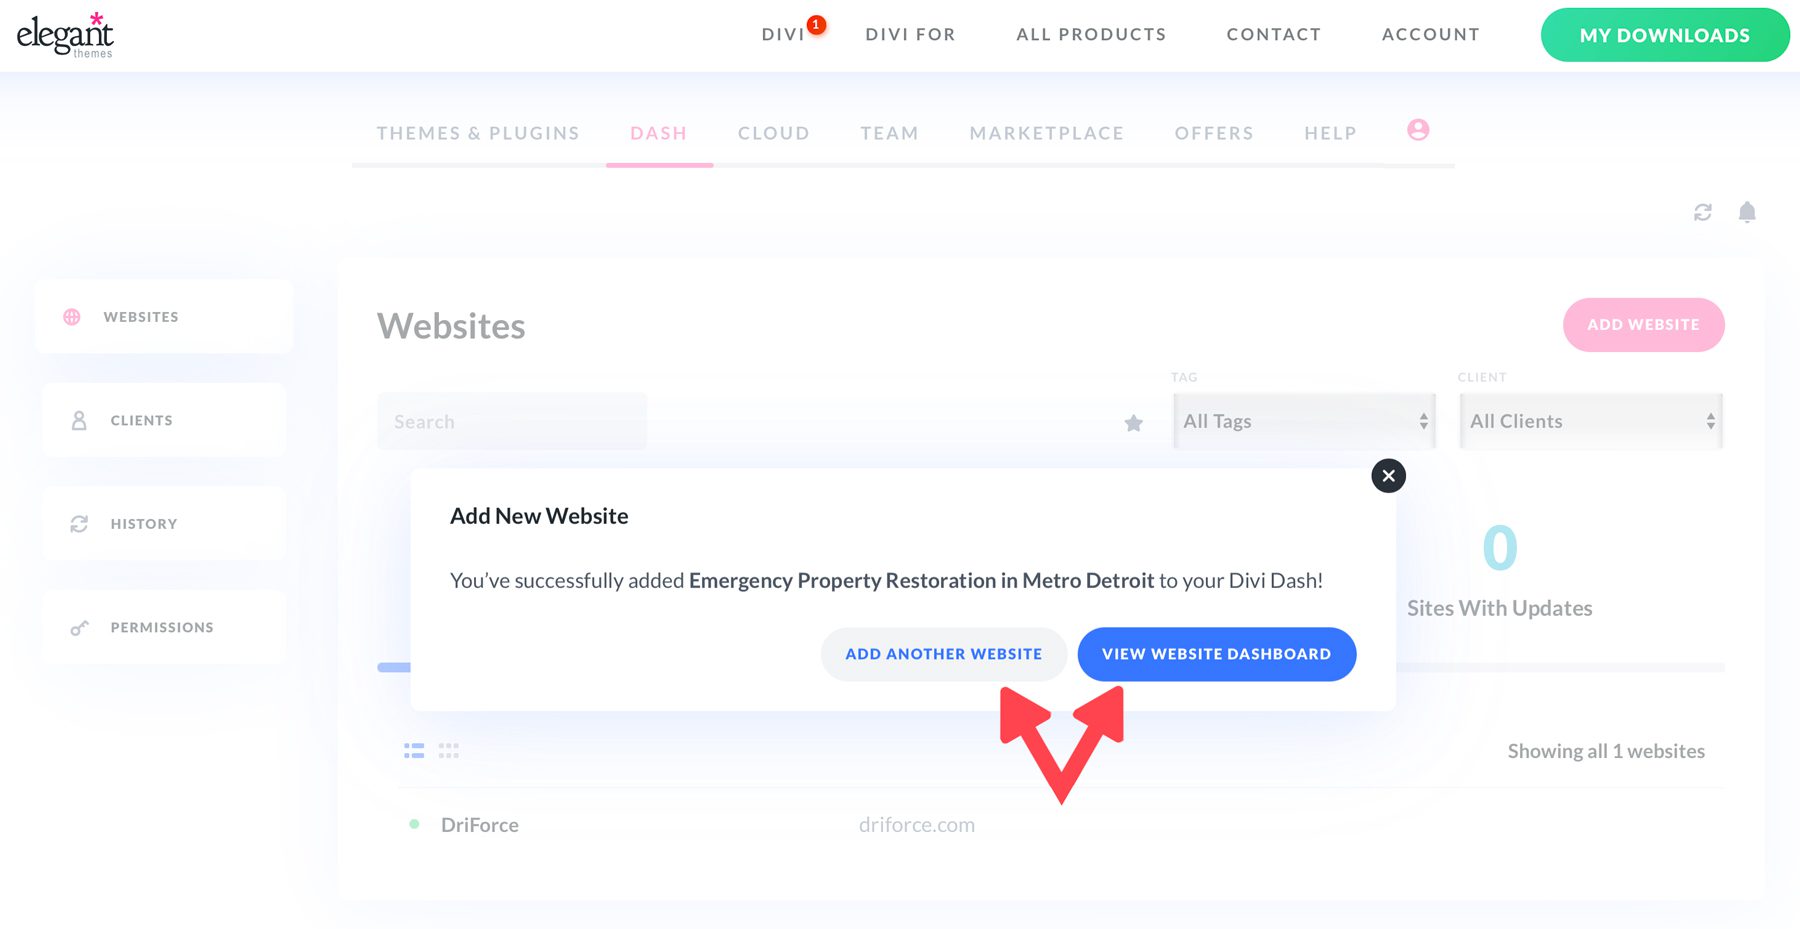
Once the website is added, a popup will appear with two options: add another website or view website dashboard. Repeat the steps above to add additional websites to Divi Dash.
Update all Your WordPress Websites At Once
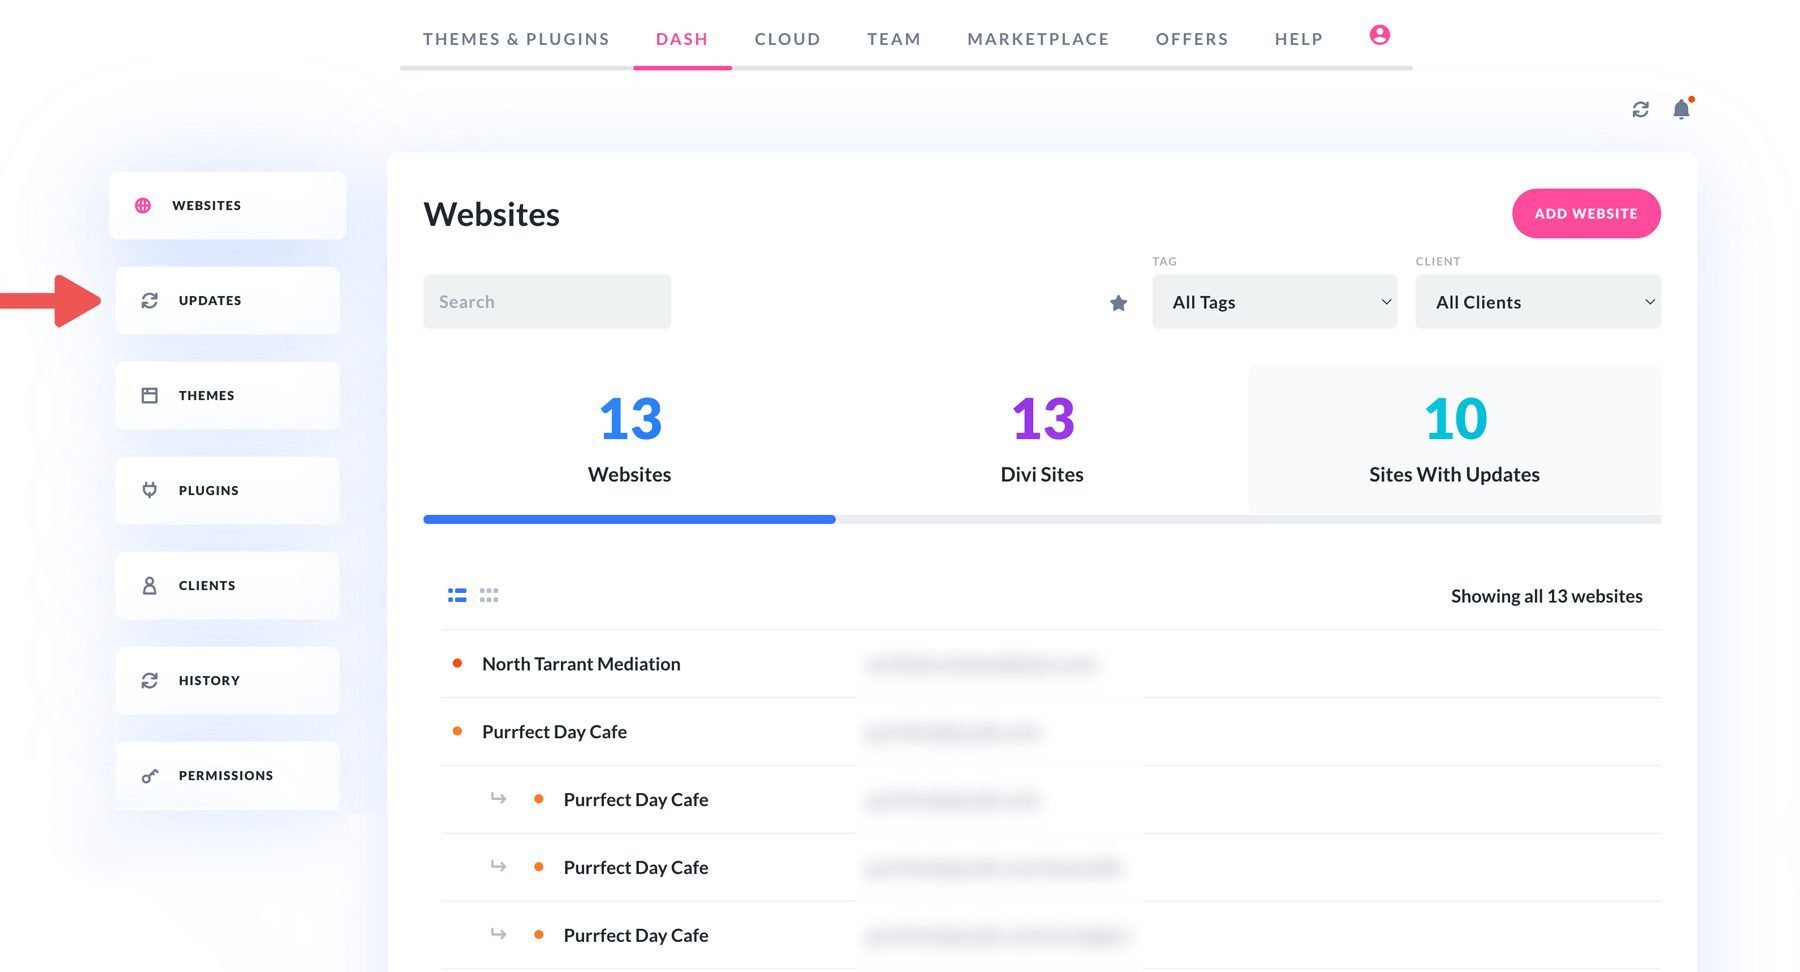
Once all your websites are connected, you can take the steps to update all software. Start by selecting the updates tab.
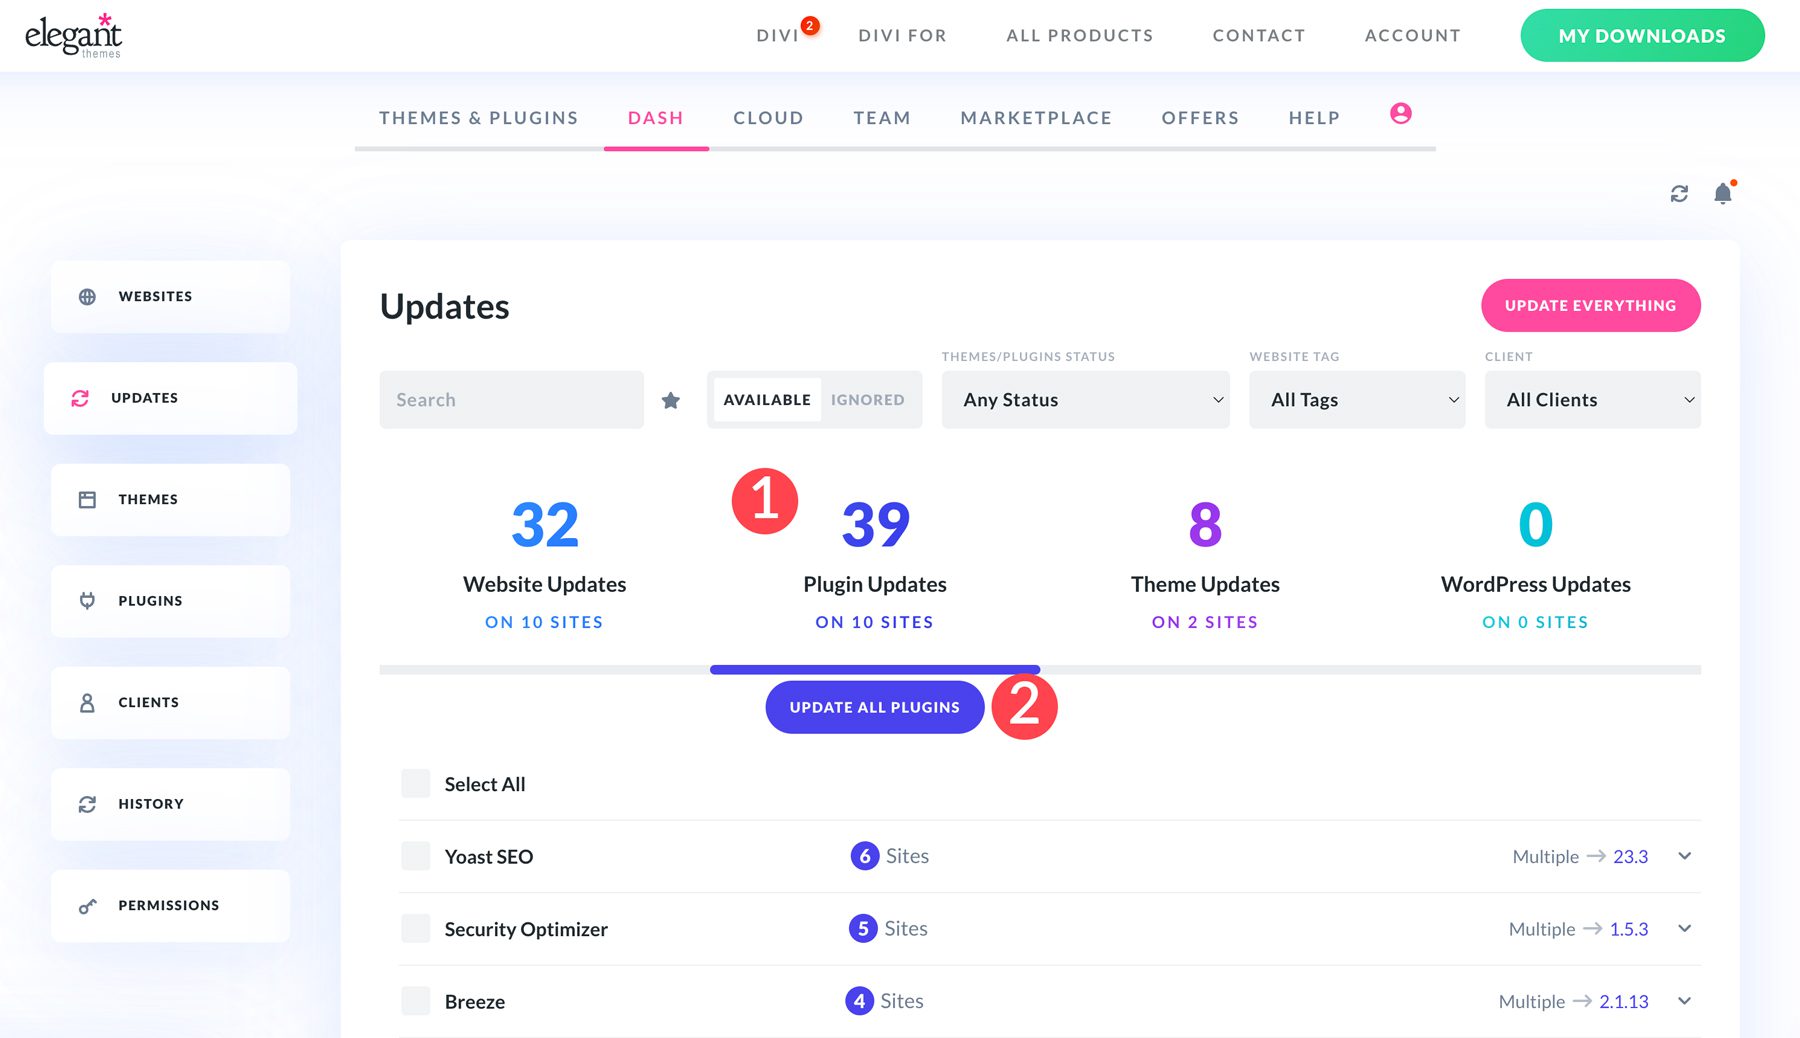
The updates tab gives you insight into what your websites need. There are four tabs, including website, plugin, theme, and WordPress updates. To Update everything across your sites, click the update all button under the website updates tab.
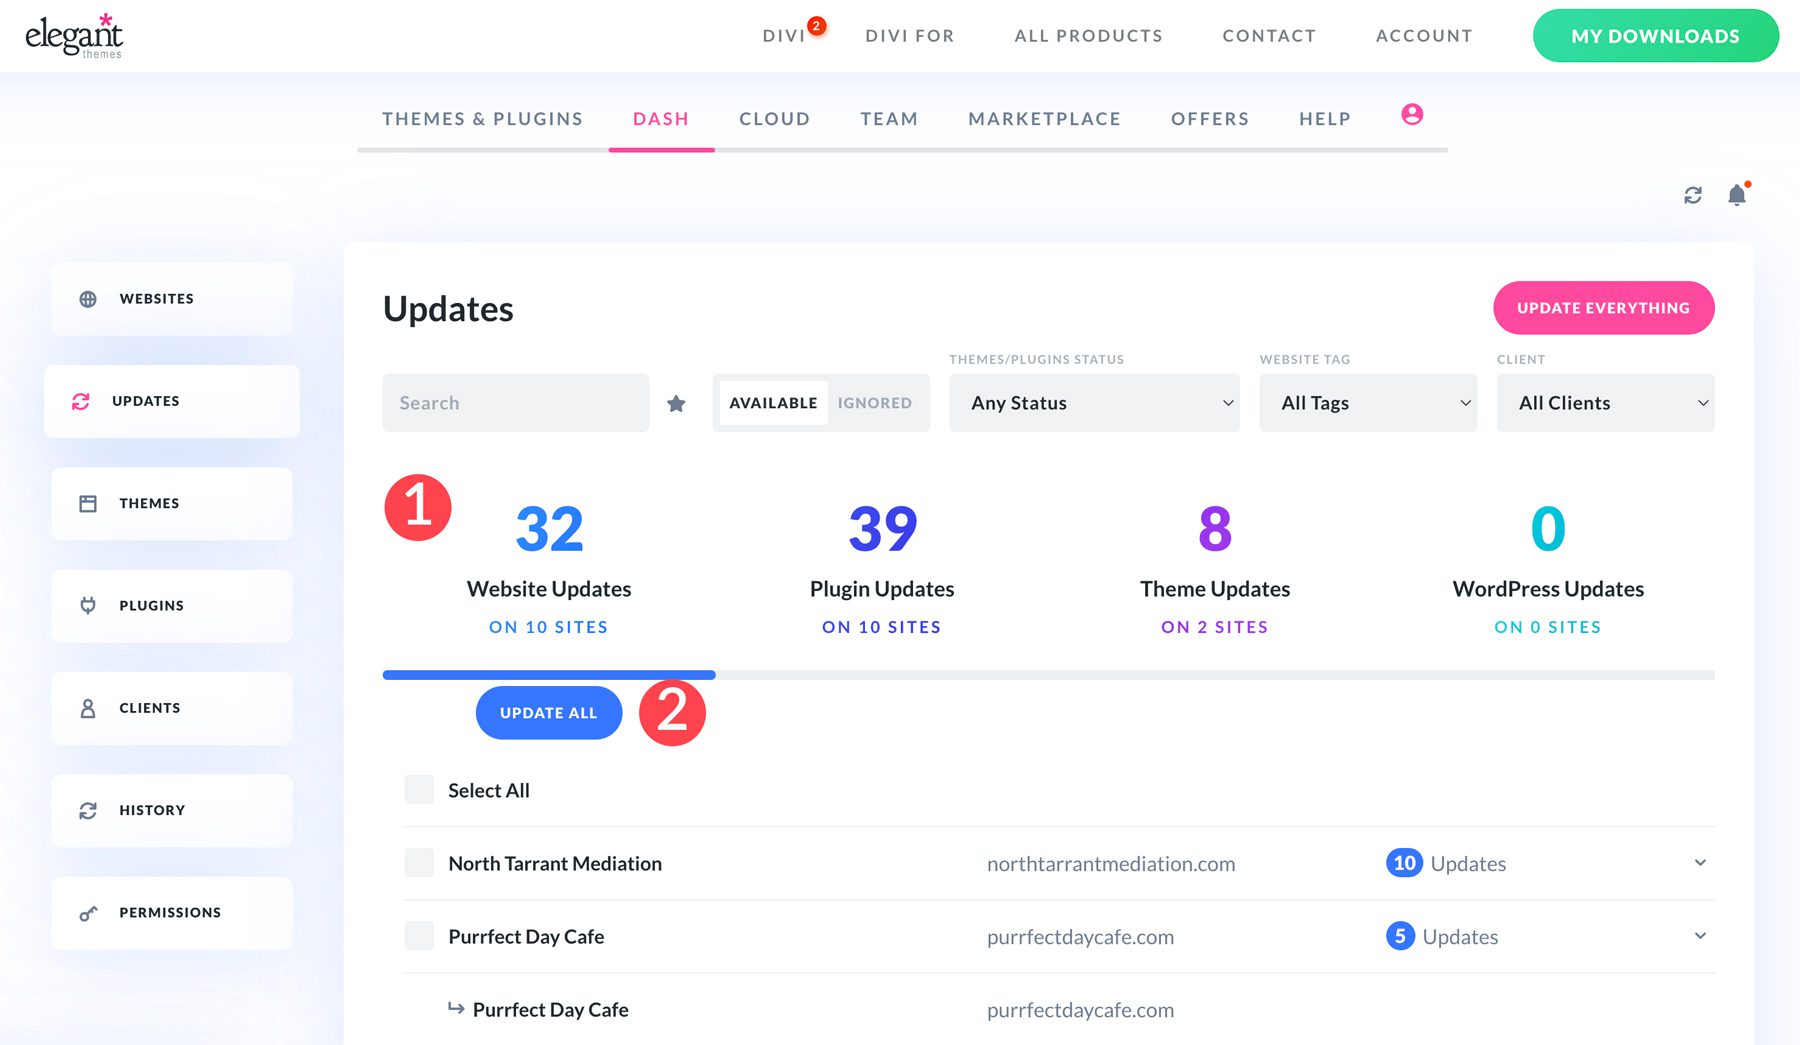
Alternatively, you can tab through the options to update specific software. For example, if you only want to update plugins across all your Divi Dash sites, click the plugin updates tab and then click the update all plugins button.
Add Clients To Divi Dash
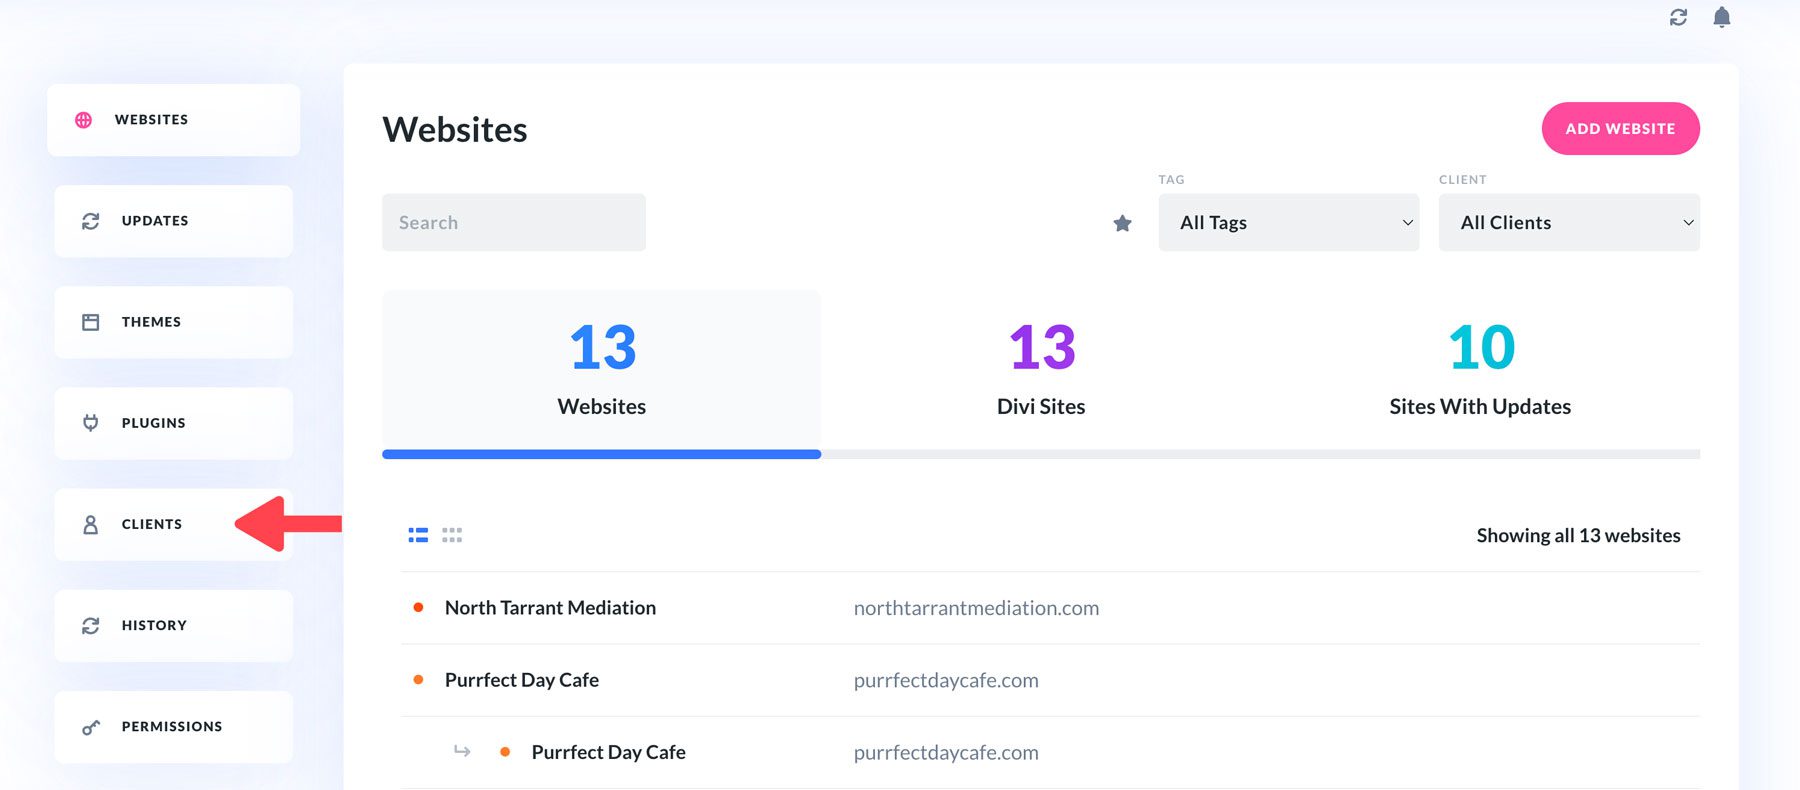
In Divi Dash, adding clients and assigning websites to them is easy. To add a new client, navigate to the clients tab.
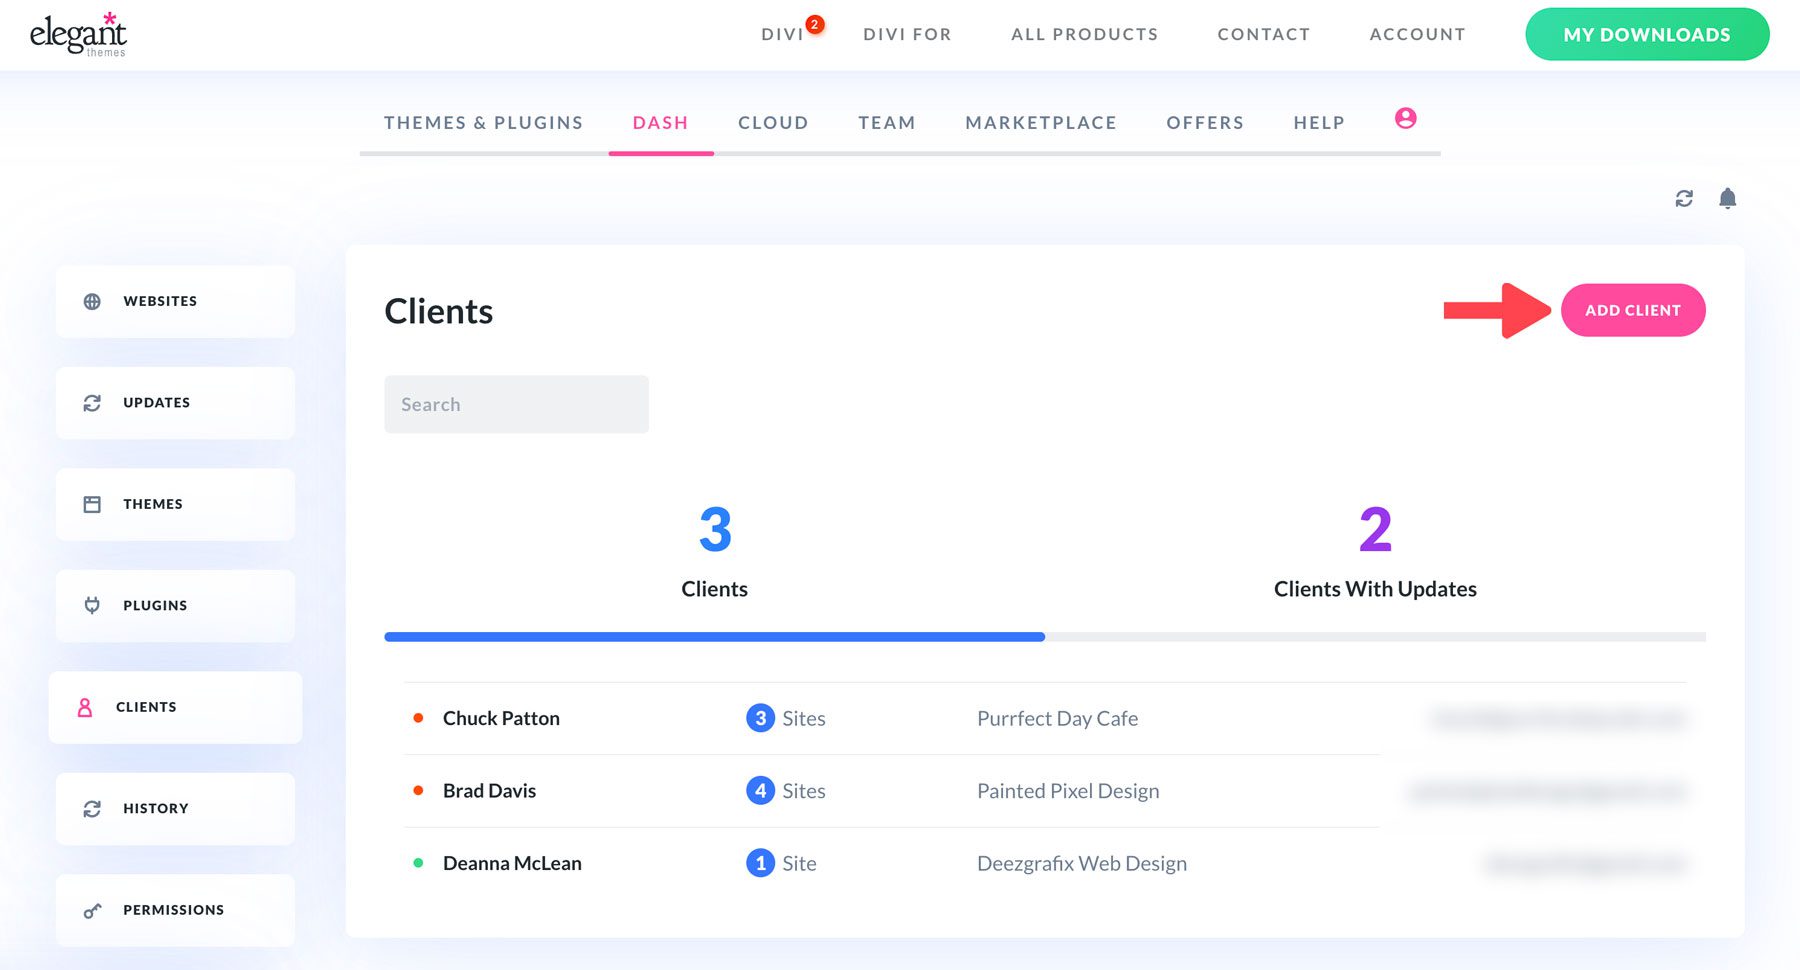
To add a new client, click the Add Client button in the top right corner of the dashboard.
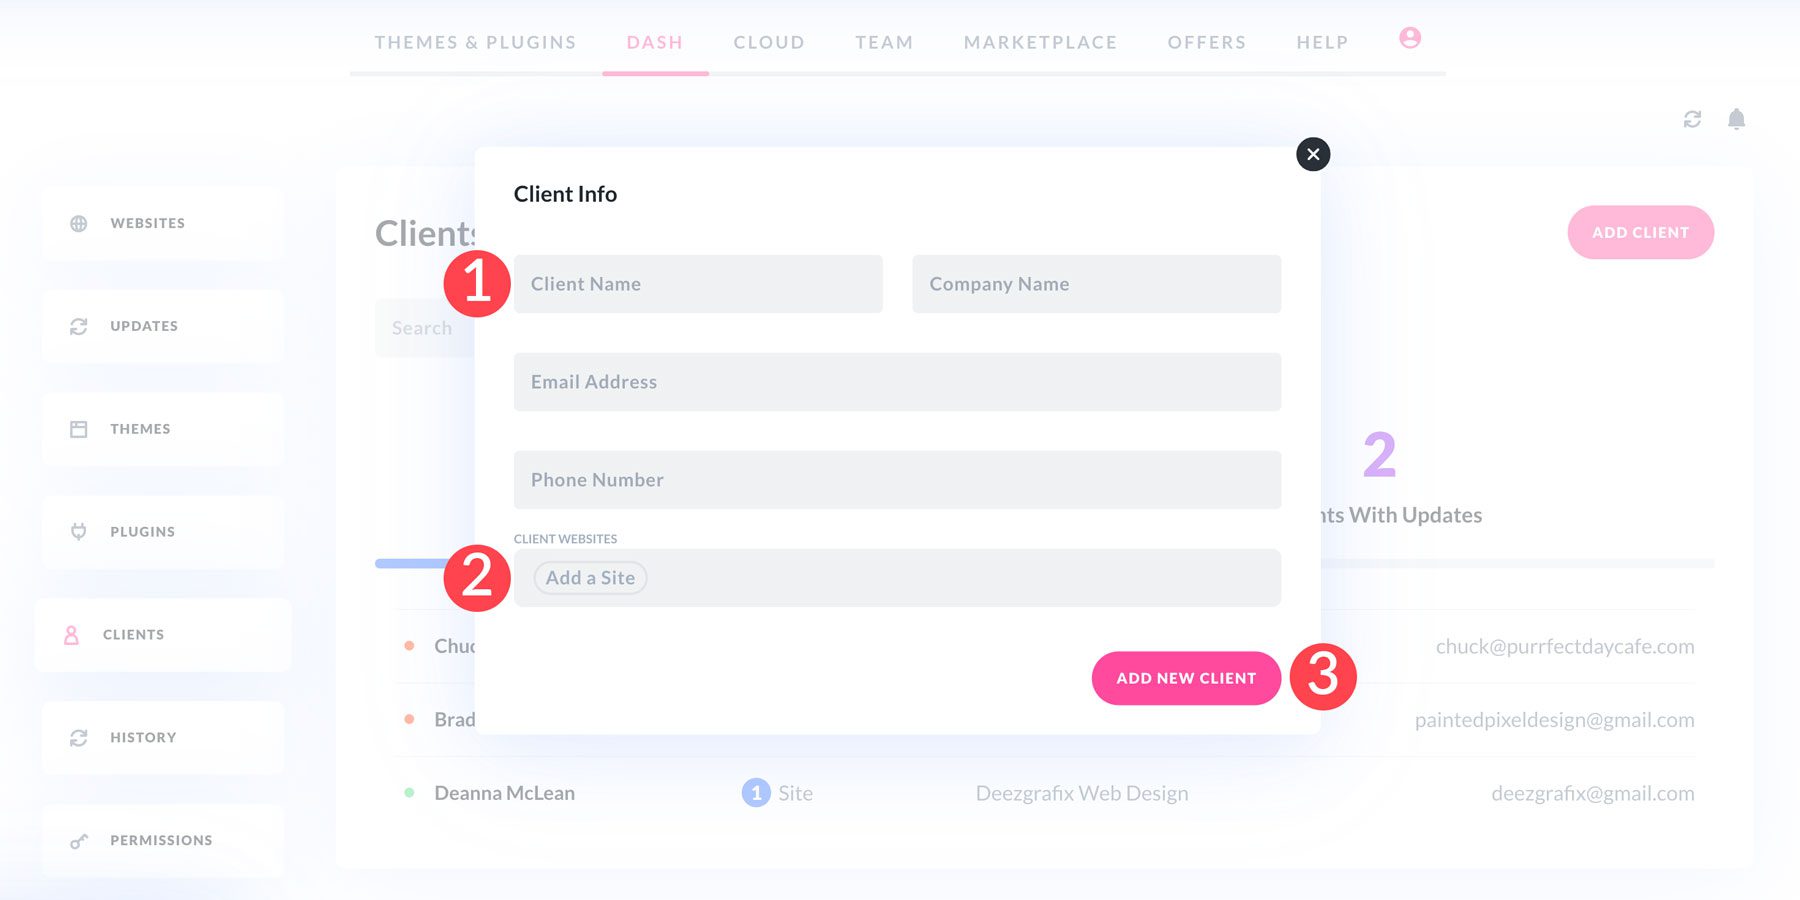
When the dialog box appears, fill out the client information fields, click Add a Site, and choose the site (or sites) you want to assign and click the Add New Client button.
These are just a few examples of tasks you can perform with Divi Dash. If you’d like to learn more, here are a couple of posts to get you up to speed:
- How to Manage Multiple WordPress Websites From One Place
- Introducing Divi Dash! Your New WordPress Site Manager
What Are The Features of Divi Dash?
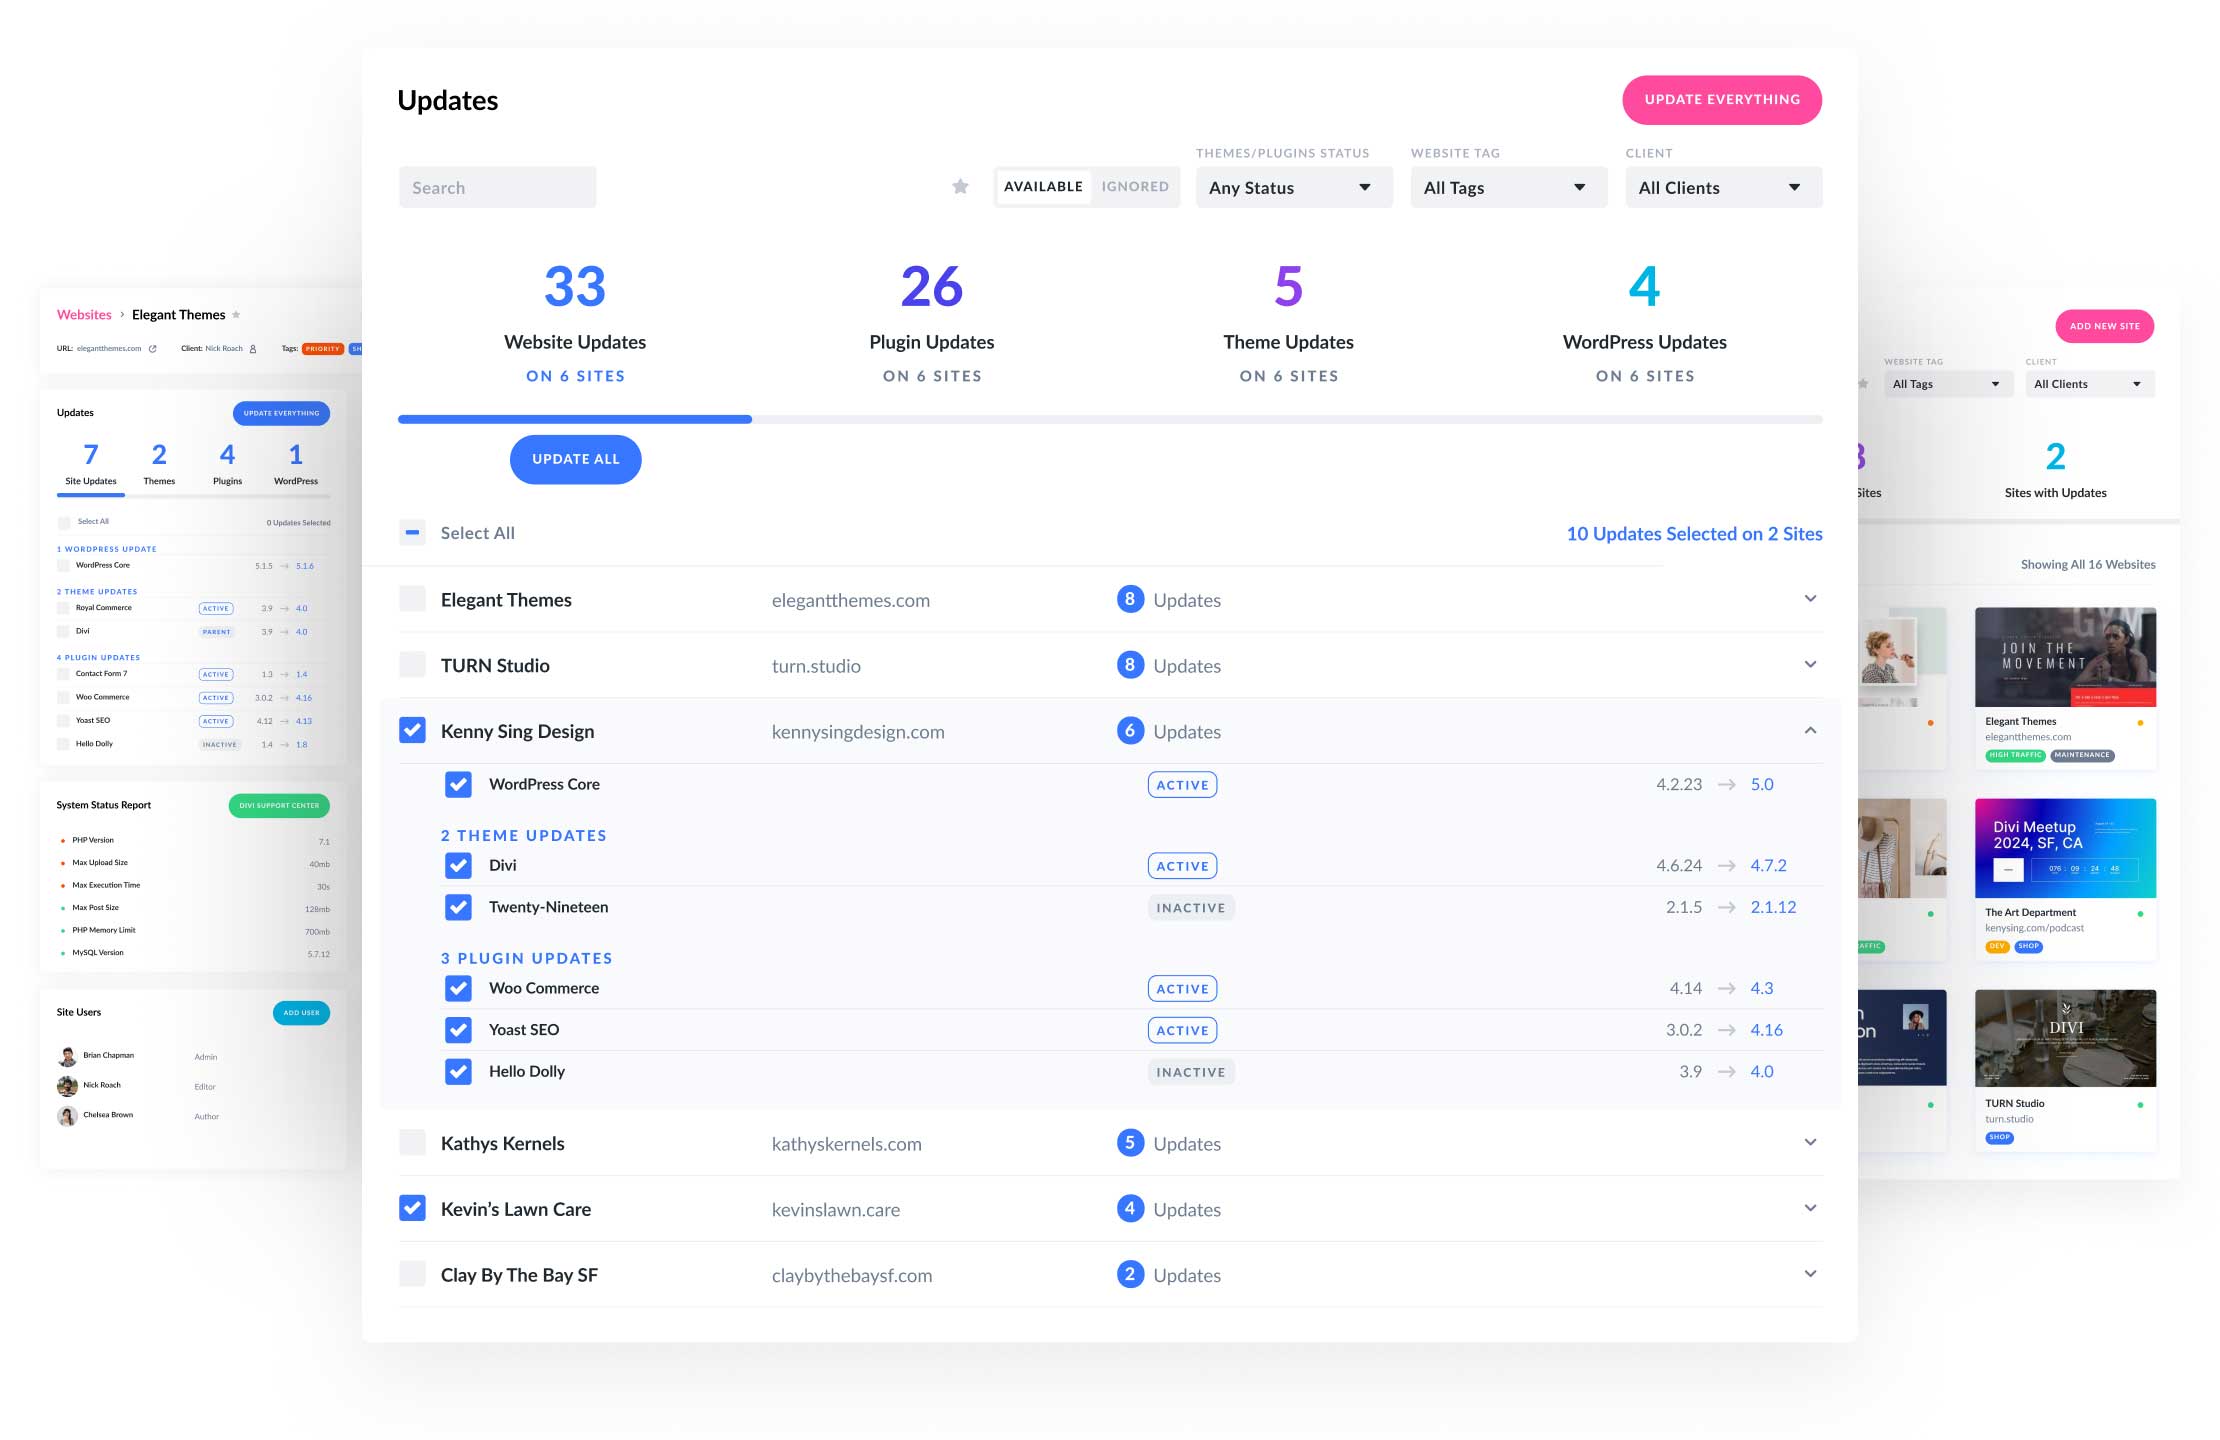
Divi Dash has you covered whether you’re looking for an easier way to log into a WordPress website, work alongside a team, or update your site’s software with one click. Let’s look closely at Divi Dash and what it can do to streamline your maintenance tasks.
Centralized Website Management
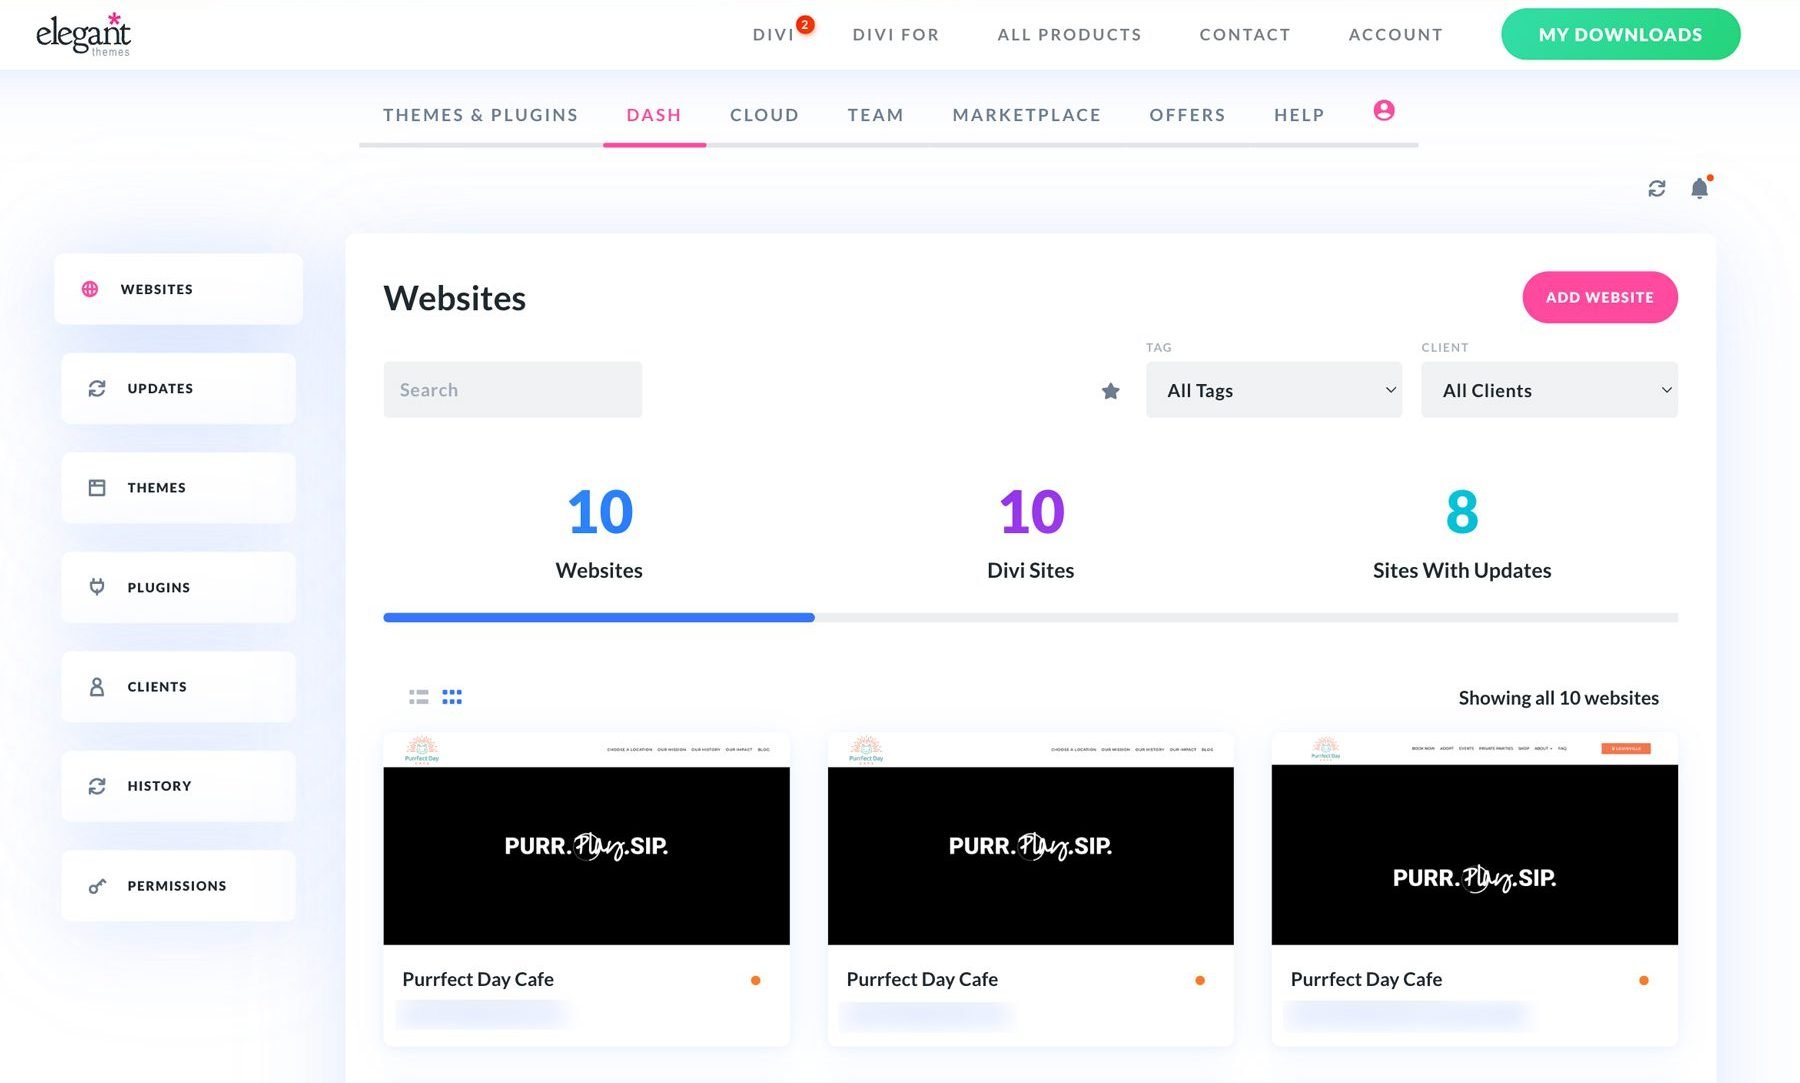
With Divi Dash, you can manage all your WordPress websites from an intuitive dashboard. This means you don’t have to switch between multiple logins or manually update each site individually. Everything you need is in one place, making it easy to keep track of your website’s performance, security, and updates.
Update All WordPress Software at Once
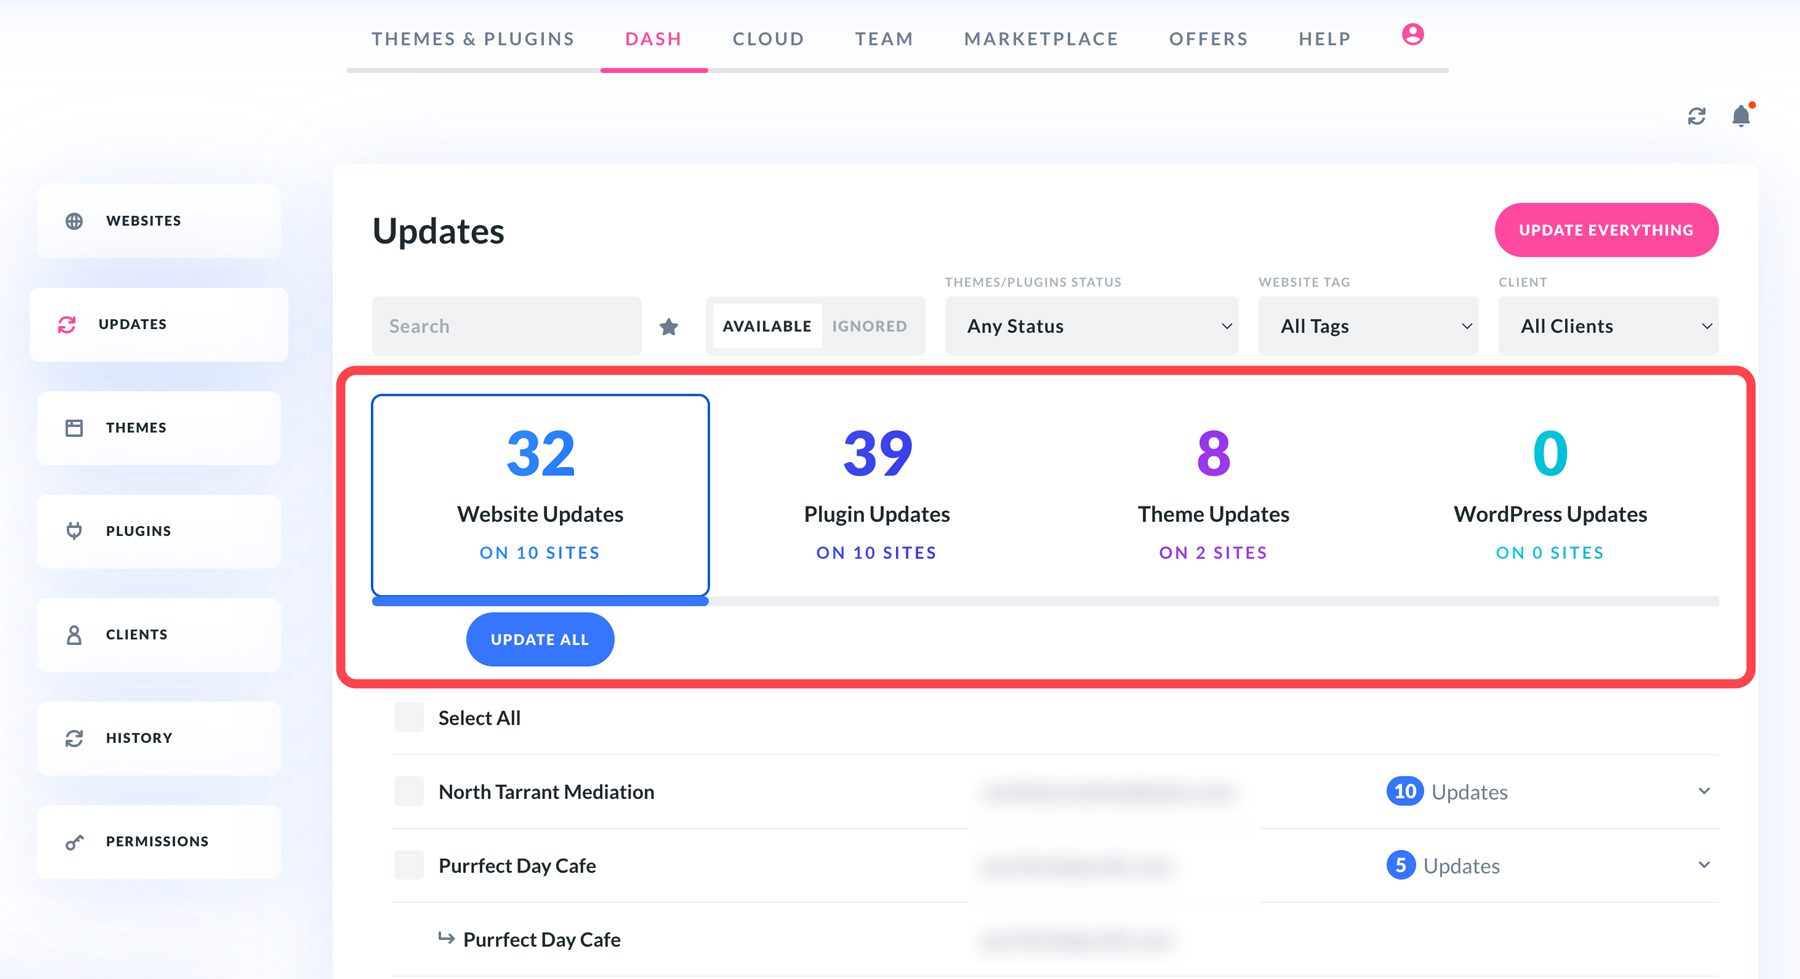
One of the best features of Divi Dash is the ability to update everything with one click. That’s right! With a single button click, you can update all WordPress core files, plugins, and themes. This feature is the biggest time-saver, especially for those who handle multiple WordPress websites. The ability to update dozens, or hundreds of websites is an absolute game-changer.
Automated WordPress Updates
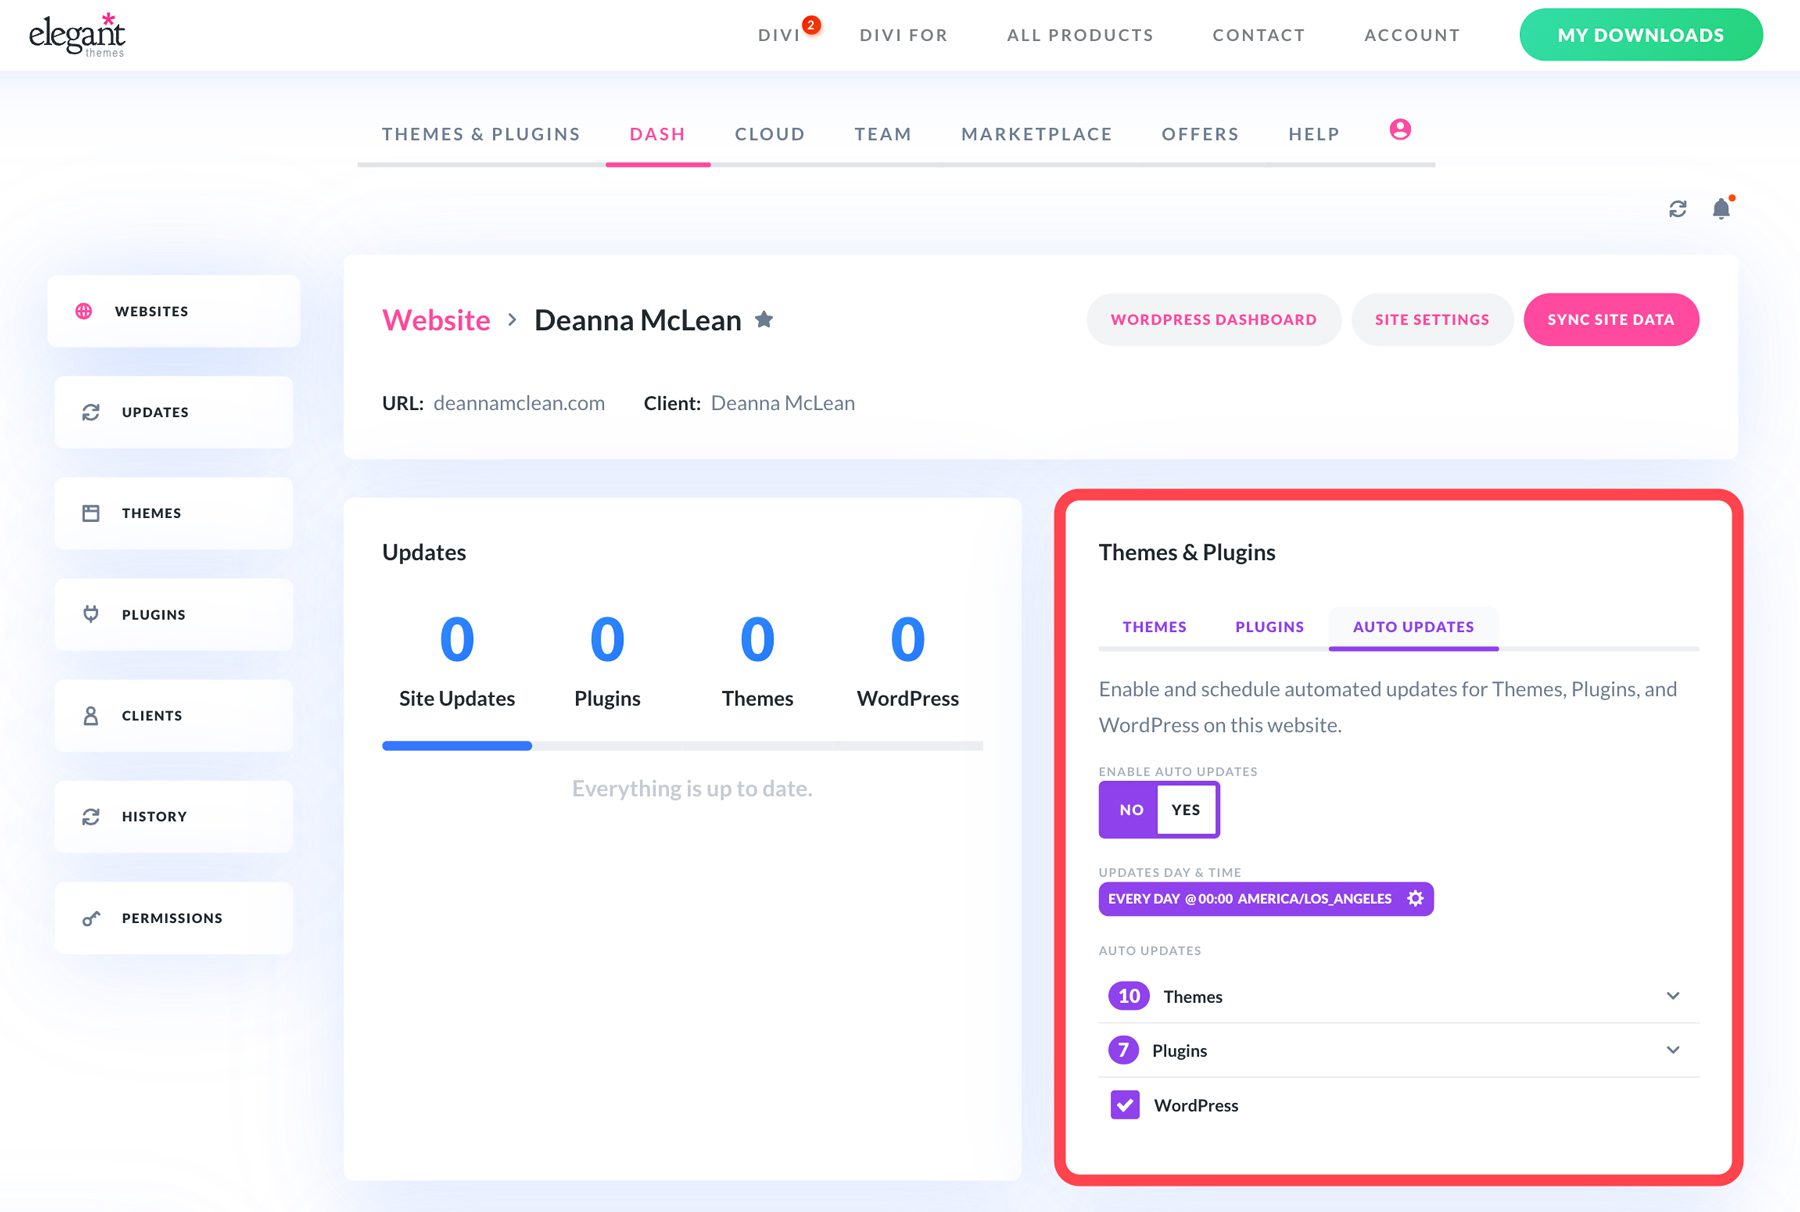
Another one of Divi Dash‘s strengths is its ability to create an update schedule for the software on all your sites. You can automatically update themes, plugins, and WordPress, ensuring your websites run the latest versions. Scheduling updates minimizes downtime and allows you to customize update settings to suit your needs. You can easily select the frequency, time, and timezone to ensure your sites will be updated with the least impact on your uptime as possible.
Client Management
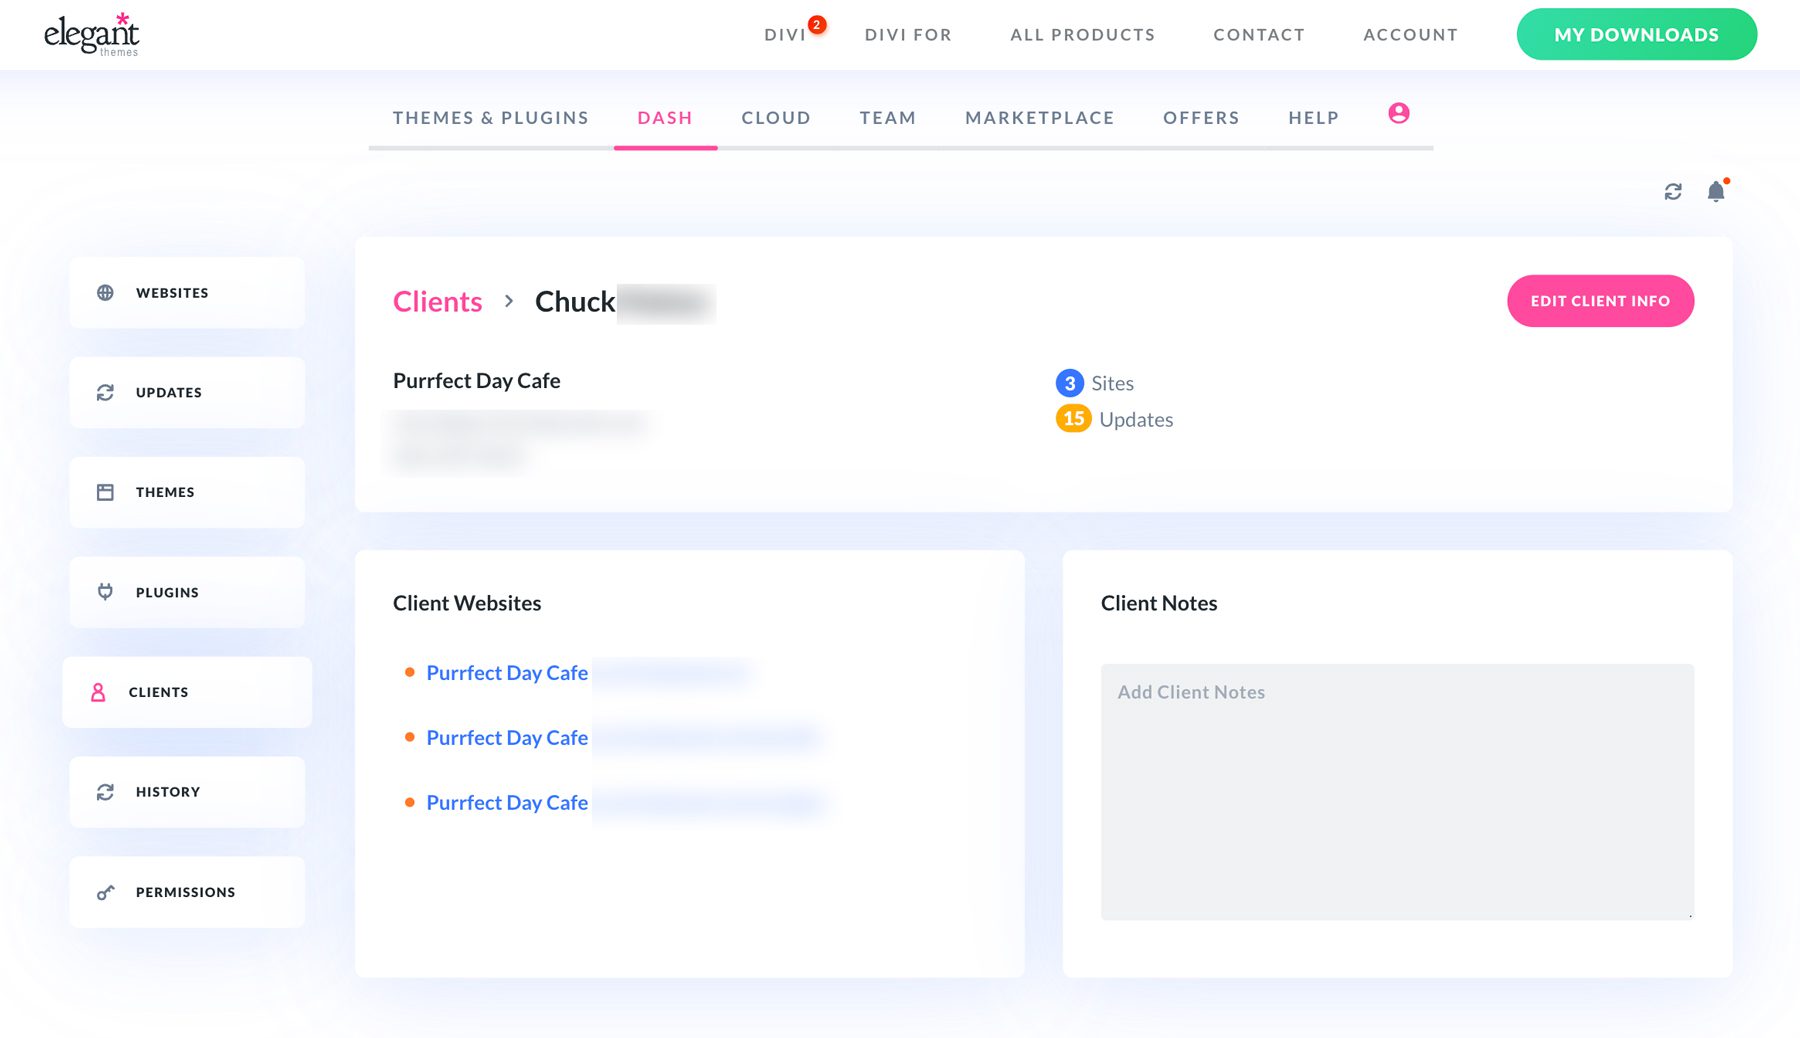
Divi Dash excels at simplifying client management. You can easily keep track of client information, project details, and website assignments in a centralized dashboard. Assigning websites to the appropriate accounts is incredibly simple. With this streamlined approach, there’s no need to search through emails, pieces of paper, or other less efficient ways to find a client’s information because it is conveniently located in the same online interface. Divi Dash is your online client directory, saving time and making you more productive.
Collaborate With Team Members
Divi Dash is also a great way to collaborate with team members. You can create multiple user accounts with different roles and permissions, allowing you to assign tasks and manage website access more effectively. It achieves this through direct integration with Divi Teams, a powerful collaboration tool that makes working with team members much easier. With Divi Dash and Divi Teams, you can easily collaborate on projects and ensure everyone is on the same page.
Get a Detailed Overview of Every Website
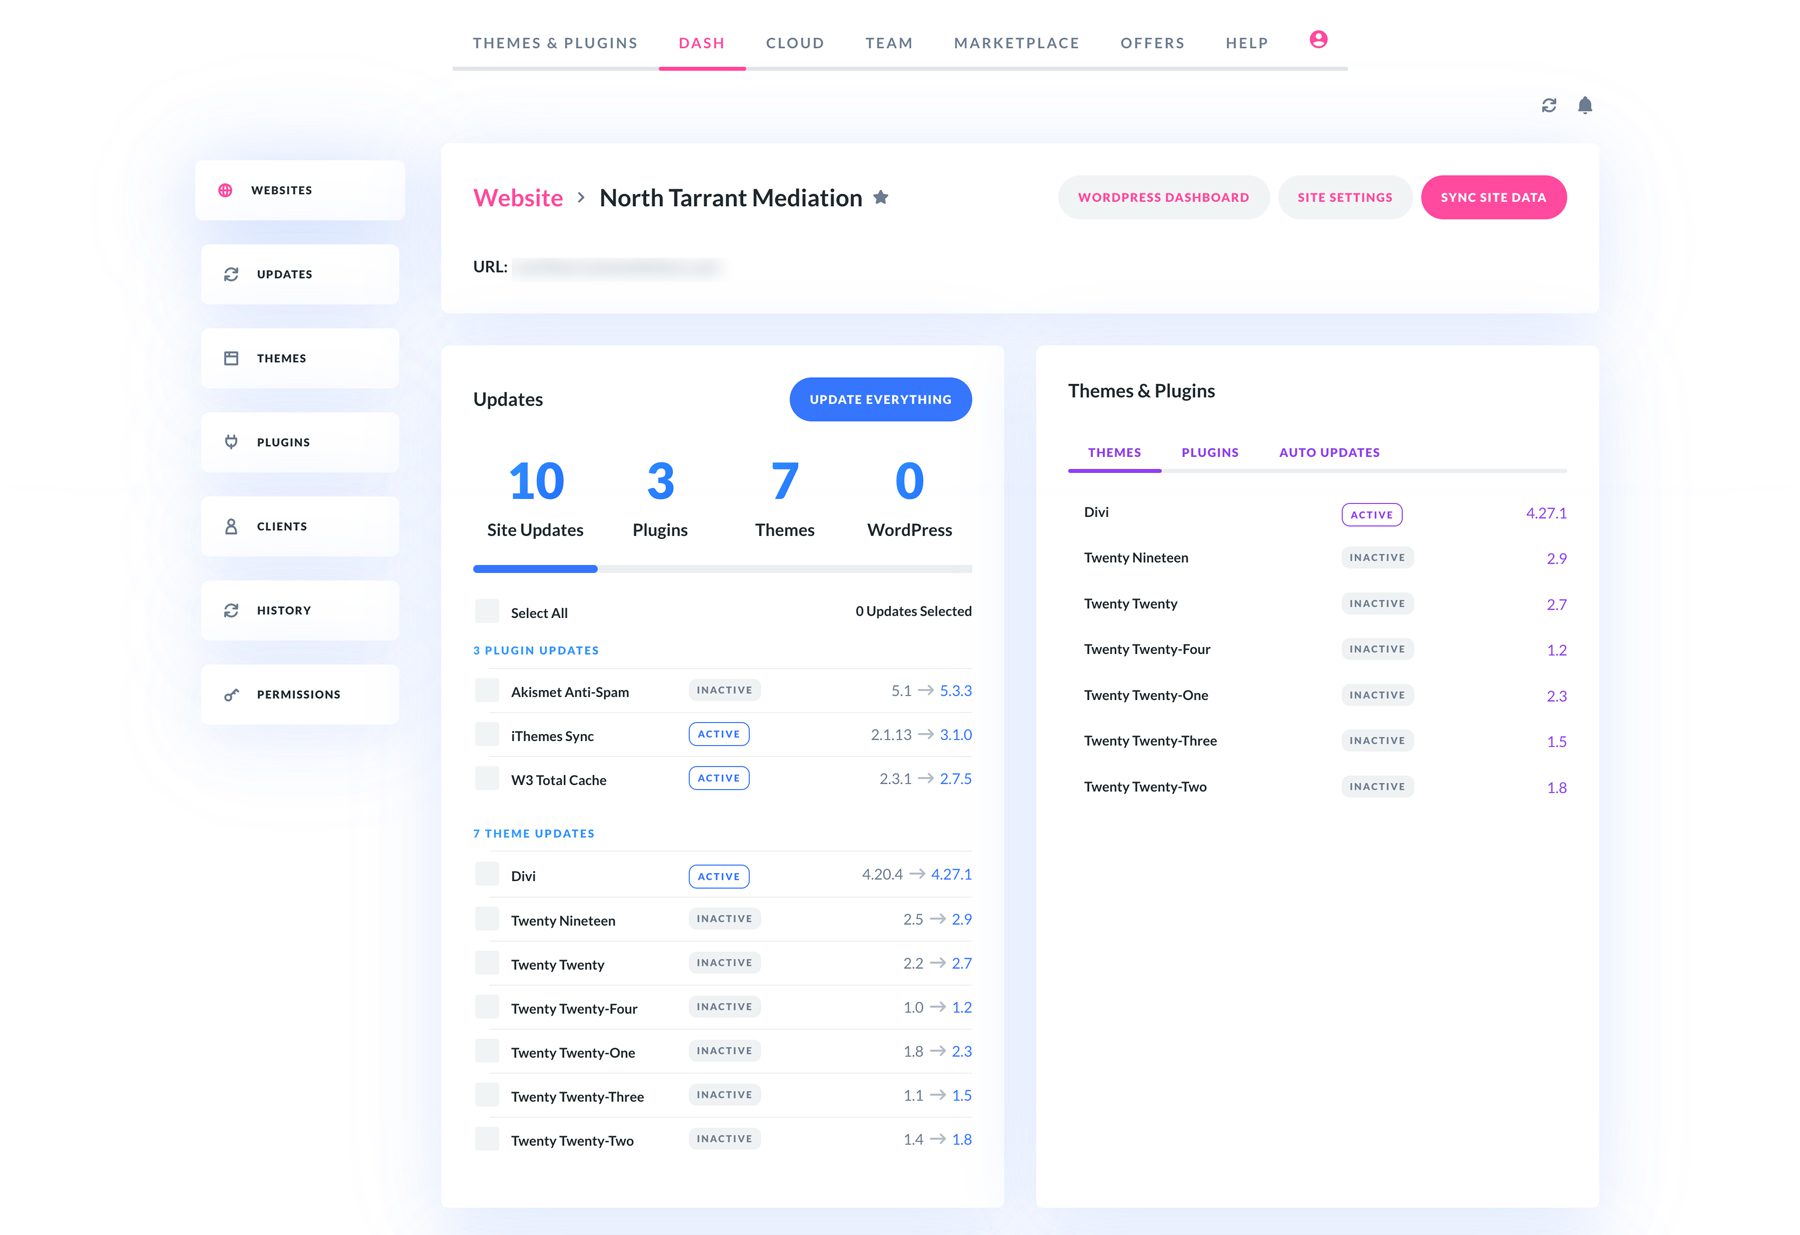
When you add a website to Divi Dash, you’ll get a detailed overview of its stats, including the themes, plugins, and core WordPress files. There are also important metrics within the system status report that shed light on important metrics like the versions of PHP and MySQL installed on your web server, along with info on specific items like max post size, PHP memory limit, and permissions for the main WordPress file structure. This info is great for quickly diagnosing potential issues and allows users to open a support ticket easily.
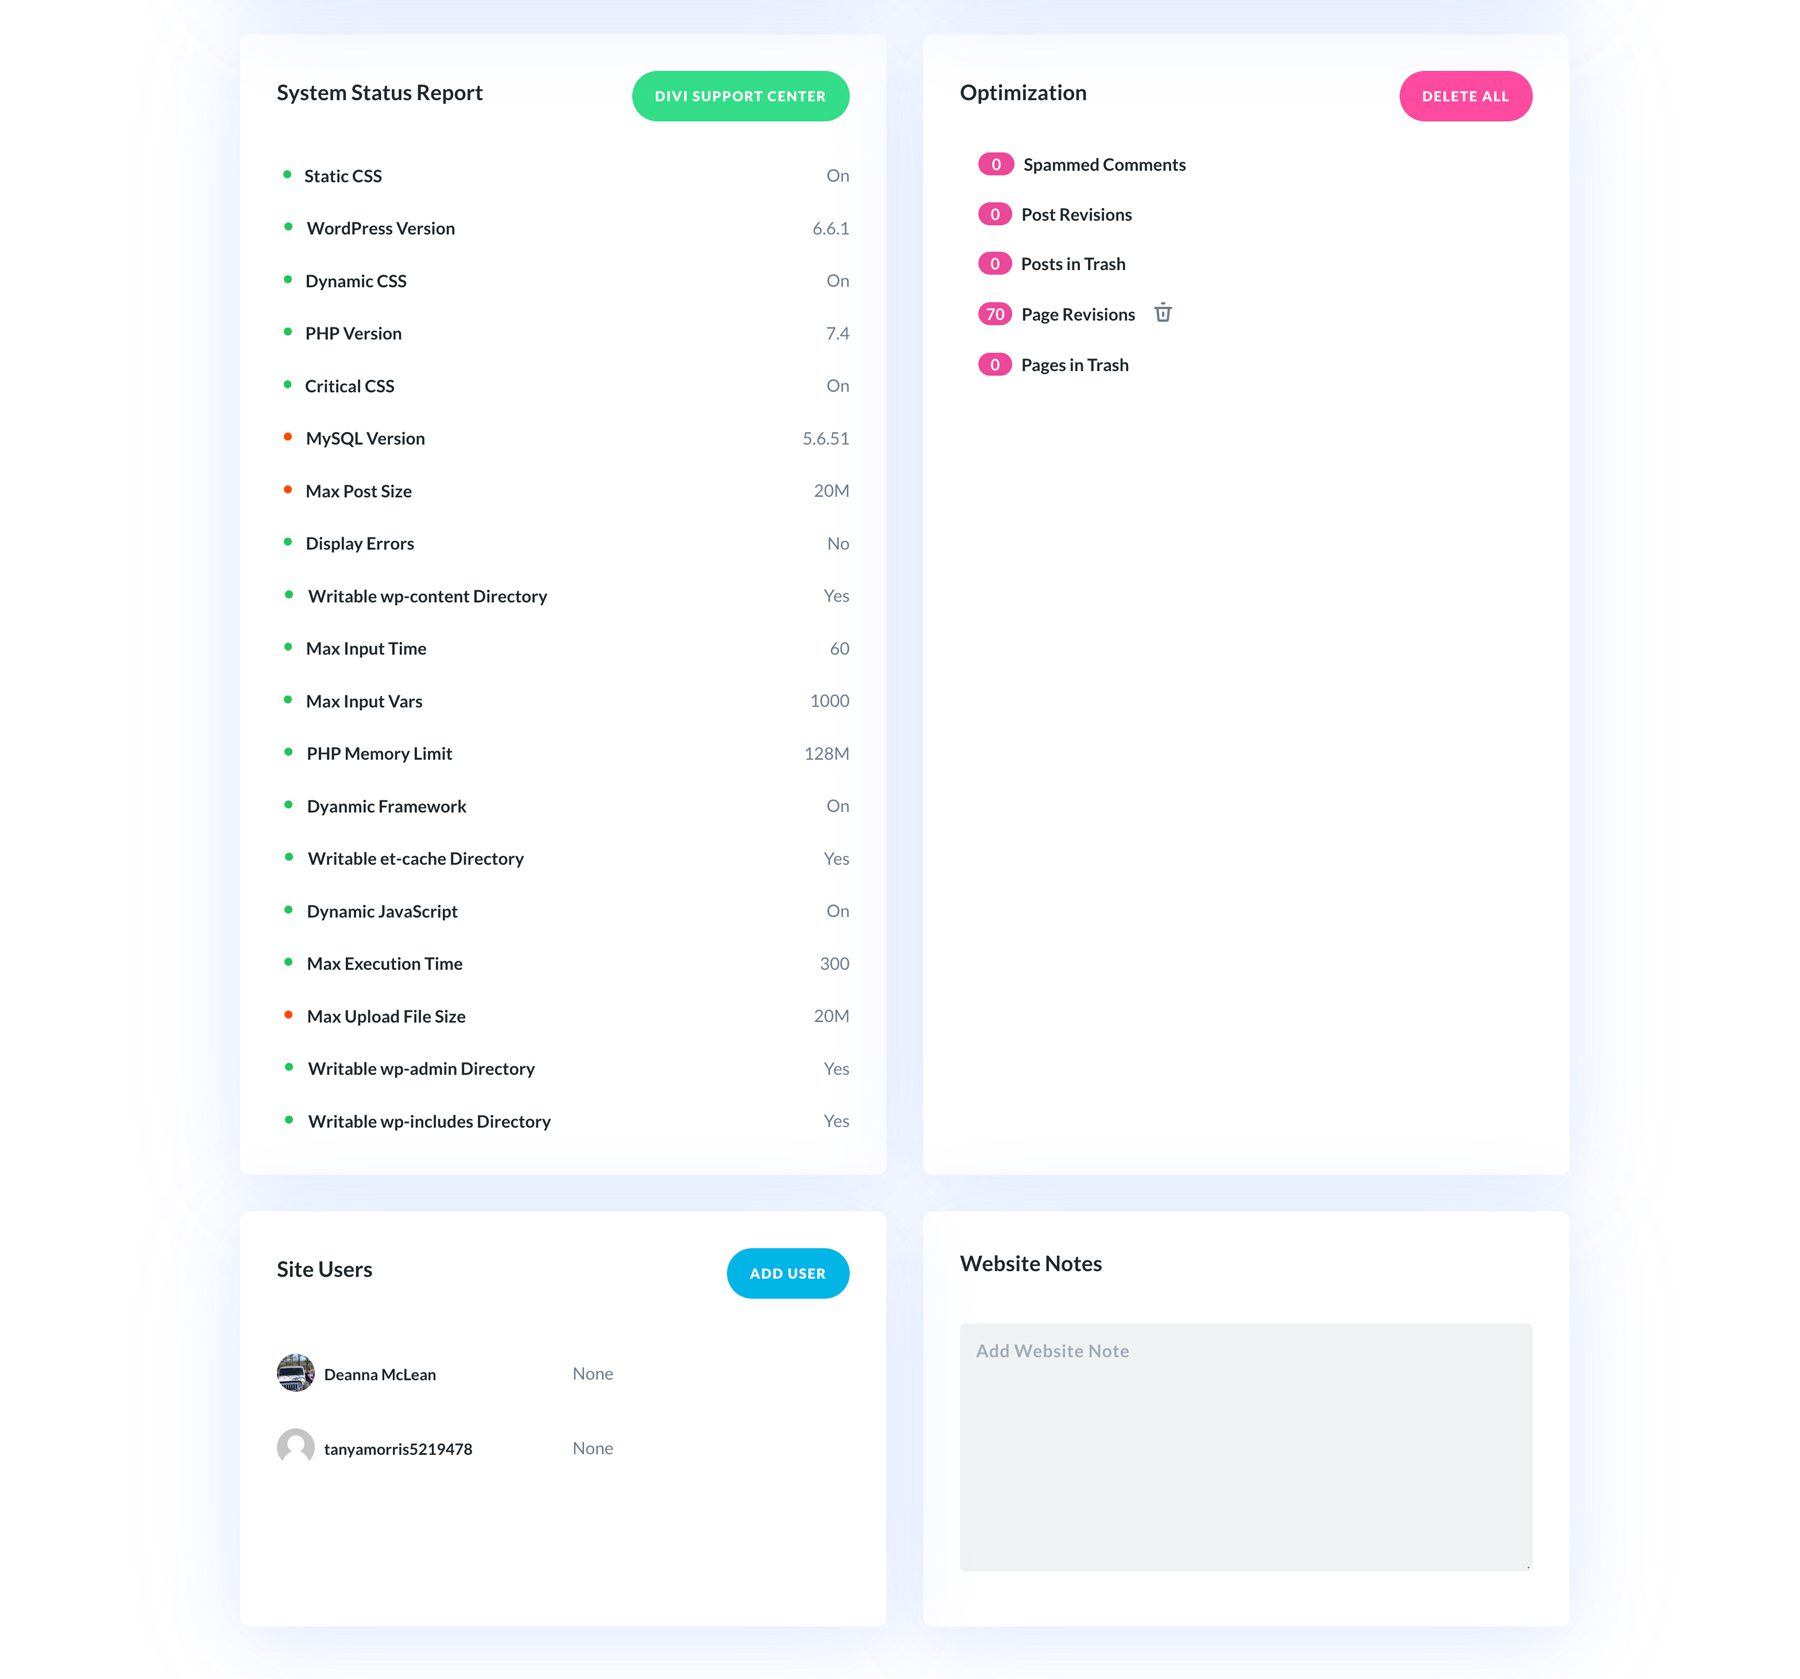
In addition, the optimization section allows you to optimize your database by removing spammed comments, post and page reviews, and trash items. You can also change the passwords for each user on the site, add new users, and keep detailed notes about your website. Accessing critical information about your website and its status is a huge benefit to those who manage multiple WordPress websites, saving you from having to log in to each site individually.
Divi Dash Makes it Easy to Update All Your WordPress Websites
Divi Dash is a powerful tool for managing multiple WordPress websites. Providing a centralized dashboard, automated updates, and the ability to update all your WordPress websites with one click can significantly speed up the time needed to perform routine maintenance tasks. For those who manage many WordPress sites, Divi Dash offers a simple solution to save time, improve efficiency, and ensure the security of their websites. If you’re a Divi user, head to the Elegant Themes member area to check it out. Otherwise, get in on this incredible benefit by signing up for a Divi license today!
The post How to Update All Your WordPress Websites at Once appeared first on Elegant Themes Blog.
# A Comprehensive Guide to Updating Multiple WordPress Websites Simultaneously
Managing multiple WordPress websites can be a daunting task, especially when it comes to keeping them updated. Regular updates are crucial for maintaining security, performance, and functionality. Fortunately, there are several methods and tools available that can help you streamline the process of updating multiple WordPress sites simultaneously. This guide will walk you through the best practices, tools, and strategies for efficiently managing updates across your WordPress network.
## Why Regular Updates are Important
Before diving into the methods for updating multiple sites, it’s essential to understand why regular updates are necessary:
1. **Security**: WordPress updates often include patches for vulnerabilities that could be exploited by hackers. Keeping your sites updated helps protect against potential threats.
2. **Performance**: Updates can improve the speed and efficiency of your website, ensuring a better user experience.
3. **New Features**: Each update may introduce new features or enhancements that can improve functionality and usability.
4. **Compatibility**: Themes and plugins also receive updates, and keeping your WordPress core updated ensures compatibility with these components.
## Methods for Updating Multiple WordPress Websites
### 1. **Using a WordPress Management Tool**
One of the most efficient ways to manage multiple WordPress sites is by using a WordPress management tool. These tools allow you to update all your sites from a single dashboard. Some popular options include:
– **ManageWP**: This tool provides a centralized dashboard for managing multiple WordPress sites. You can perform updates, backups, and security checks all in one place.
– **MainWP**: An open-source solution that allows you to manage multiple WordPress sites from a single WordPress installation. It offers features like bulk updates, backups, and performance monitoring.
– **InfiniteWP**: Similar to ManageWP and MainWP, InfiniteWP allows you to manage multiple sites with a focus on speed and efficiency.
### 2. **Using WP-CLI**
For those comfortable with the command line, WP-CLI (WordPress Command Line Interface) is a powerful tool for managing WordPress installations. You can write scripts to update multiple sites simultaneously. Here’s how to do it:
1. **Install WP-CLI**: Ensure that WP-CLI is installed on your server.
2. **Create a Shell Script**: Write a shell script that loops through your sites and runs the update commands. For example:
“`bash
#!/bin/bash
sites=(“site1.com” “site2.com” “site3.com”)
for site in “${sites[@]}”; do
wp –path=”/var/www/$site” core update
wp –path=”/var/www/$site” plugin update –all
wp –path=”/var/www/$site” theme update –all
done
“`
3. **Run the Script**: Execute the script to update all your sites in one go.
### 3. **Using a Multisite Network**
If your websites are related and can be managed under one umbrella, consider setting up a WordPress Multisite Network. This allows you to manage multiple sites from a single WordPress installation. Here’s how to set it up:
1. **Enable Multisite**: Modify your `wp-config.php` file to enable Multisite.
“`php
define(‘WP_ALLOW_MULTISITE’, true);
“`
2. **Install Multisite**: Follow the prompts in the WordPress dashboard to set up your network.
3. **Manage Updates**: Once set up, you can update themes and plugins across all sites from the Network Admin dashboard.
### 4. **Automating Updates**
To minimize the need for manual updates, consider enabling automatic updates for WordPress core, themes, and plugins. You can do this by adding the following lines to your `wp-config.php` file:
“`php
define(‘WP_AUTO_UPDATE_CORE’, true);
add_filter(‘auto_update_plugin’, ‘__return_true’);
add_filter(‘auto_update_theme’, ‘__return_true’);
“`
### 5. **Regular Backups**
Before performing any updates, it’s crucial to back up your websites. This ensures that you can restore your sites in case something goes wrong during the update process. Use plugins like UpdraftPlus or BackupBuddy to automate backups.
## Best Practices for Updating Multiple WordPress Sites
– **Test Updates on a Staging Site**: Before applying updates to live sites, test them on a staging environment to ensure compatibility and functionality.
– **Monitor Site Performance**: After updates, monitor your sites for any performance issues or errors.
– **Keep a Change Log**: Maintain a record of updates performed on each site for future reference.
– **Stay Informed**: Subscribe to WordPress news and updates to stay informed about critical updates and security patches.
## Conclusion
Updating multiple WordPress websites simultaneously doesn’t have

Recent Comments