

I’ve seen my share of business owners managing their email subscribers manually via spreadsheets and old-school pen-and-paper signup sheets. But there are now so many dead-simple ways of collecting new subscribers that the old methods should be retired. If you use Mailchimp and a WordPress website for your business, you’re in for a treat.

Thankfully, WordPress users no longer need to feel the pain of manual uploads. There are dozens of easy ways to integrate Mailchimp with your WordPress website. This will help you save time and build a strong foundation for automation. I’ll cover four of my favorite ways to integrate Mailchimp with your WP website.
Don’t have Mailchimp Yet?
How to Integrate Mailchimp with WordPress
Below are the four most common ways of integrating Mailchimp into your WordPress website. There are more ways than only these four, but it’s likely that one of these will do the trick for you. If you asked me, I’d skip down to option #2 and grab Bloom.
1. Embedding Mailchimp Forms Using Inline Code
Since WordPress is so flexible in allowing you to add custom code to your site, sometimes the only “integration” you actually need is to add a simple form to a page. No APIs or syncing accounts. Probably the easiest way to get your website working in your favor is to simply create a form in Mailchimp and put it on a page. We’ll start by creating the form itself.
Create a Form in Mailchimp
Under the “Audience” sidebar section, click “Signup forms.” Select “Embedded forms”. This lets you create a form that you can later embed on your site. Note that you can also create a popup form, but the installation directions are a bit different. For our purposes, we will stick to an embeddable inline form.
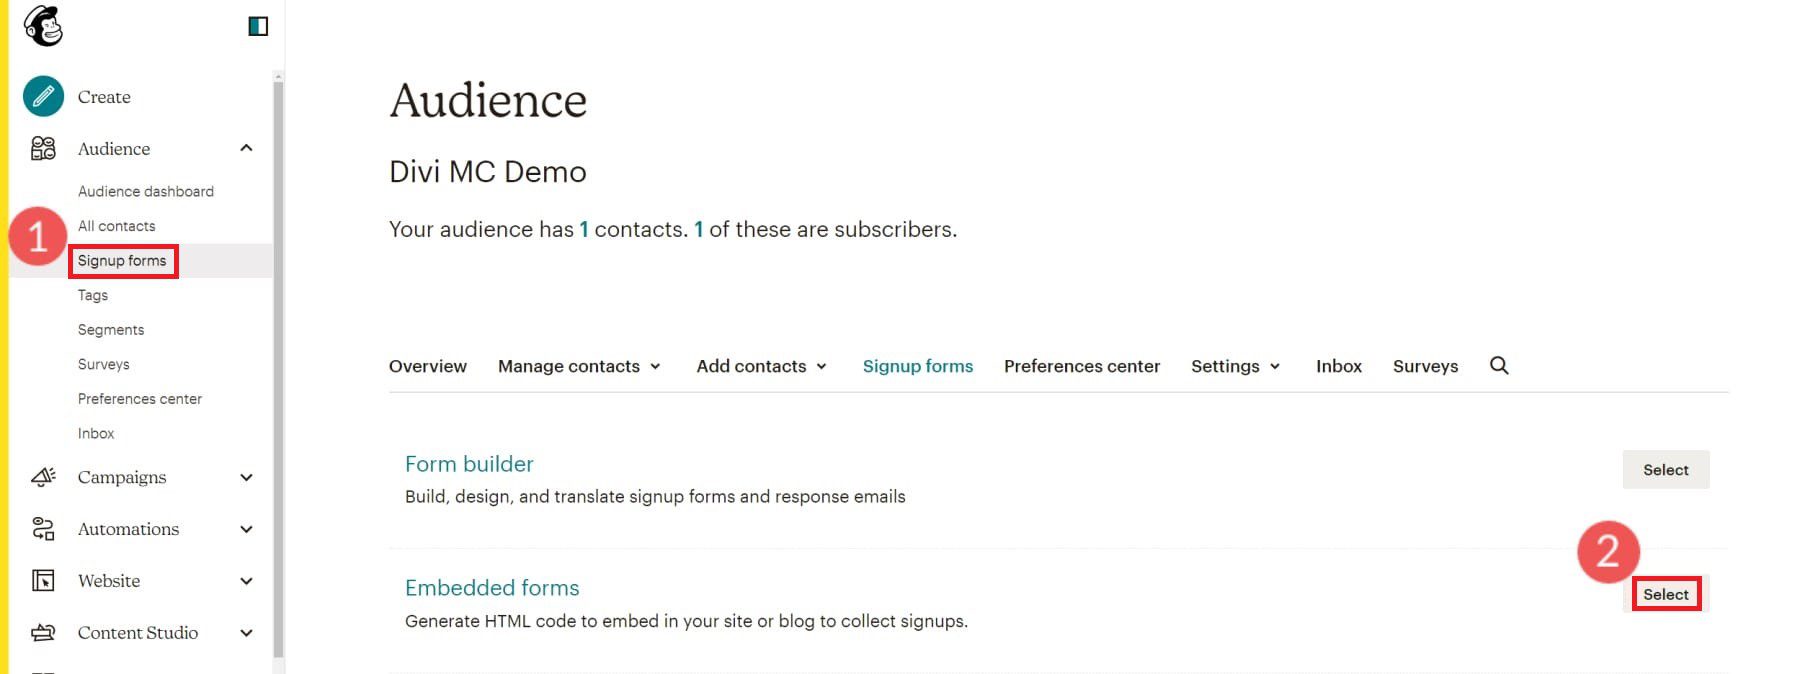
Next, you will see the Form Builder page. Choose your form fields, their order, and which ones are required fields. To the right is a live preview of your form. Click “Continue” in the top right when you are happy with it.
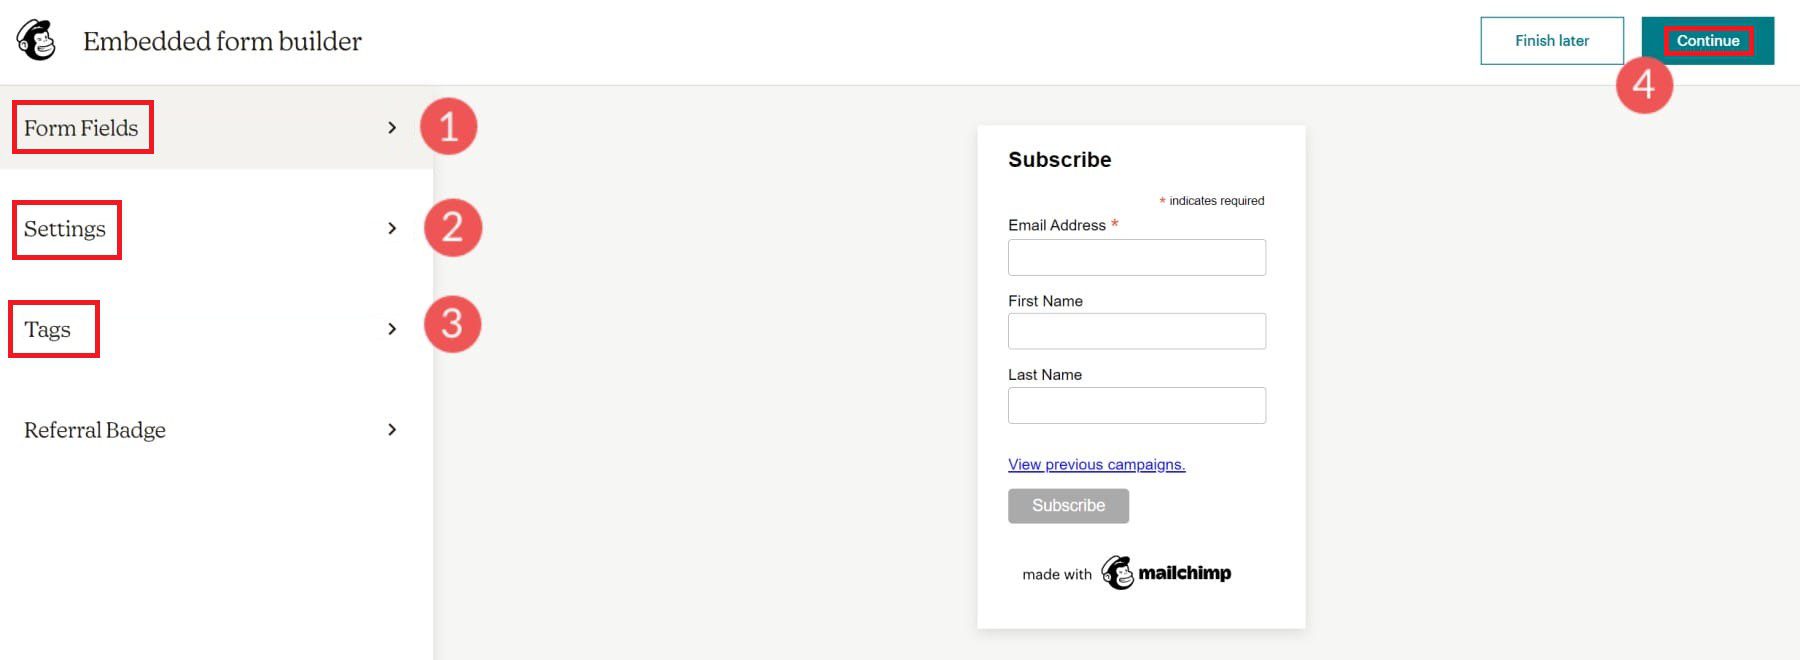
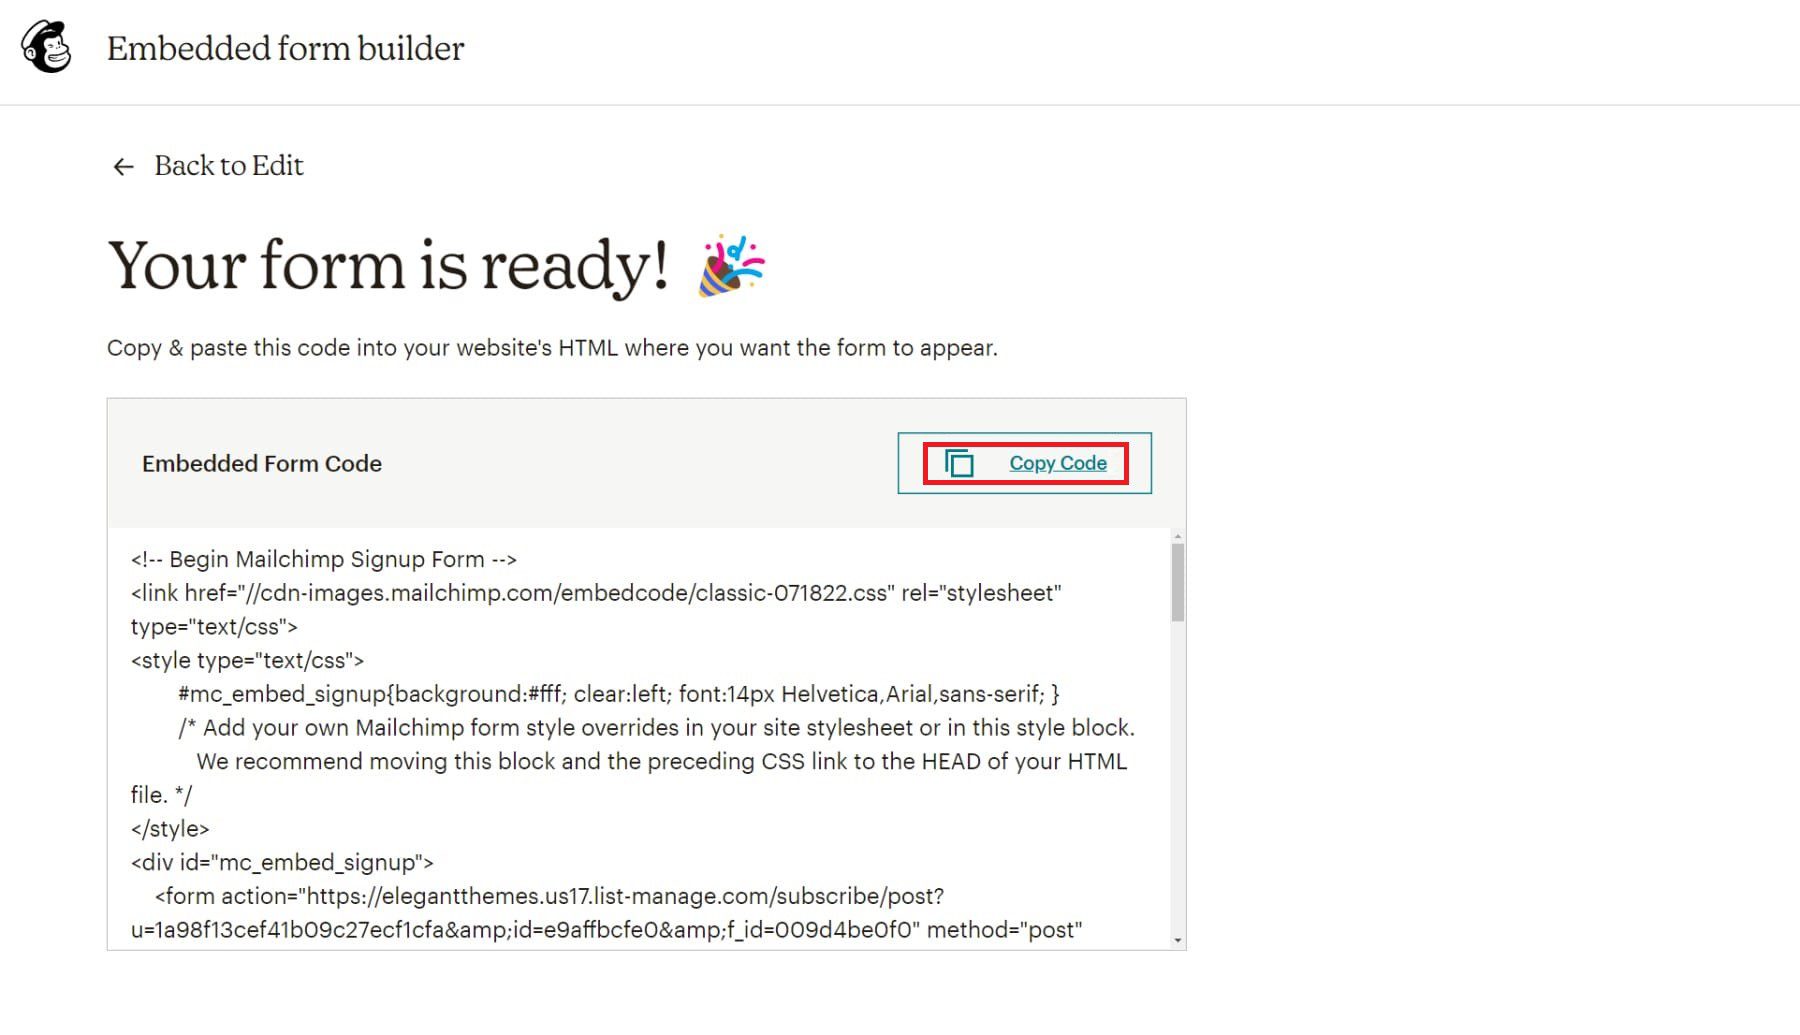
On the next screen, click “Copy Code” to save the form HTML code to your clipboard.
Now, log into your WordPress website.
Add the Signup form to your WordPress Website
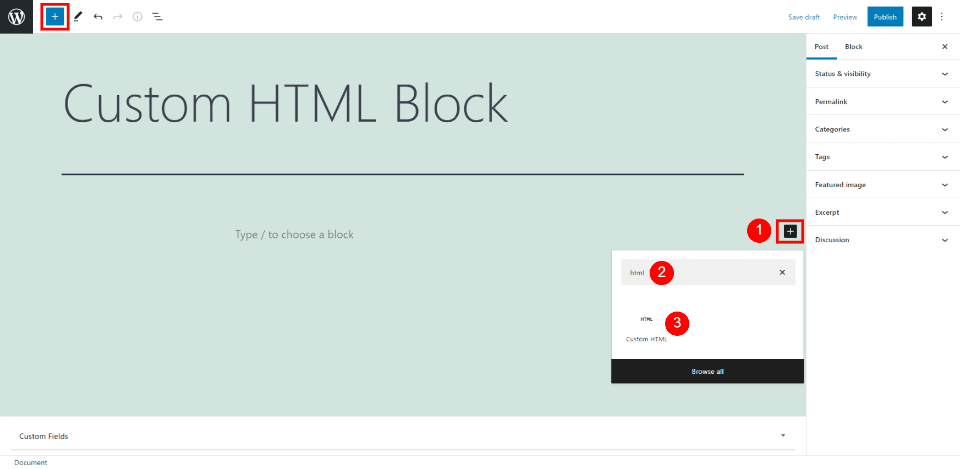
Open the Block Editor on your preferred WordPress Page or Post. Add an HTML Block where you want it, and paste the HTML code.
With Divi, add a Code Module to your preferred page. Paste the code into the “text” field and click the Green Check Box to apply the changes.
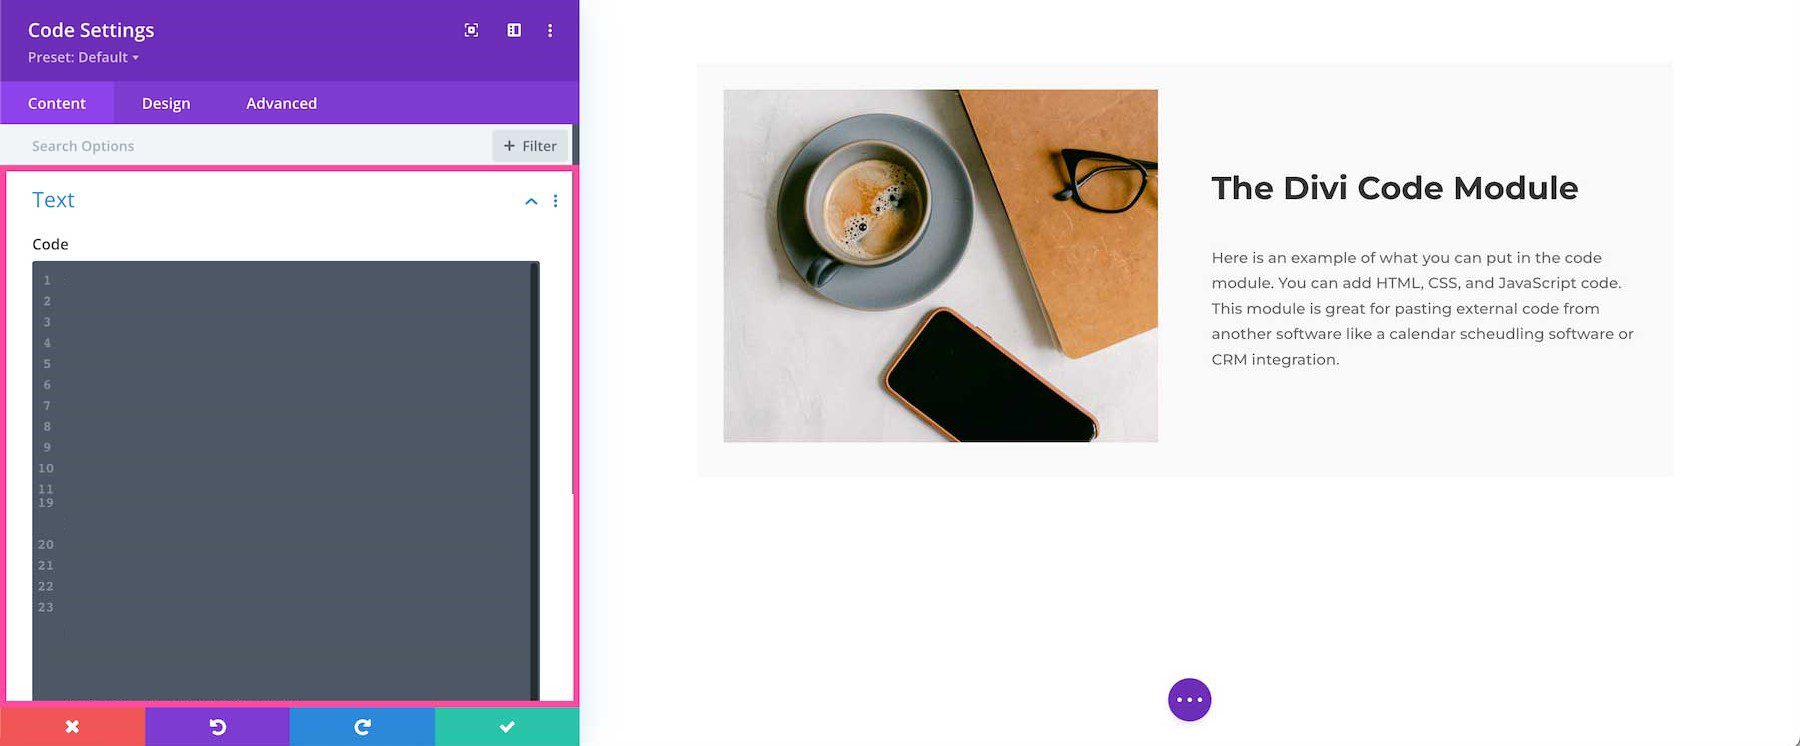
Now, anytime someone fills out the form, their information goes straight to your Mailchimp account.
This a great option for most users. However, it does leave some to be desired on the design side, and it limits you to only having the Mailchimp integration on your forms. If you use another opt-in builder, you could sync your contacts in multiple places (like Mailchimp, Google Sheets, and a CRM).
2. Using a Dedicated WordPress Opt-in Form Builder
There are times when a featureful opt-in form builder is needed. Website owners getting serious about Conversion Rate Optimization (CRO) and capturing every ounce of revenue from your website ought to be interested in this.
Opt-in forms plugins cover the basics of a form: design flexibility, custom fields, and easy deployment. But they bring a lot more advanced tools that even go beyond what Mailchimp offers in its embeddable forms. This includes things like:
- Conditional Display Logic to trigger your forms on just the right occasion
- A/B tests of creative assets to see what causes conversions
- Very flexible design systems
- Ability to connect to multiple tools, more than just Mailchimp
There are a few opt-in plugins on the WordPress market, like OptinMonster, Privy, or Bloom. We’re partial to Bloom, which does a good job and has all the features mentioned above.

Bloom integrates directly with Mailchimp to automatically send subscriber data to your email marketing account. What’s more, Bloom is much more powerful than the standard Mailchimp forms.
For a detailed guide on connecting and integrating Mailchimp with Bloom on WordPress, visit Bloom’s documentation page on Adding Email Accounts in Bloom.
3. Using the Official Mailchimp Plugin for WooCommerce
The Mailchimp integration for WooCommerce, however, is highly recommended for WooCommerce store owners. It allows you to add signup forms, website subscribers, and purchases directly to your Mailchimp Audiences and bring stores from your WooCommerce store into your Mailchimp dashboards.
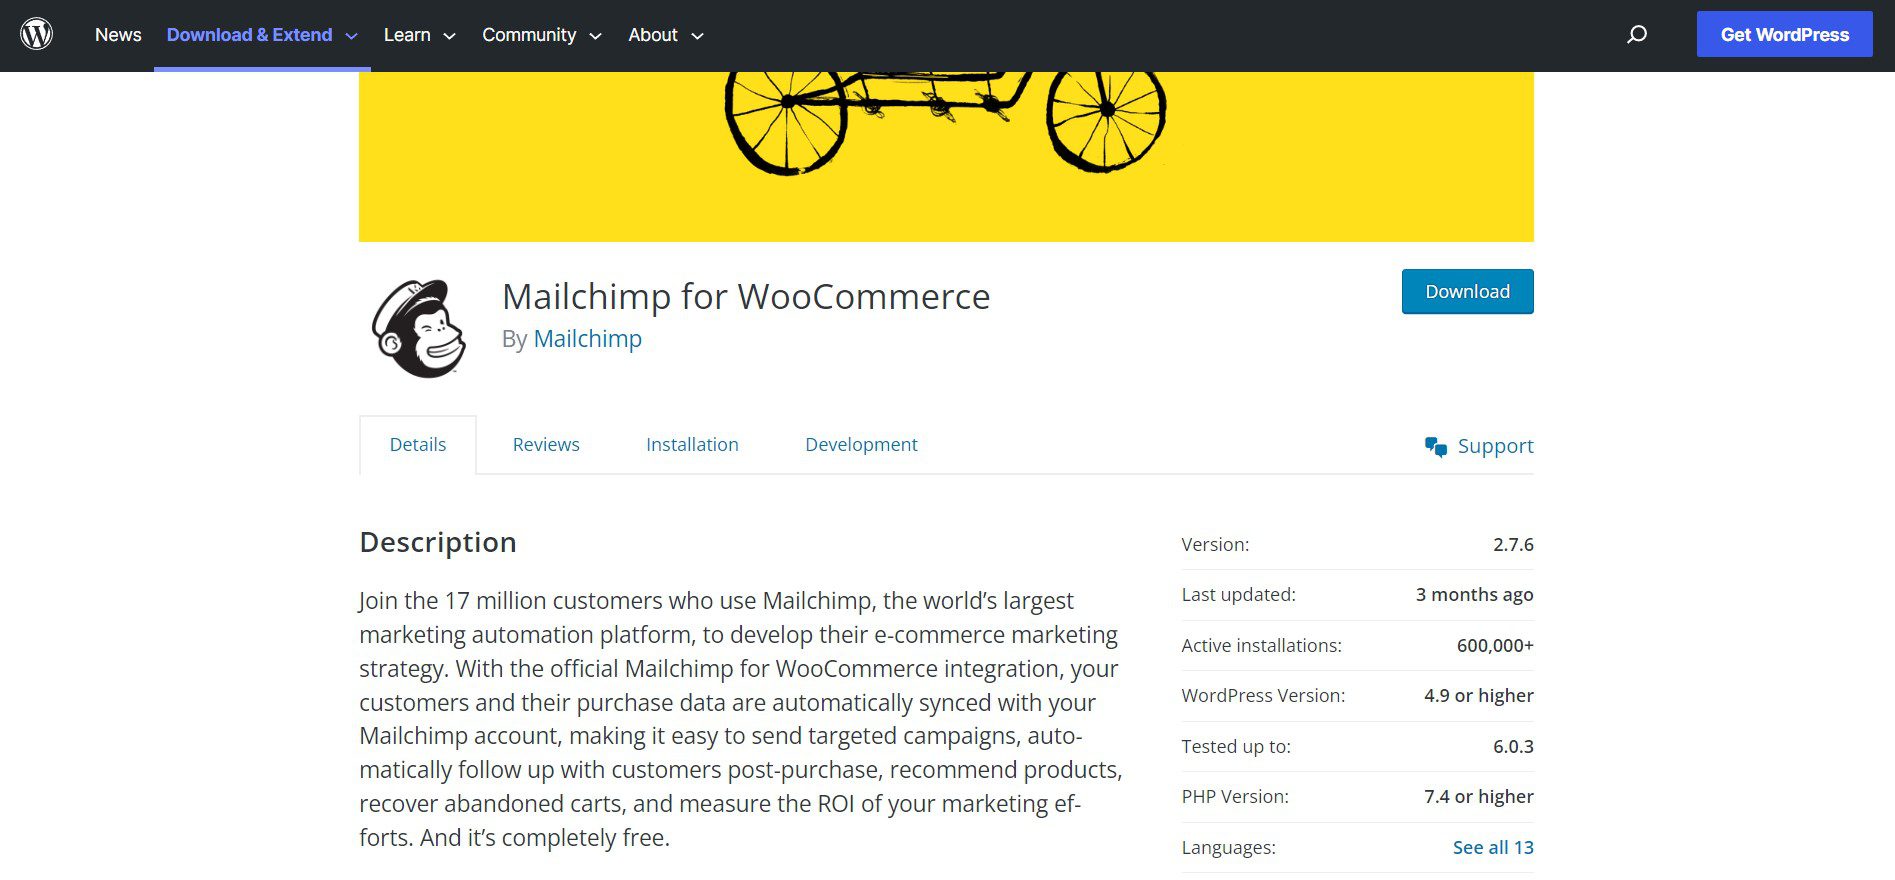
How to Setup the Mailchimp WooCommerce Plugin
To install and set up the Mailchimp for WooCommerce plugin, you must first set up a WooCommerce store on your WordPress site. Then, go to “Plugins” and “Add New.” Search for “Mailchimp for WooCommerce” and click the “Install Now” and “Activate” buttons.
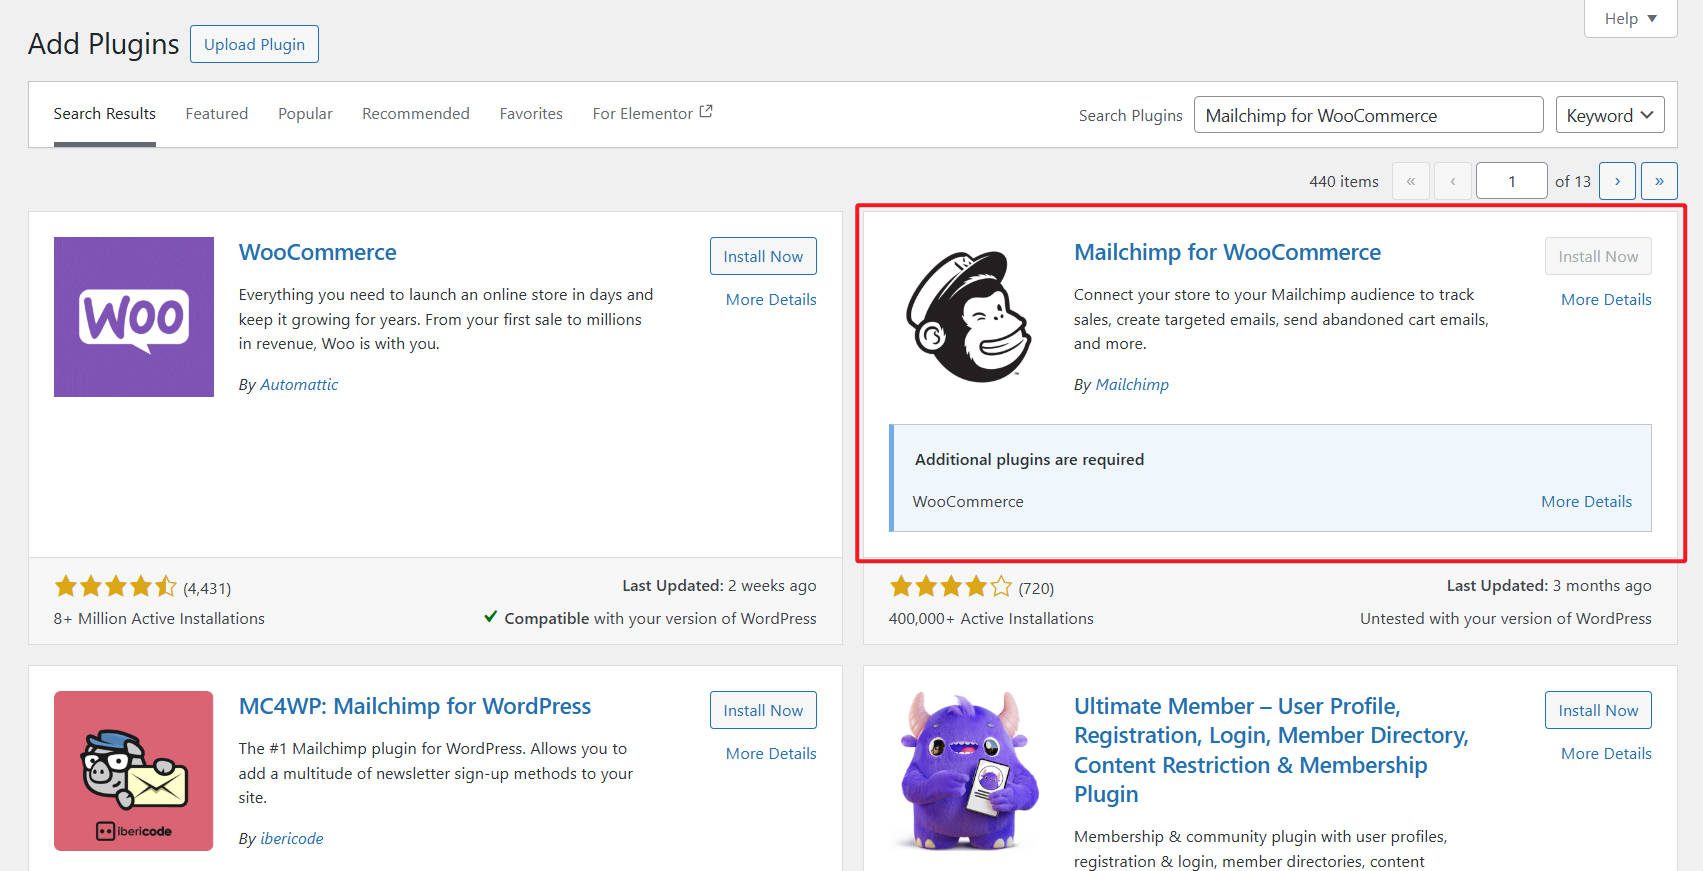
After activation, you will find the Mailchimp menu item in your WooCommerce dashboard sidebar. Under the plugin’s “Settings” tab, you’ll find a field to input a Mailchimp API Key. Visit this help article to learn
how to create a Mailchimp API key.
Pros of the Mailchimp for WooCommerce Plugin
- A plugin that is officially made by Mailchimp developers
- Easy way to bring subscriber and purchase data from WordPress to Mailchimp
- Data enriches your email marketing reports to see how your email campaigns are performing in terms of eCommerce sales
- Plugin is well-maintained and well-reviewed
Cons of the Mailchimp for WooCommerce Plugin
- Only useful if you are running a WooCommerce store
Overall, the Mailchimp for WooCommerce plugin is a great option for those who have a WooCommerce store and are looking for a simple way to integrate Mailchimp with their store. With its easy setup, this plugin can help you improve conversion through store behavior data and improve your email marketing through segmentation.
4. Using the Official Mailchimp Plugin for WordPress
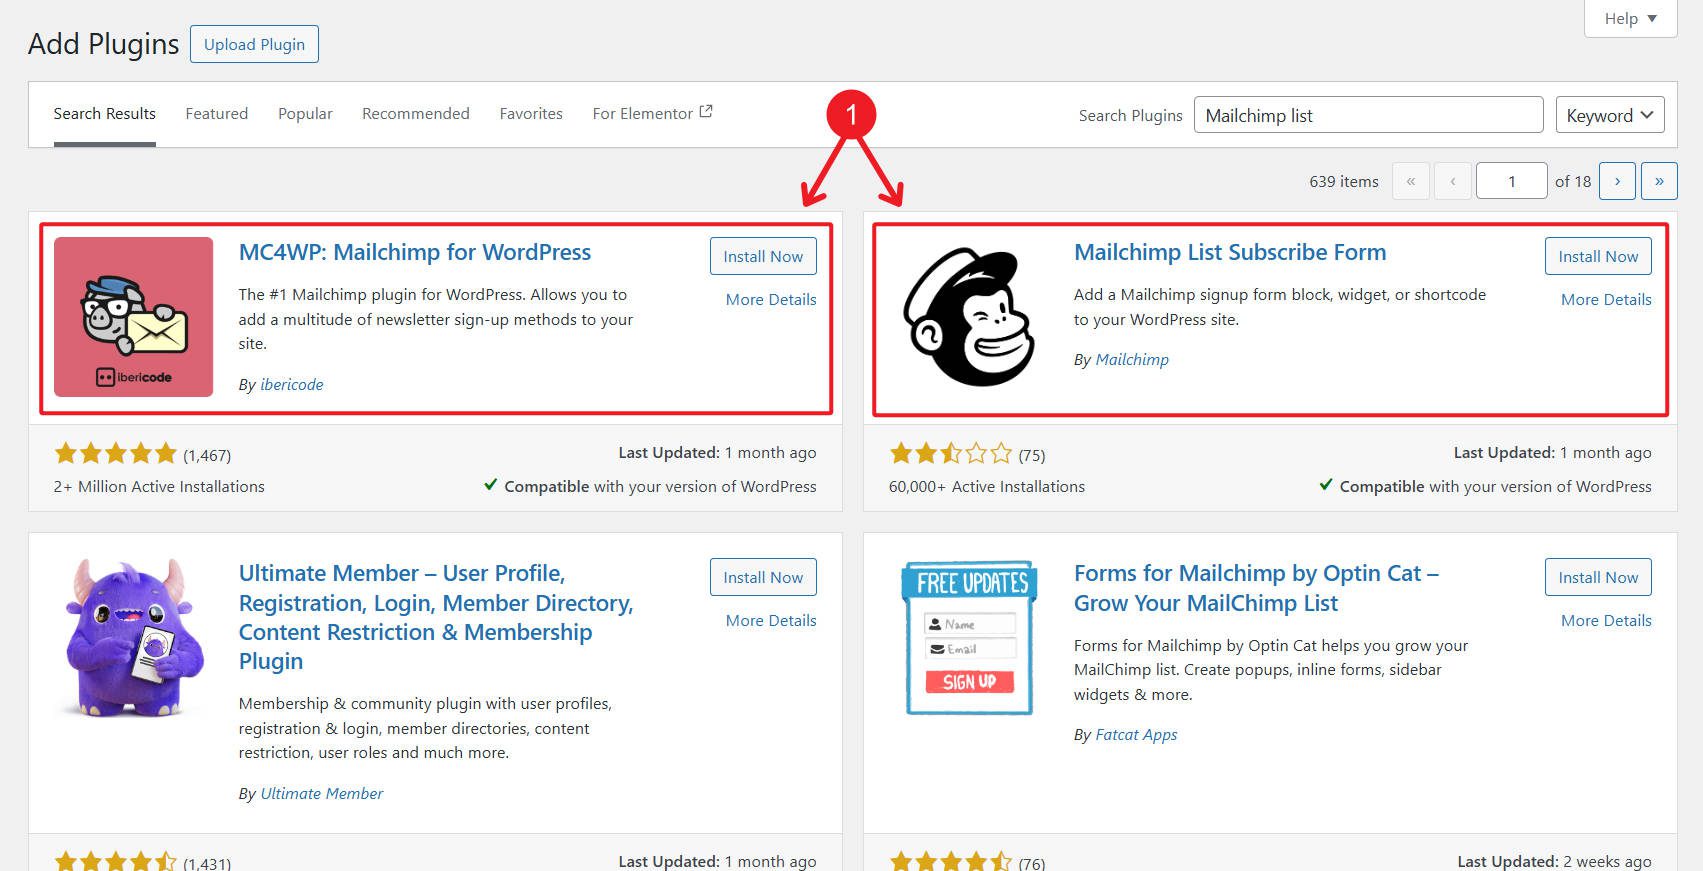
The Mailchimp List Subscribe Form plugin for WordPress is the official plugin for integrating Mailchimp with your WordPress website. It allows you to add a Mailchimp-hosted signup form to your WordPress website. This method, however, is not recommended by any serious WordPress user, though most articles on the subject do recommend it. We’re listing it here so you know about it and know to pursue other options if you are able.
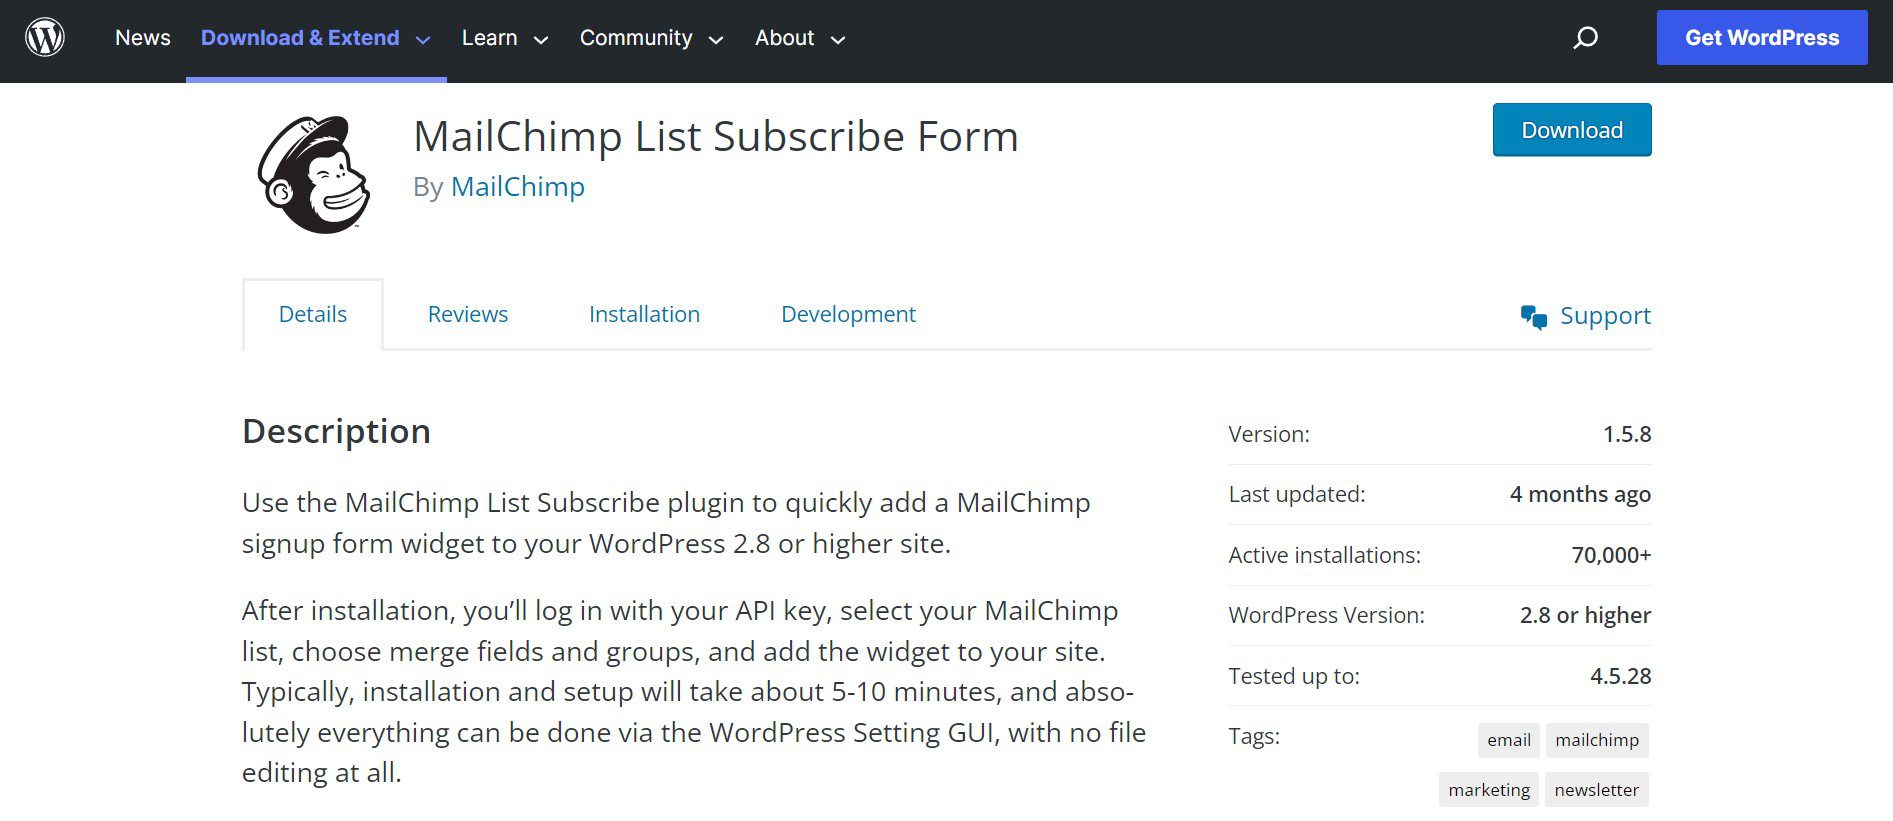
How to Setup the Mailchimp List Subscribe Form Plugin
Installing and setting up the Mailchimp plugin for WordPress is easy.
- Log into your WordPress site, go to the Plugins page, and click “Add New.” Search for “Mailchimp List Subscribe Form,” and click on the “Install Now” and “Activate” buttons. After activation, you will find the Mailchimp menu item in your WordPress dashboard sidebar. Under the plugin’s “Settings” tab, you’ll find a field to input a Mailchimp API Key. Visit this help article to learn how to create a Mailchimp API key. There’s also a more popular MC4WP plugin that accomplishes similar things but is better maintained and reviewed.
Pros of the Official Mailchimp Plugin
- Official plugin developed by Mailchimp
- Provides an easy way to install forms made in your Mailchimp account
- Focuses on basic functionality
Cons of the Official Mailchimp Plugin
- Mailchimp isn’t as invested in its WordPress plugin
- The plugin is updated infrequently
- Infrequently tested for the current versions of WordPress when it is updated
- Offers limited customization options for forms compared to other methods mentioned in this article
- Poorly reviewed by the WordPress community—better to use a different form/opt-in plugin or embed Mailchimp forms inline
Conclusion
Integrating Mailchimp with your WordPress website saves you time with your email marketing. It’ll also help you grow your lists and help you create welcome emails. We’ve covered four easy methods for integrating Mailchimp with your WordPress website: using the official Mailchimp plugin for WordPress, for WooCommerce, embedding a Mailchimp form, and using an opt-in form builder. Each method has its own set of pros and cons, so it’s important to consider your specific needs before deciding which method to use.
How have you tried setting up an integration between Mailchimp and WordPress? Has that method lacked features?
The post How To Integrate Mailchimp With WordPress: 4 Easy Methods appeared first on Elegant Themes Blog.
# A Comprehensive Guide to Integrating Mailchimp with WordPress: Four Simple Methods
In the digital age, effective email marketing is crucial for businesses looking to engage with their audience, nurture leads, and drive conversions. Mailchimp, one of the leading email marketing platforms, provides a robust set of tools to manage and automate email campaigns. If you’re using WordPress as your website platform, integrating Mailchimp can streamline your marketing efforts. This guide will walk you through four simple methods to integrate Mailchimp with WordPress.
## Method 1: Using the Mailchimp for WordPress Plugin
### Step-by-Step Guide
1. **Install the Plugin**:
– Log in to your WordPress dashboard.
– Navigate to `Plugins` > `Add New`.
– Search for “Mailchimp for WordPress”.
– Click `Install Now`, then `Activate`.
2. **Connect Your Mailchimp Account**:
– After activation, go to `MC4WP` in your dashboard.
– Click on `Mailchimp` and enter your Mailchimp API key. You can find this in your Mailchimp account under `Account` > `Extras` > `API keys`.
3. **Create a Signup Form**:
– Go to `MC4WP` > `Forms`.
– Click on `Add New Form` and customize your form fields.
– Use the provided shortcode to embed the form on your desired pages or posts.
4. **Configure Additional Settings**:
– Set up success messages, error messages, and other options to enhance user experience.
### Benefits
Using the Mailchimp for WordPress plugin is user-friendly and allows for extensive customization of signup forms, making it a popular choice for many WordPress users.
## Method 2: Using Mailchimp’s Embedded Forms
### Step-by-Step Guide
1. **Create an Embedded Form in Mailchimp**:
– Log in to your Mailchimp account.
– Navigate to `Audience` > `Signup forms`.
– Choose `Embedded forms` and customize the form to your liking.
2. **Copy the HTML Code**:
– Once you’re satisfied with the form design, copy the provided HTML code.
3. **Embed the Form in WordPress**:
– Go to your WordPress dashboard and navigate to the page or post where you want to add the form.
– Switch to the HTML editor (or use a Custom HTML block in the Gutenberg editor) and paste the code.
4. **Publish Your Changes**:
– Update or publish the page to make the form live.
### Benefits
This method allows for a straightforward integration without the need for additional plugins, making it ideal for users who prefer minimalism.
## Method 3: Using a Third-Party Form Builder
### Step-by-Step Guide
1. **Choose a Form Builder**:
– Popular options include WPForms, Gravity Forms, and Ninja Forms. For this example, we’ll use WPForms.
2. **Install and Activate WPForms**:
– Go to `Plugins` > `Add New`, search for WPForms, and install it.
3. **Connect WPForms to Mailchimp**:
– After activation, go to `WPForms` > `Addons`.
– Find the Mailchimp addon and install it.
4. **Create a New Form**:
– Go to `WPForms` > `Add New` and select a template.
– Add the Mailchimp integration in the form settings and configure the audience settings.
5. **Embed the Form**:
– Use the provided shortcode to embed the form in your desired location.
### Benefits
Third-party form builders often provide advanced features like conditional logic, multi-step forms, and payment integrations, making them a powerful choice for complex needs.
## Method 4: Using Custom Code
### Step-by-Step Guide
1. **Create a Mailchimp Signup Form**:
– Go to your Mailchimp account and create a signup form as you would for the embedded method.
2. **Copy the Form Code**:
– Copy the HTML code generated by Mailchimp.
3. **Add Custom Code to WordPress**:
– Navigate to `Appearance` > `Widgets` or `Appearance` > `Customize` > `Additional CSS/HTML`.
– Paste the HTML code where you want the form to appear.
4. **Style the Form**:
– Use CSS to customize the appearance of your form to match your website’s design.
### Benefits
This method provides maximum flexibility and control over the form’s design and functionality, making it suitable for developers or those comfortable with coding.
## Conclusion
Integrating Mailchimp with WordPress can significantly enhance your email marketing efforts, allowing you to capture leads and engage with your audience effectively. Whether you choose to use a plugin, embedded forms, a third-party form builder, or custom code, each method

Recent Comments